1 Dashboard
1.1 Overview
The Dashboard of EdifyBiz Task Module in EdifyBiz gives an overview of all the tasks to an user. The Dashboard is divided into three sections namely: Task Cards, Graph and Table.

1.2 Task Cards
It is divided into four cards depending upon the type of tasks as follows:
- Over Due Task: It displays the number of tasks which have passed their due date. On clicking the View More button the screen hovers down and the Over Due Task table is seen.
- Todays Due Task: It displays the number of tasks which are assigned to the user that have to be completed in todays time. On clicking theView More button the screen hovers down and the Todays Due Task table is seen.
- Assigned Task: It displays the number of tasks which are assigned to the user. On clicking the View More button the screen hovers down and the Assigned Task table is seen.
- Created Task: It displays the number of tasks which are created by the user and are currently open. On clicking theView More button the screen hovers down and the Created Task table is seen.

1.3 Graph
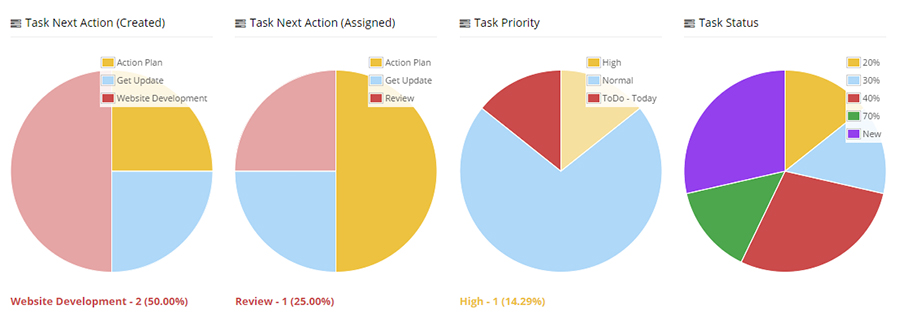
Graphical depiction simplifies each processs and is always better to understand any work process in terms of visual classification. The Graph on the dashboard is divided into four graphs based on four different fields as follows:
- Next Action of Task Created: The classification of the Next actions of all the tasks created by the user.
- Next Action of Task Assigned:The classification of the Next actions of all the tasks assigned to the user.
- Task Priority: The task priorities of all the tasks. Whether they are High, Low, To-do or Critical.
- Task Status: The status of how much of the tasks have been completed. It can be New, Open, Completed or 10-100% numerical terms.
1.4 Task Table
When the user clicks on the View More in the Task cards, the screen hovers down to this section. It comprises the list of all the tasks of the selected card. On clicking the Task link, the user will be redirected to the Task Details page of the particular task.

2. New Task
2.1 Overview
The New Task feature of EdifyBiz enables a user to add New task. The Add Task looks exactly like the below image.
2.2 Add New
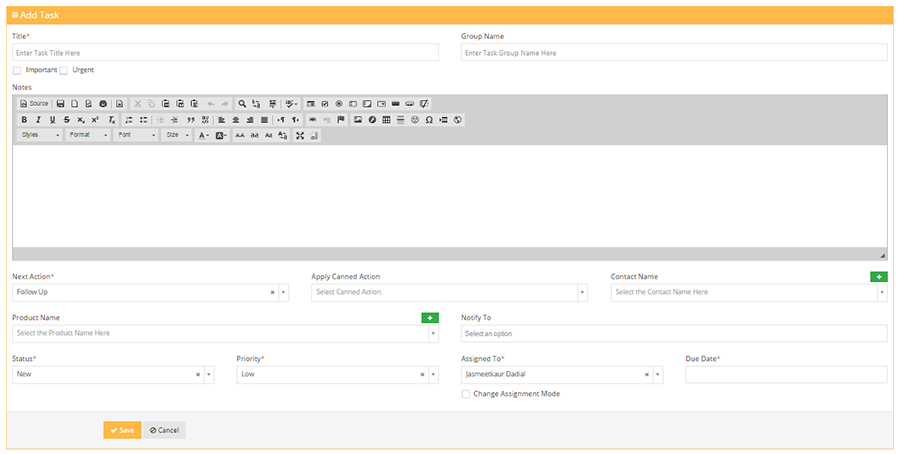
To add a new task, the user has to fill in various fields in this tab. The fields in the below image are:

- Title: The Title is the name defined for the particular task.
- Group Name: EdifyBiz Task has a feature wherein you can assign and notify a group together. Thus, the user can add the Group Name here desiring to notify.
- Description: The user can fill in necessary details related of the task in this Description field.
As the user scrolls down, the other fields are as shown in the below image:

- Next Action: The next line of action for the task.
- Apply Canned Action: This feature is like the Gmail Canned Action feature wherein, a user can save a list of Template messages or details. On clicking one particular Canned Action, it will be reflected in the Description field.
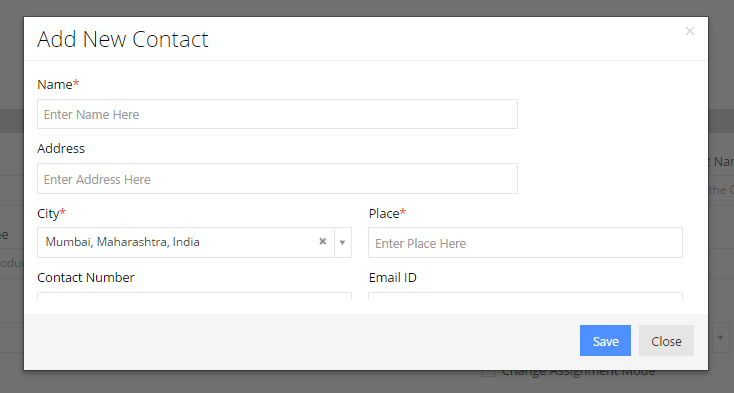
- Contact Name: Here the user can add a Contact Name which is already there in the system, If user wants to add a new contact, he/she can click on the green "+" button on the top. On doing so the Add New Contact form will pop-up. It will appear as follows:
- Product Name: Here the user can add a Product which is already there in the system. If user wants to add a new product, he/she has to click on the green "+" button on the top. On doing so the Add New Product form will pop-up. It has a view exactly like the below image. On clicking
the More button below the fields, the user will be redirected to Add Product page to fill in more details of the product.

- Notify To: Here the user can add those team memebers or user which he wants should be notified each time this particular task is updated.
- Status: Status of the task completed.
- Priority: Priority of the task whether it is Low, high, Normal or Critical.
- Assigned To: Through this field the user can assign this task to someone who will be responsible for the Next Action.
- Due Date: Here the user can define a timeline or due date till when the task has to be completed.
3. Tasks Details
3.1 Overview
The Task Details page is wherein all the tasks are updated regularly as the work is completed or as per the due date. It has The view of Task details looks like the below image. It gives all the details of the task when it was created in this view.

The important points are explained as follows:
- Labels: The Task can be given labels as needed. Labels are created by the Admin. The Labels feature looks like below image:

- Overall time Taken and Group Name: As shown in the below image, the Overall Time taken displays the Hours and Days put for the whole task. On clicking the Clock icon, it also divides by the time put into the task by each employee.
For Group name, when user clicks on the link, Task group page of the particular group will be displayed.

- Change Owner: On clicking the Change owner button on the top right corner, the Change Ownership pop-up is seen. The user can fill in Change Owner to and Assign to tabs respectively.

3.2 Task Details Tabs
As the user scrolls down, there are six tabs as follows:
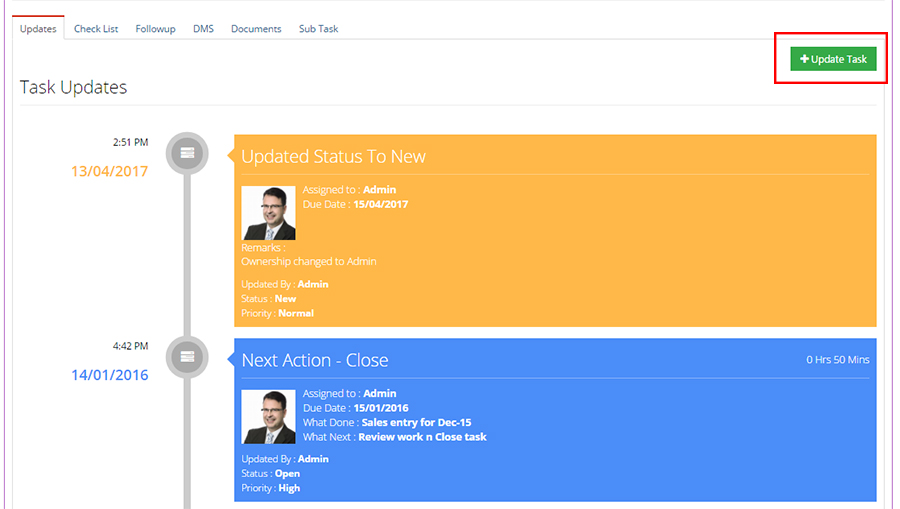
- Update: The Update tab is a timeline of the Task. In Task Updates section, all tasks updates by the task members are seen one below the other, with time and date when it was updated. To add a new update, the user has to click on the Update Task button on the top-right corner.
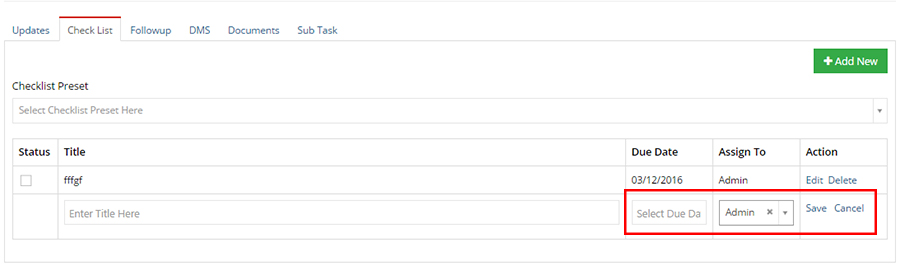
- Check List: The Check List in a task is like a standard To-Do list. A user can assign a check list related to the task and assign it to someone with a due date. To add a new check list the user can click on the Add New button on top-right corner. The user can Edit, Save and Delete the check lists as needed.
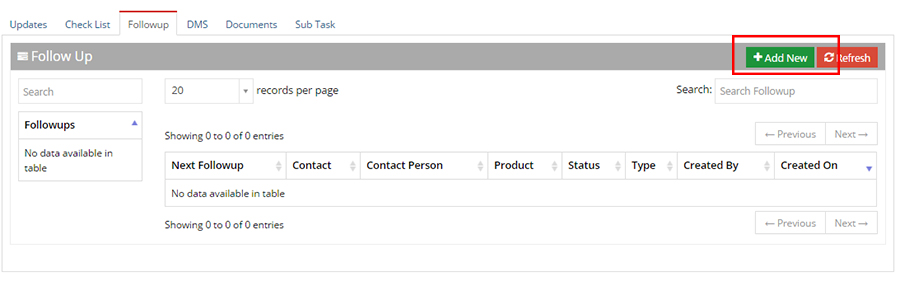
- Follow Up: The Follow-Up tab enables the user to communicate with a client for any reuqirement or information related to the product. Being added in the task itself avoids confusion and is time consuming. The user can add a Contact, Contact Person and Product in the Follow Up.
- DMS: The DMS is the Document Management System of EdifyBiz. Here the task memebers can upload documents relevant to the particular task. As shown in the below image, the user can upload a file by clicking on the Upload file button on the top-rigt corner. Also to read an uploaded document he/she has to click on the File name link.
Also the user can Delete, Move or Label the uploaded files by clicking and selected the check boxes besides the file names.

- Documents: A task member can add a cloud based document related to the task through this Document feature. The user can Add, Move and Delete the existing selected documents.
On clicking the Add button the Document Details page is displayed. Here user can fill in Title, Folder and Description for the Document.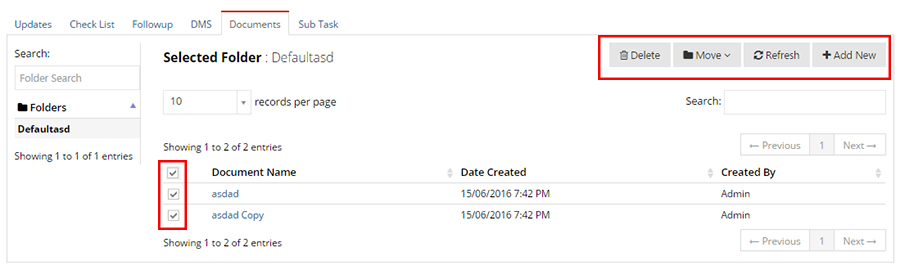

- Sub Task: As the name says, a Sub task is a task within a task. To add a Sub Task, the user has to click on the Create Task button. On clicking this, the Add Task page is displayed. Here user can fill in all the details for subtask. The only difference will be accessing of file will be restricted to main task and not independently. The Sub task tab looks like the below image.

4. Bulk Tasks
4.1 Overview
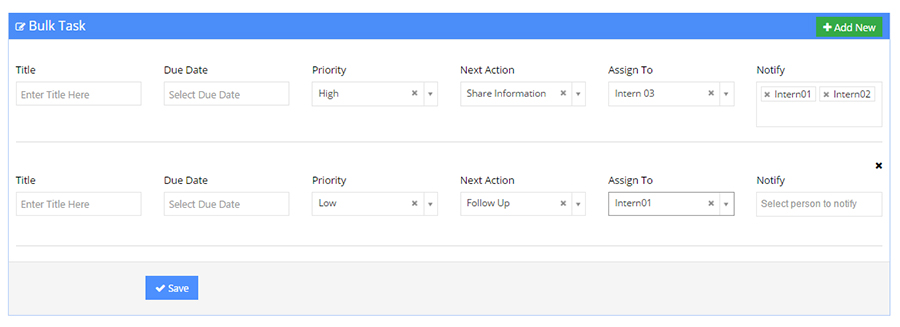
The Bulk Task feature of EdifyBiz is used to create stacks of Tasks quickly. This can be used by a user when he/she has to create more than one task. He/she can assign and notify members as per the need. The Bulk task form looks like below image.

The fields to be filled in are:
- Title: Name of the Task.
- Due Date: Date to complete the task.
- Priority: Can be Low, Normal, High or Critical.
- Next Action: Next Line of Action.
- Assign to: Next person to execute the Plan of action.
- Notify to: Multiple users can be selected.
4.2 Add new
To add a new task, user can click on the Add New button on top-right corner.
5. All tasks
5.1 Overview
In this feature, all the tasks are divided into the following tabs shown in the below image:
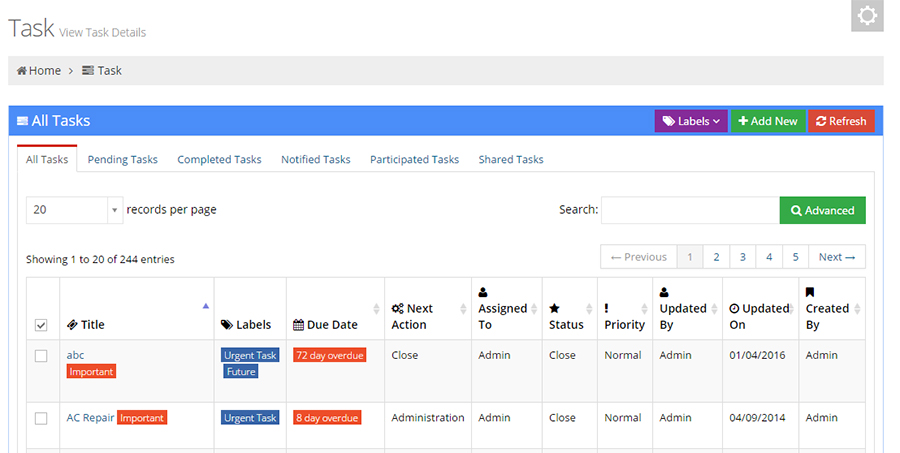
The fields to be filled in are:
- All Task: In All Tasks list,the user can see all tasks which are Created, Assigned to or Overdue to him/her.
- Pending Task: In the Pending Tasks list, user can see tasks which he/she has created and is overdue and pending.
- Completed Tasks: The task which was created by user and has been closed can be seen in this list.
- Notified Tasks: In this list, user can see those tasks in which he/she is notified.
- Participated Tasks: In the Participated tasks list, user can see all those tasks in which he had ever participated in past.
- Shared Tasks:The Head of Department or Management can turn sharing on of its employee from Settings->Sharing module. There is Emails, Task, Calendar, Follow Up and Minutes of Meeting Sharing. When the user selects particular sharing option, the head of department or management will get notifications through mail each time user updates a task, calendar, follow-up etc.
6. Task Group
6.1 Overview
A company has various departments and groups. To be productive and efficient, this feature is used to create and manage all the activities related to a particular group at one place.

6.2 Details
On the left side of Group Wise Task tab, list of all Group Names is placed in the Group Name. The user can search group with help of Group filter field on the top.
On selection of a particular group name, all tasks related to that group will be seen in table next to it. The table has columns as follows: Task- On clicking on this link, the user will be redirected to particular task page, Next Action- Next line of action for the particular task, Assigned to, Created by, Status, Priority etc.

7. Task Quadrant
7.1 Overview
The Task quadrant feature of EdifyBiz helps to define Priority of tasks. As the name suggests, Task are divided into four parts depending upon its urgency and importance.
The four Quadrants are as follows:
- Important and Urgent.
- Important and Not Urgent.
- Not Important and Urgent.
- Not Important and Not Urgent.
Task Quadrant has the view exactly like below image.

7.2 Details
Each Quadrant has following table details:
- Title: Title of task. On clicking title link, particular Task page will be displayed.
- Due Date: It displays the number of days by which the task as been overdue or crossed its due date.
- Next Action: Next line of action for particular task.
- Search: The search button on top-right corner helps to filter and search through the task lists.

8. Task Monitor
8.1 Overview
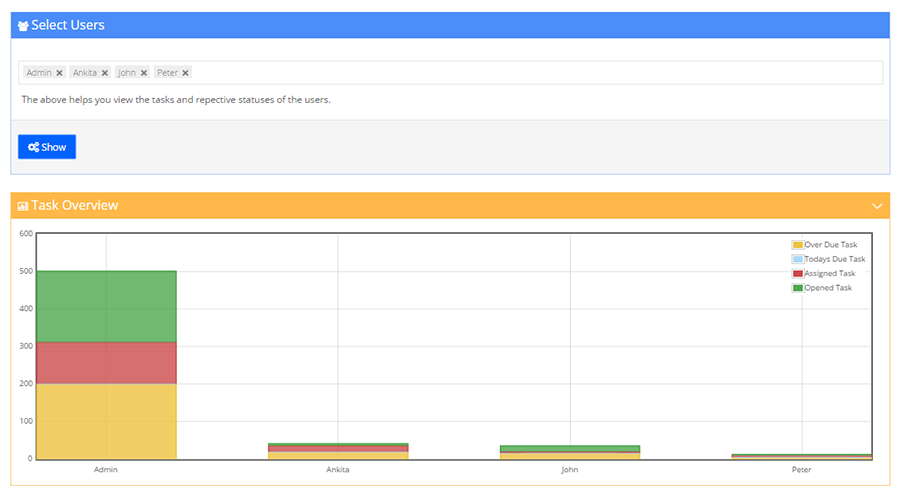
The Task Monitor feature is of great importance for the Management, HOD or Owner of a company. It gives a "bird-eye" view to them. They can monitor and access into all overdues, assigned or opened tasks easily. The Task monitor looks like below image.
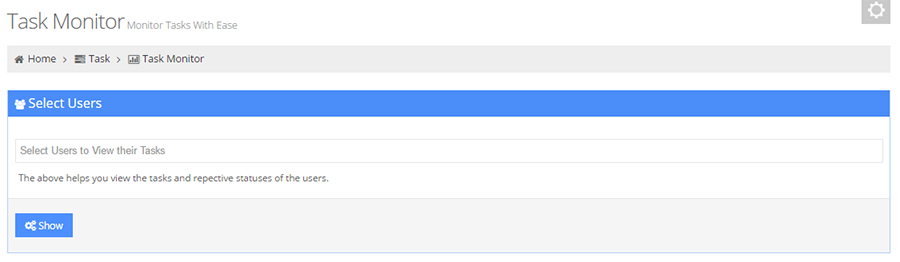
8.2 Select Users
This helps you view the tasks and repective statuses of users. The user can use one or more users to view thier tasks.

After selecting the users and clicking Show button, the Task Overview tab opens below.
8.3 Task Overview
The Task overview tab is a graphical depiction of users work. Variables of graph being: Overdue, Todays Due, Assigned and Opened tasks.