
- Sample In
- Sample Out
Sample In
In the Sample In sub-module, the user can manage incoming sample products in stock in an efficient and easy manner.This sub-module is divided into the following three sections:
- Sample In Stock List
- Add New Sample In Stock
- Sample In Stock View
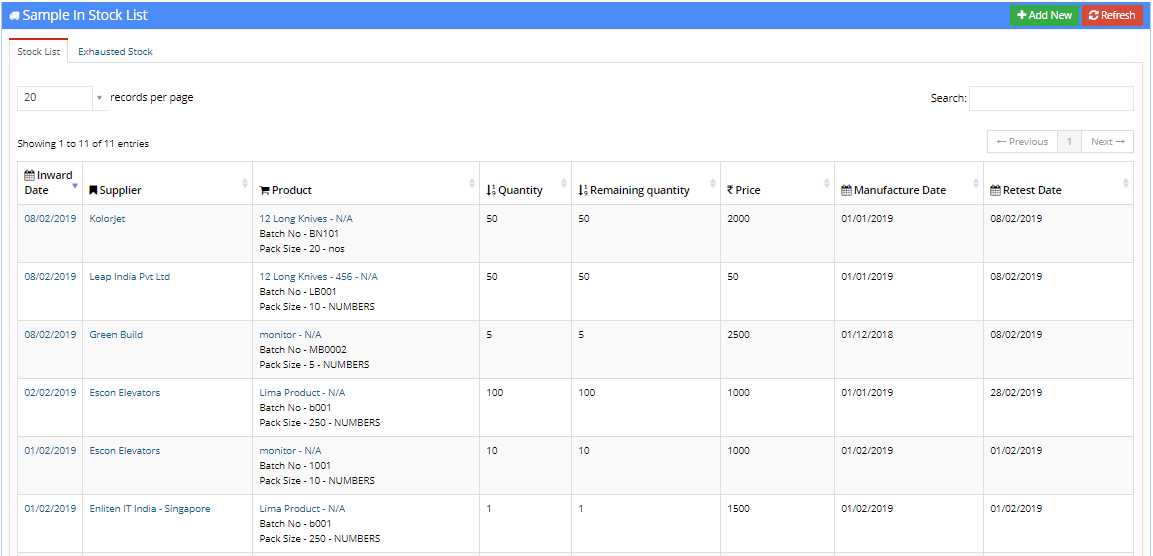
Sample In Stock List
This section displays a list of all the samples that have been received by an organization.The user can use the search bar to look up a particular record or vary the number of records per page using the dropdown in the top left.
The user can also view the following details about the sample product:
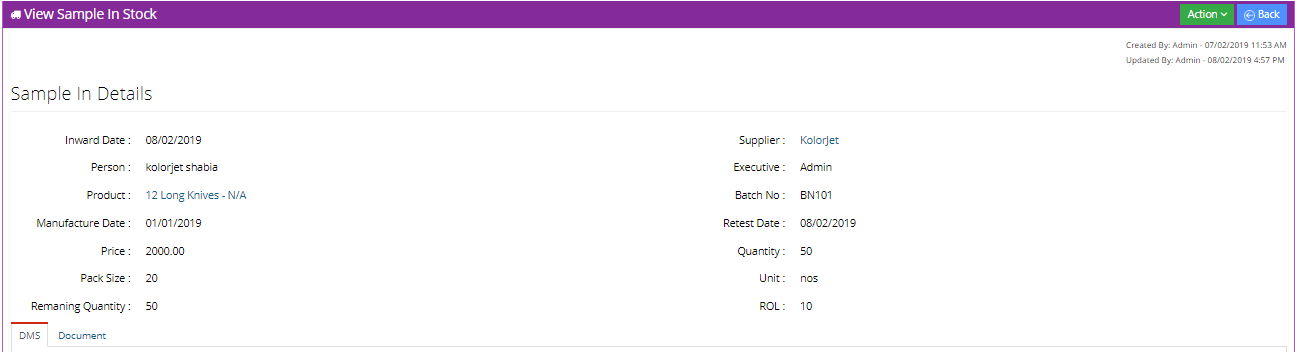
- Inward Date: This represents the date on which the sample products were received. Upon clicking on an inward date, the user is displayed the Sample In Stock View corresponding to that respective record.
- Supplier: This displays the supplier of the samples received. Upon clicking on the name of a supplier, the Company module is opened in a new tab. Here the user can view additional details about the supplier.
- Product: This displays the name of the sample product along with the batch number and the pack size of the samples. Upon clicking on the name of a product, the Product module is opened in a new tab. Here the user can view additional details about the product.
- Quantity: This displays the total quantity of the sample product received.
- Remaining Quantity: This displays the quantity of the sample product remaining.
- Price: This represents the price of the product received.
- Manufacture Date: This column displays the date on which that sample product was manufactured.
- Retest Date: This displays the date on which the products are to be/were retested.
- Stock List: This section displays to the user all the samples currently in stock.
- Exhausted Stock: This section displays to the user the stock of samples that have been exhausted.
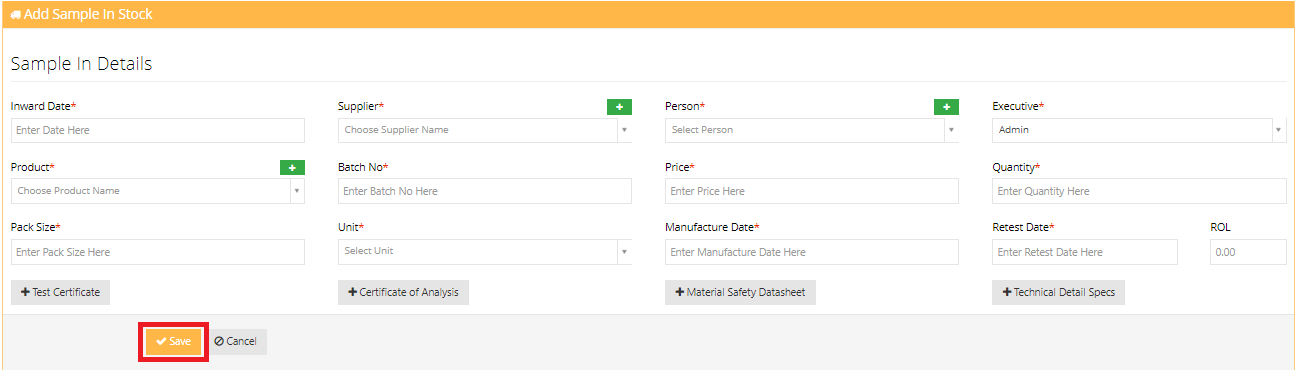
Add New Sample In Stock
To register new samples, click on the Add New button in the Sample In Stock List window.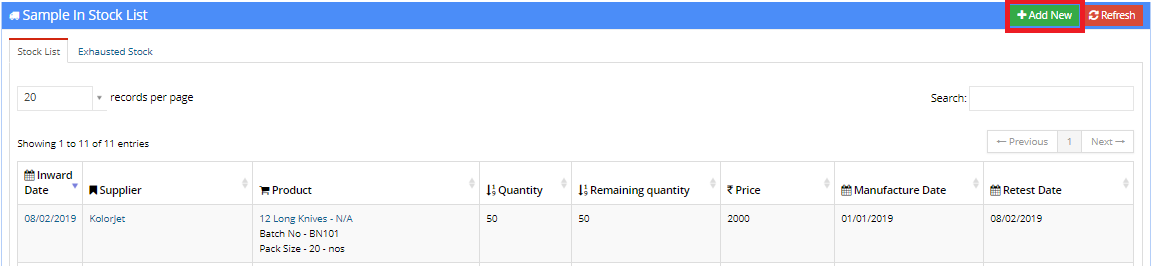
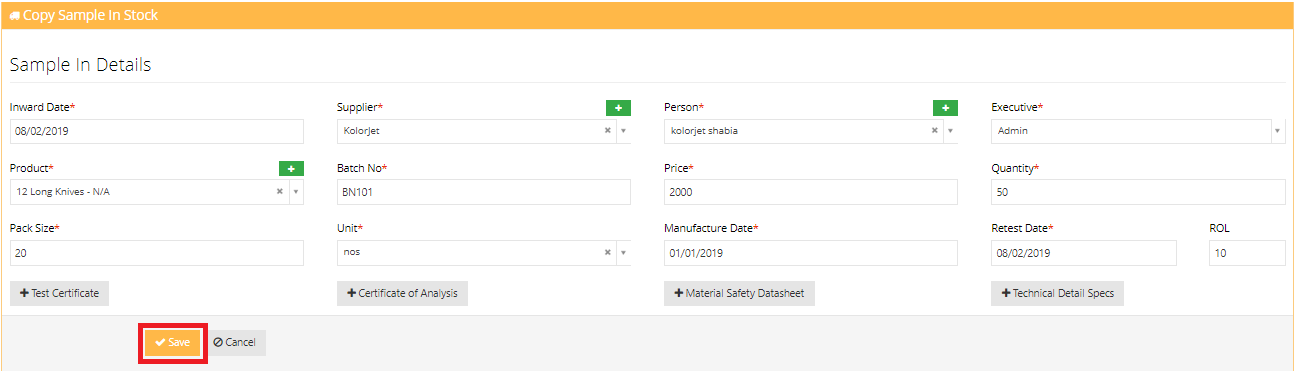
Fields marked with an asterisk(*) are required and can not be left empty.
Along with filling the fields, the user can also upload the following documents.
- Test Certificate
- Certificate of Analysis
- Material Safety Datasheet
- Technical Detail Specs
Sample In Stock View
To open the view for a sample, click on the the inward date corresponding to the required sample.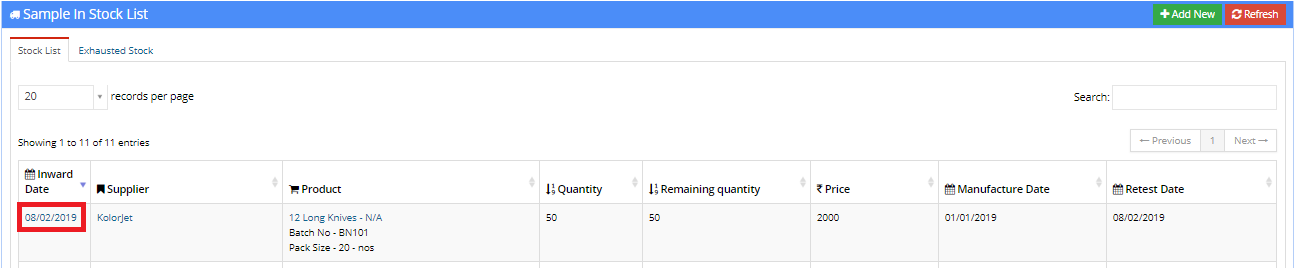
Actions
The three actions a user can perform on a sample stock are Copy, Edit and Delete.Copy
To copy the details of a record, click on the Action button dropdown in the top right corner. After this, click on Copy.
After making necessary changes to the sample stock, press the Save button to create a copy of the sample stock and Cancel to discard these changes and go back to the view.
Edit
To edit the details of a record, click on the Action button dropdown in the top right corner. After this, click on Edit.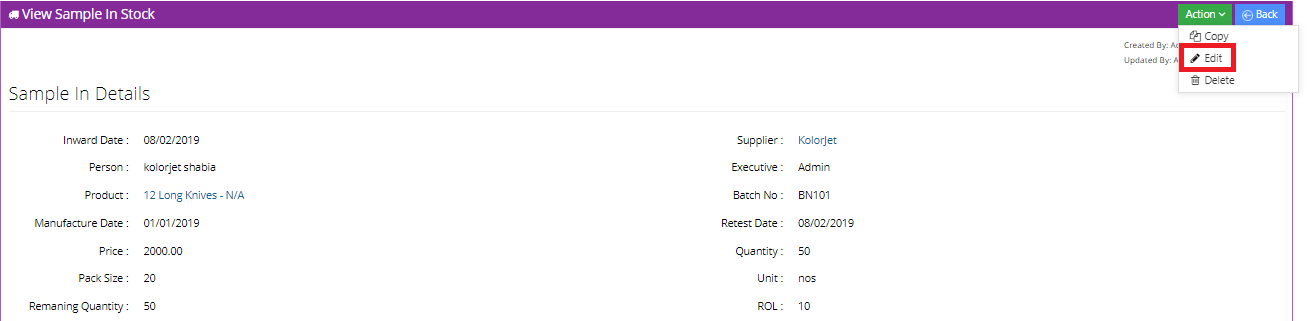
After making necessary changes to the sample stock, press the Save button to confirm the changes and Cancel to discard these changes and go back to the view.

Delete
To delete the record, click on the Action button dropdown in the top right corner. After this, click on Delete.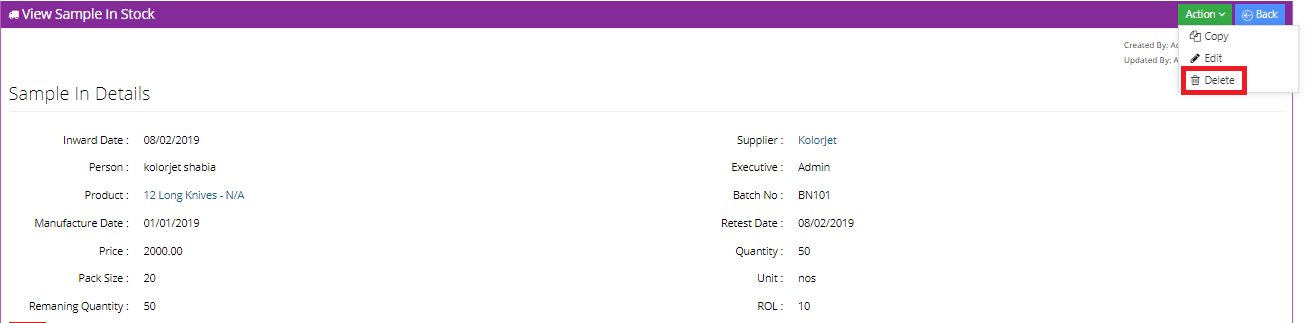
Tabs
The user can add additional information to a sampe stock using the following two tabs:- DMS
- Document
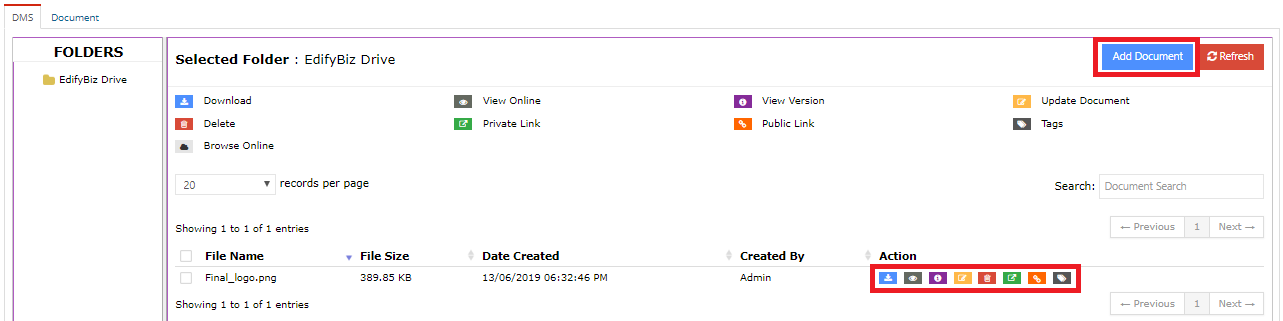
DMS
The user can attach additional documents to a sample stock using Edifybiz's DMS functionality.
To add a new document, the user can click on the Add Document button and refresh the list of added documents by clicking on the Refresh button.
The user can navigate through different folders in the Folders column.
The details of a document include the File Name, the Size of the File, the Date of Creation and the user who created the document.
The actions that can be taken on a document include:
- Download: To download the document.
- View Online: This opens the document in a new tab.
- View Version: Allows the user to view previous versions of the document.
- Update Document: Allows the user to revise or update a document.
- Delete: Enables the user to delete a document.
- Private Link: This generates a link to the document. This document is password protected.
- Public Document: This generates a link to the document which can be viewed by anyone who posseses the link.
- Tags: This enables the user to add a tag to the document.
Documents
In this section, the user can upload and view different uploaded documents. The user can also print computer generated templates in this tab.
The user can navigate through different folders in the Folders column on the left.
Once a folder is selected, the user can view the documents that exist in that folder.
The user can generate a link to the document by clicking on the Get Link button.
To get an overview of a document, the user can click on the name of the document.
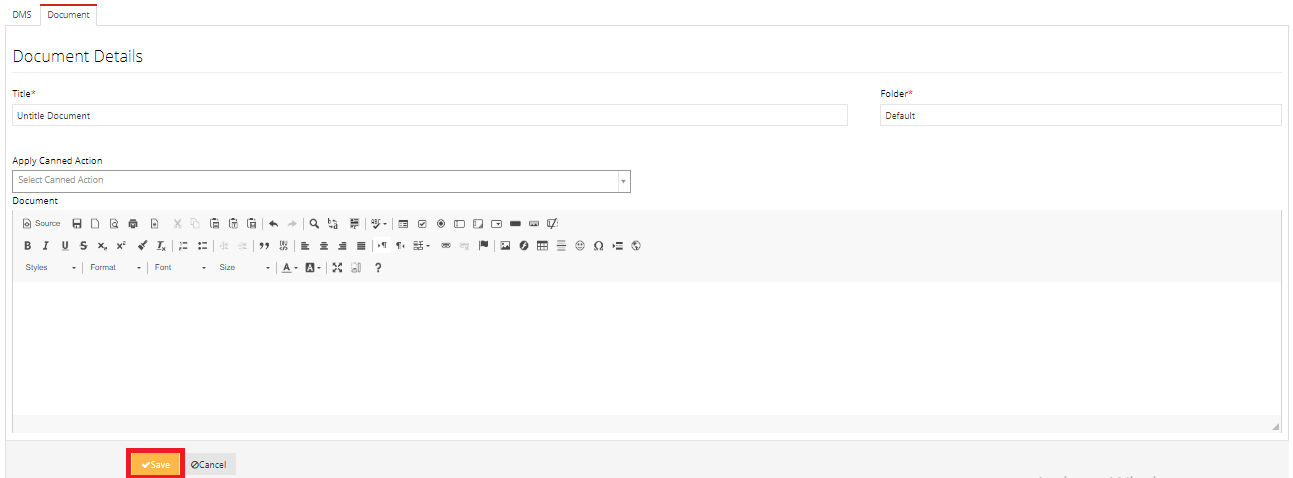
To add a new document to the selected folder, the user can click on the Add New button.

When the user clicks on the Add New button, the user is prompted to enter the document details. These details include the Document title, the Folder and Apply Canned Action.
Use Apply Canned Action to generate a document in accordance to a set template.
The user then is able to format the document using the CK Editor.
Upon finishing the above procedure, the user can press the Save button to save the document or cancel the document and go back to the previous screen by pressing the Cancel button.
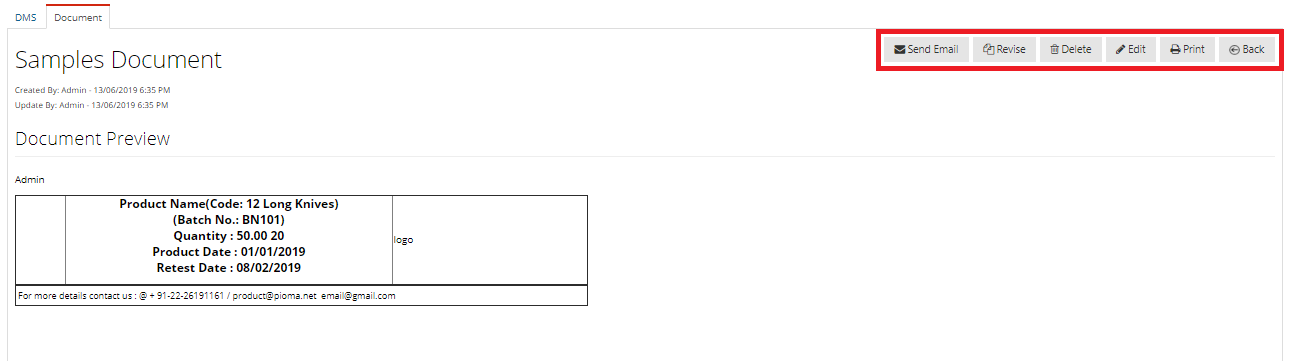
After clicking on the name of a document, the user can see a preview of the document
Various actions can be taken on the document. These include:
- Mail the document to someone else.
- Revise the document.
- Delete the document.
- Edit the document.
- Print the document.
Sample Out
In the Sample Out sub-module, the company can manage outgoing sample stock in an efficient and easy manner.This sub-module is divided into the following three sections:
- Sample Out Stock List
- Add New Sample Out Stock
- Sample Out Stock View
Sample Out Stock List
This section displays a list of all the samples that have sent out by an organization.The user can use the search bar to look up a particular record or vary the number of records per page using the dropdown in the top left.
The user can also view the following details about the sample out products:
- Outward Date: This represents the date on which the sample products were sent. Upon clicking on an outward date, the user is displayed the Sample Out Stock View corresponding to that respective record.
- Customer Name: This displays the name of the customer to whom the sample product was sent. Upon clicking on the name of a customer, the Contact module is opened in a new tab. Here the user can view additional details about the customer.
- Product: This displays the name of the sample product along with the batch number and the pack size of the samples. Upon clicking on the name of a product, the Product module is opened in a new tab. Here the user can view additional details about the product.
- Person: This displays the person who collected the sample products.
- Sub Courier Name: This displays the sub courier's name. Upon clicking on the name of a sub-courier, the Contact module is opened in a new tab. Here the user can view additional details about the courier.
- Courier Number: This represents the number of the courier delivering the sample products.

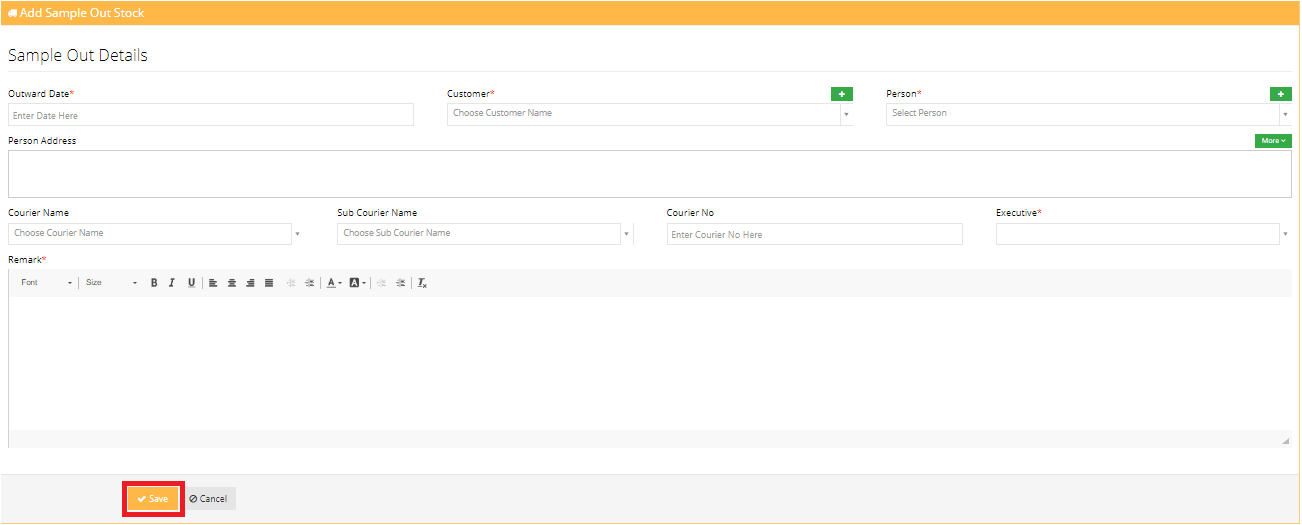
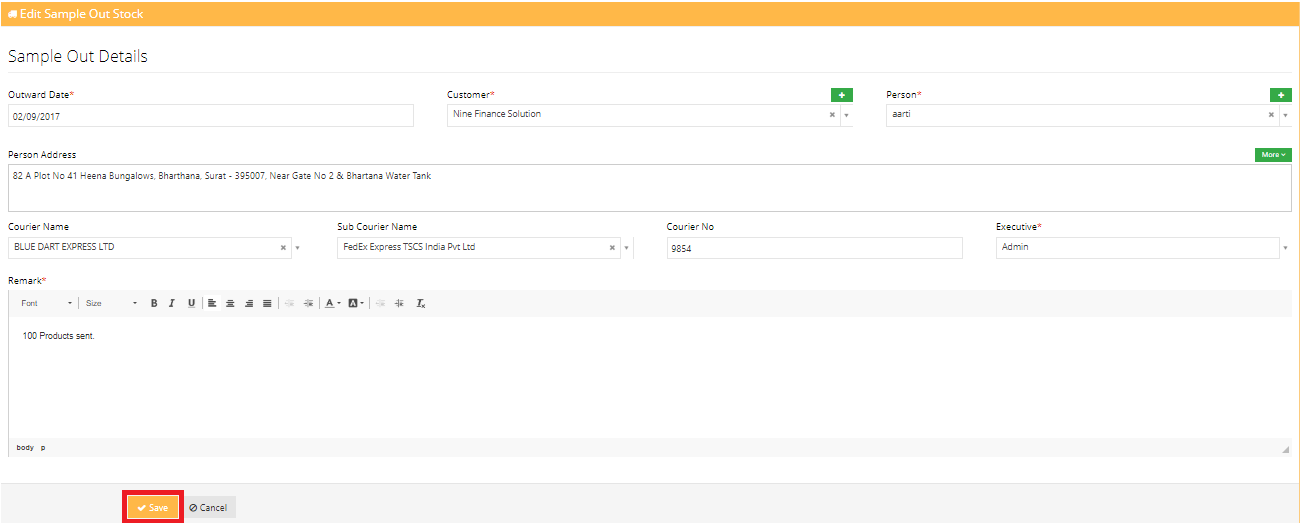
Add New Sample Out Stock
To add records for sample product stock being sent out, click on the Add New button in the Sample Out Stock List window.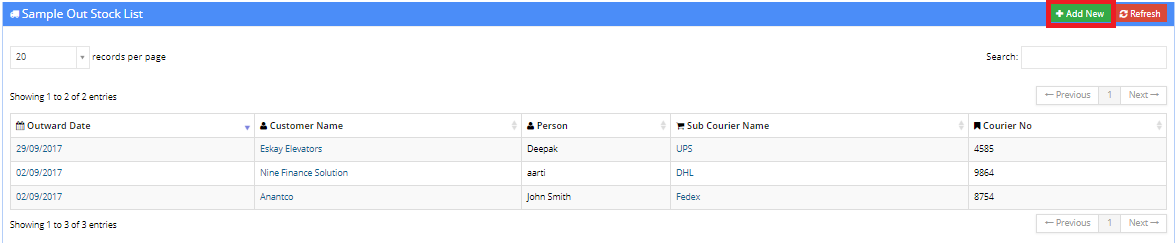
Fields marked with an asterisk(*) are required and can not be left empty. After entering the necessary details, press the Save button to add the new record. Press Cancel to discard the data entered and go back to the previous screen.
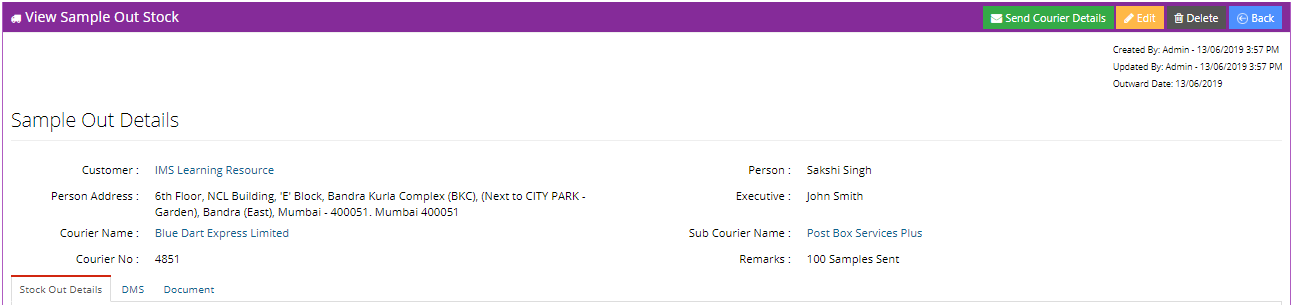
Sample Out Stock View
To open the view for a sample, click on the the outward date corresponding to the required sample.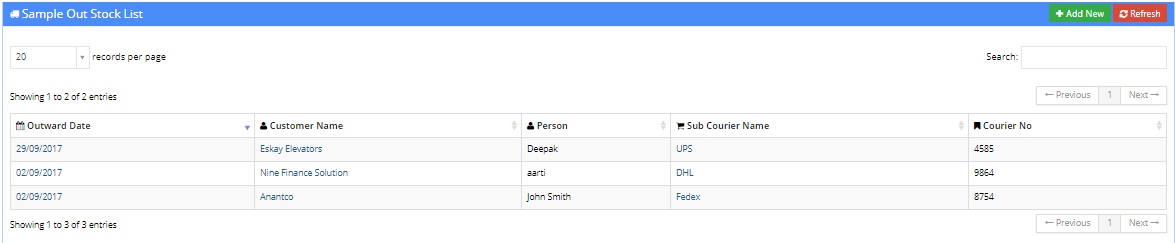
Actions
The four actions a user can perform on a sample out stock are as follows:Send Courier Details:
To share the details about the courier to someone by email, press the Send Courier Details button.The user is now directed to the Email module where a mail containing the details of the courier can be sent to the desired recipient.

Edit
To edit the details of a record, click on the Edit button in the top right corner.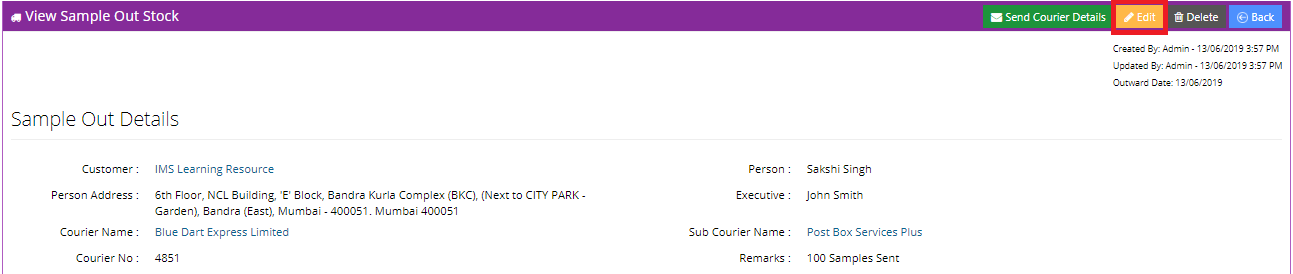
After making necessary changes to the sample stock, press the Save button to confirm the changes and Cancel to discard these changes and go back to the view.
Delete
To delete the record, click on the Delete button in the top right corner.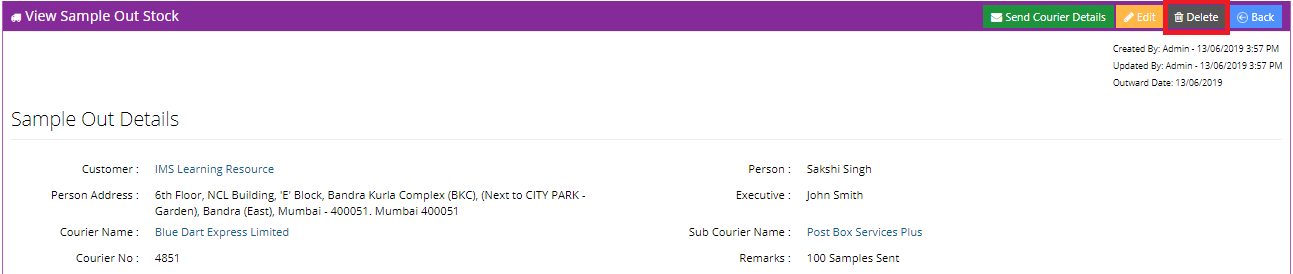
Back
To go back to the Sample Out Stock List, click on the Back button.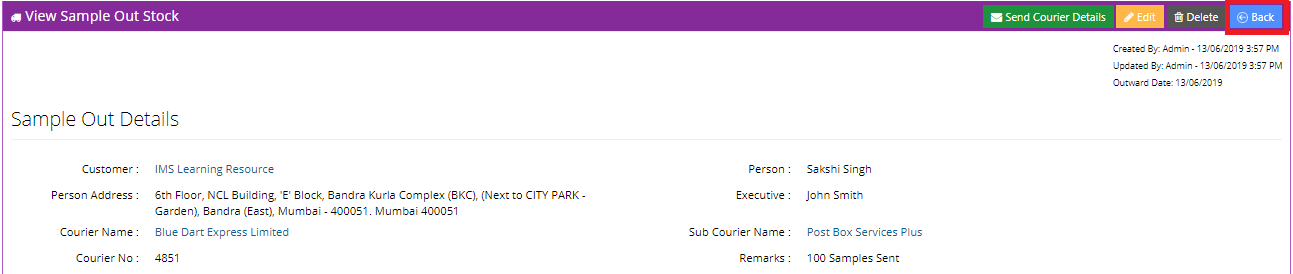
Tabs
The user can add additional information to a sampe stock using the following two tabs:- Stock Out Details
- DMS
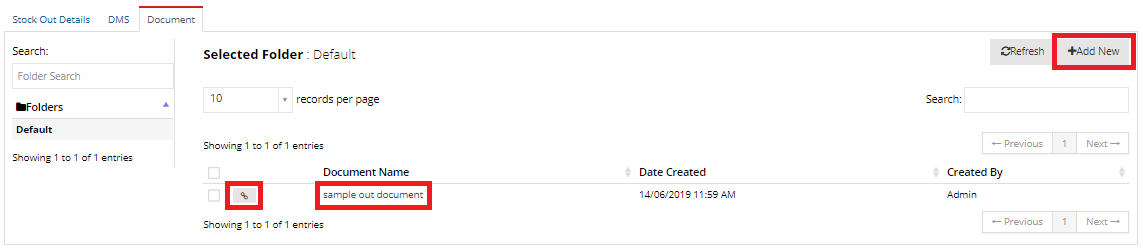
- Document
Stock Out Details
The user can add further Stock Out Details in this tab.
To add new stock out details, click on the Add New button.
After entering necessary details, click on the Save button to save the new details. Press Cancel to discard the details added.


DMS
The user can attach additional documents to a sample out stock using Edifybiz's DMS functionality.
To add a new document, the user can click on the Add Document button and refresh the list of added documents by clicking on the Refresh button.
The user can navigate through different folders in the Folders column.
The details of a document include the File Name, the Size of the File, the Date of Creation and the user who created the document.
The actions that can be taken on a document include:
- Download: To download the document.
- View Online: This opens the document in a new tab.
- View Version: Allows the user to view previous versions of the document.
- Update Document: Allows the user to revise or update a document.
- Delete: Enables the user to delete a document.
- Private Link: This generates a link to the document. This document is password protected.
- Public Document: This generates a link to the document which can be viewed by anyone who posseses the link.
- Tags: This enables the user to add a tag to the document.

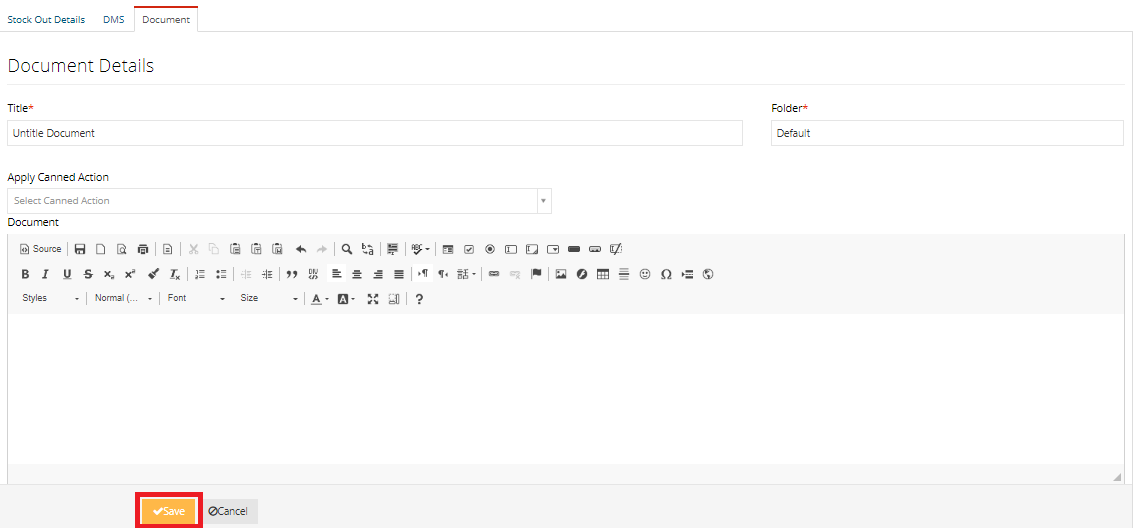
Documents
In this section, the user can upload and view different uploaded documents. The user can also print computer generated templates in this tab.
The user can navigate through different folders in the Folders column on the left.
Once a folder is selected, the user can view the documents that exist in that folder.
The user can generate a link to the document by clicking on the Get Link button.
To get an overview of a document, the user can click on the name of the document.
To add a new document to the selected folder, the user can click on the Add New button.
When the user clicks on the Add New button, the user is prompted to enter the document details. These details include the Document title, the Folder and Apply Canned Action.
Use Apply Canned Action to generate a document in accordance to a set template.
The user then is able to format the document using the CK Editor.
Upon finishing the above procedure, the user can press the Save button to save the document or cancel the document and go back to the previous screen by pressing the Cancel button.
After clicking on the name of a document, the user can see a preview of the document
Various actions can be taken on the document. These include:
- Mail the document to someone else.
- Revise the document.
- Delete the document.
- Edit the document.
- Print the document.
