The Product Lead Management module is designed to help manage a company's leads based on individual product requirements. It is divided into three sub-modules:
- List
- Heatmap
- Lead Funnel
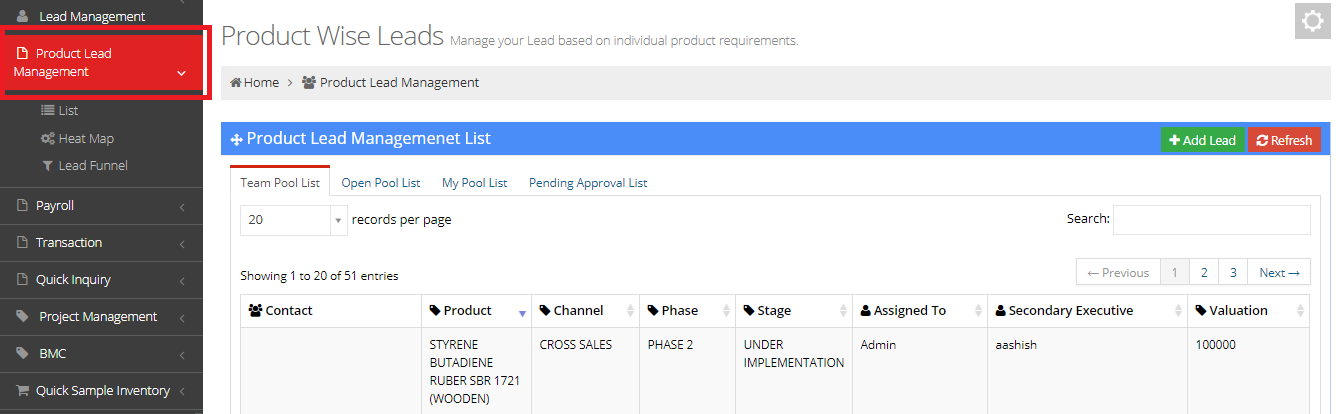
1. Product Lead Management List
Once the user clicks on List, the list of contacts and the users to which each lead has been assigned can be seen.
The user can change the number of records per page and search for a particular record using the search bar.
The list contains of the following 4 sections:
- Team Pool List
- Open Pool List
- My Pool List
- Pending Approval Pool List
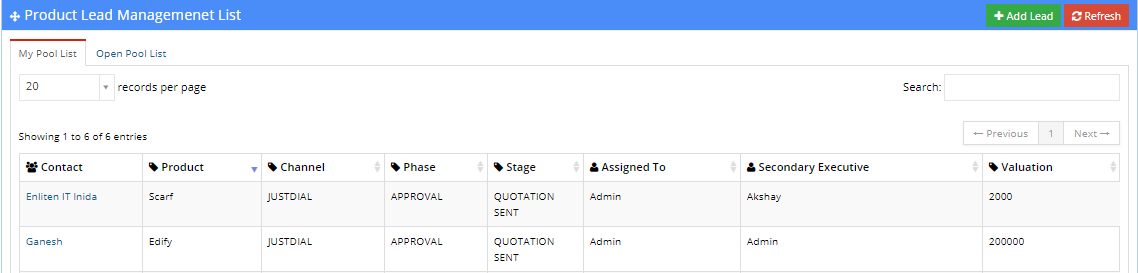
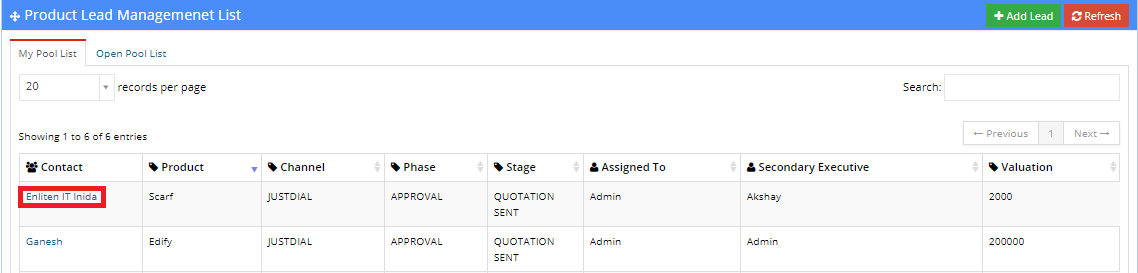
1.1 My Pool List
This section contains the listing of all the leads assigned to the user.
The list displays the contact of the lead, the details of the Product and the user to which it has been assigned. It also shows the secondary executive of the lead if any.
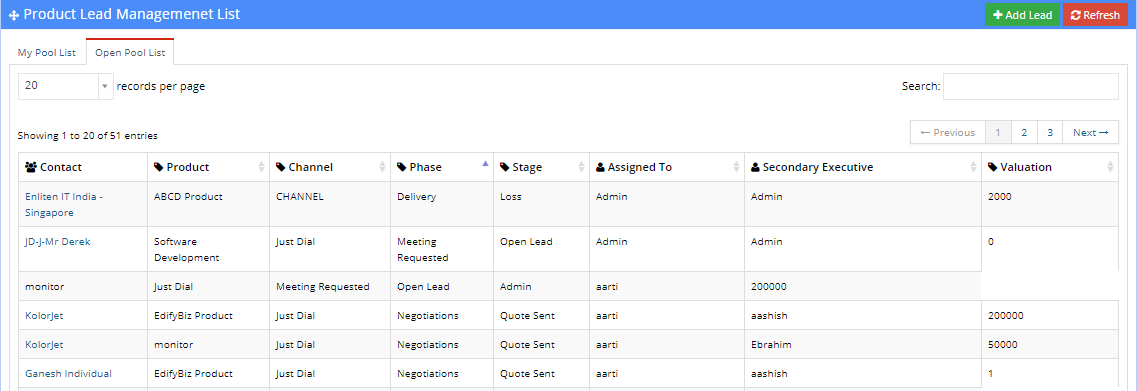
1.2 Open Pool List
This section contains the listing of all the leads that have not been assigned to any employee.
The list displays the contact of the lead, the details of the Product and the user to which it has been assigned. It also shows the secondary executive of the lead if any.
A lead from the open pool list can be assigned to an employee.
1.3 Add Lead
To add a new lead, click on the Add Lead button.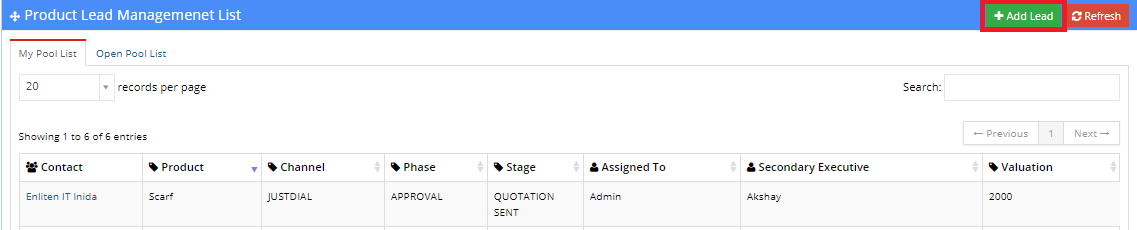
The following fields need to be filled by the user:
- Name of the Contact.
- Name of the Product.
- Tentative Closing Date of the lead.
- Primary Executive of the lead
- Secondary Executive of the lead
- Valuation of the product.
- Channel via which the lead was obtained.
- Stage of the lead.
- Sub-Stage of the lead.
- Additonal Remarks.
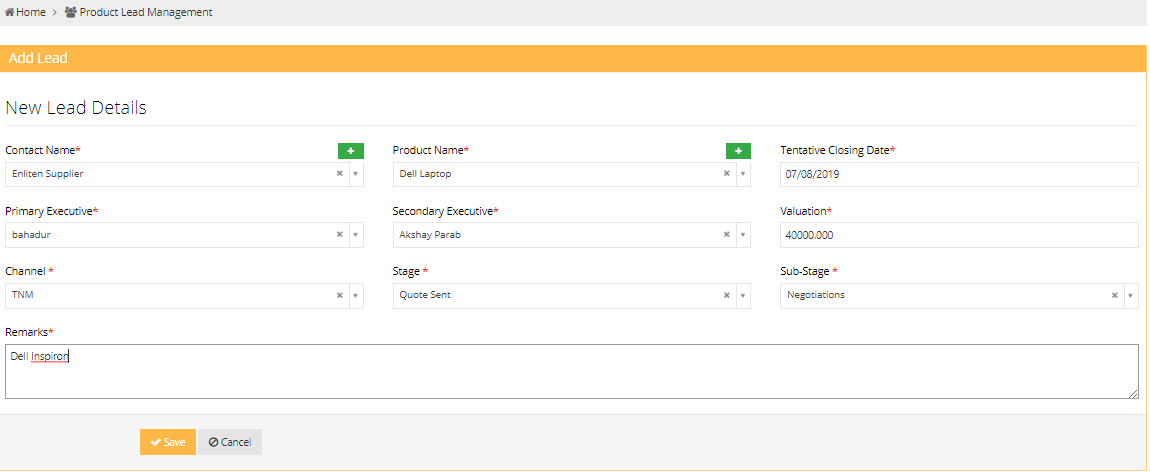
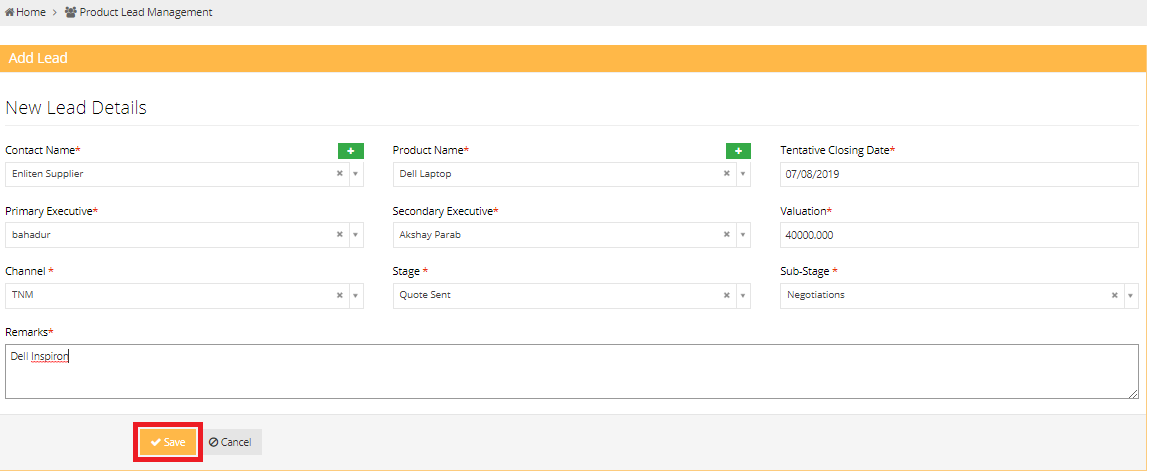
After filling in the details of the new lead, press the Save button to add the lead to the pool.
Press the Cancel button to cancel the changes and go back to the previous screen.
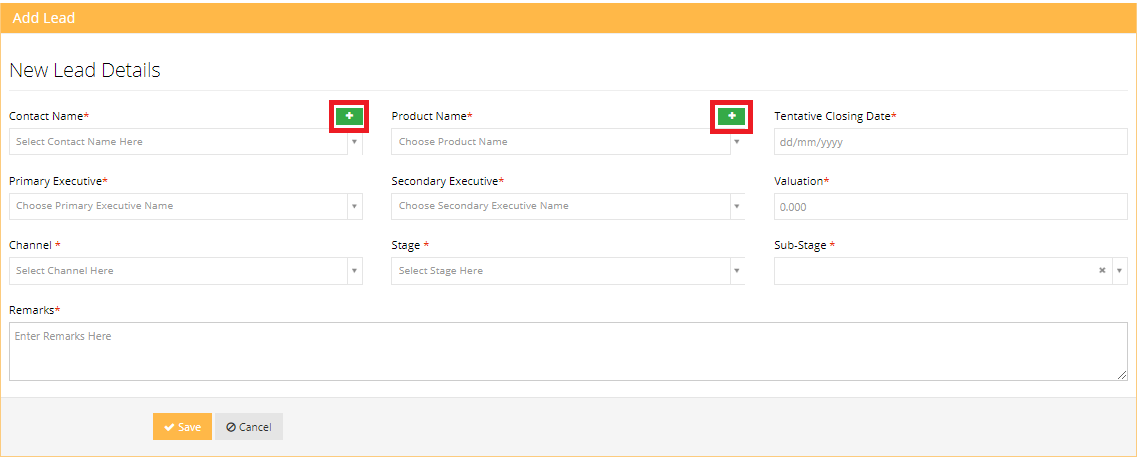
To add a new Contact or a Product, click on the + icon next to their respective labels.
1.4 Lead View
The Lead View is displayed when the user clicks on the name of a contact in the list.
The user can view all the details of a lead in this section, convert the lead to an inquiry and perform various actions on a lead. These are mentioned later in this section.

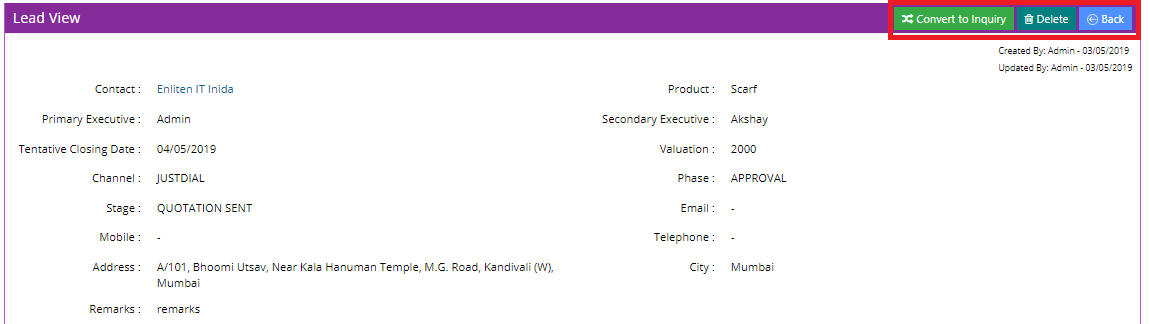
The following actions can be taken on a lead:
- Convert to Inquiry: To convert the lead to an inquiry, click on the Convert to Inquiry button.The user is redirected to the Inquiry module and is prompted to enter a form. Once the form is filled, press the Save button to save the inquiry or the Cancel button to discard the changes made.
- Edit: If the lead's current status is Approved, the user will have the option of editing the details of the lead. This is not possible if the lead is currently pending approval.
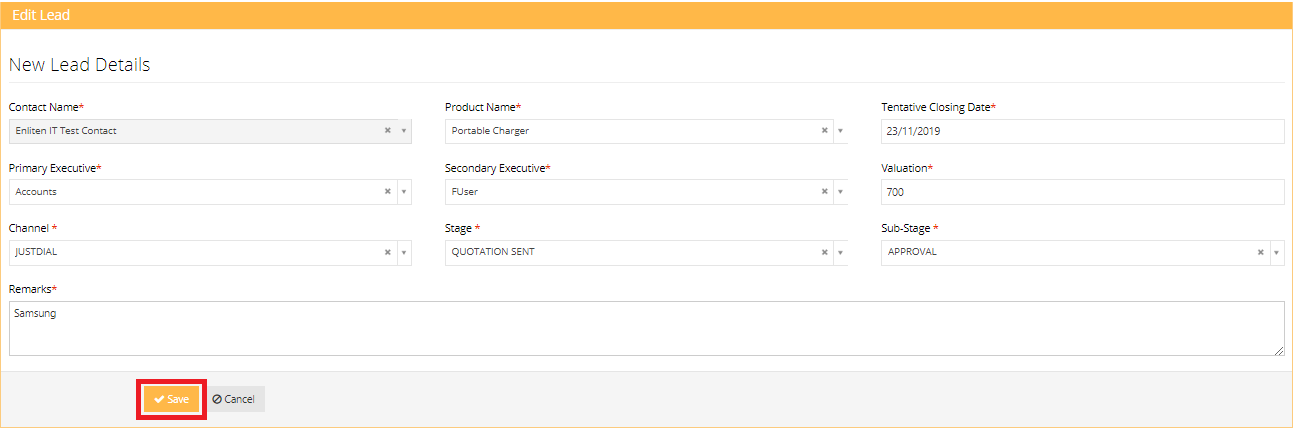
To do this, click on the Edit button, located in the top right section of the screen.
The user is now displayed a form with fields containing already existing data. The user can make changes to the data and then press Save to save the changes to the record. To discard the changes made, press the Cancel button.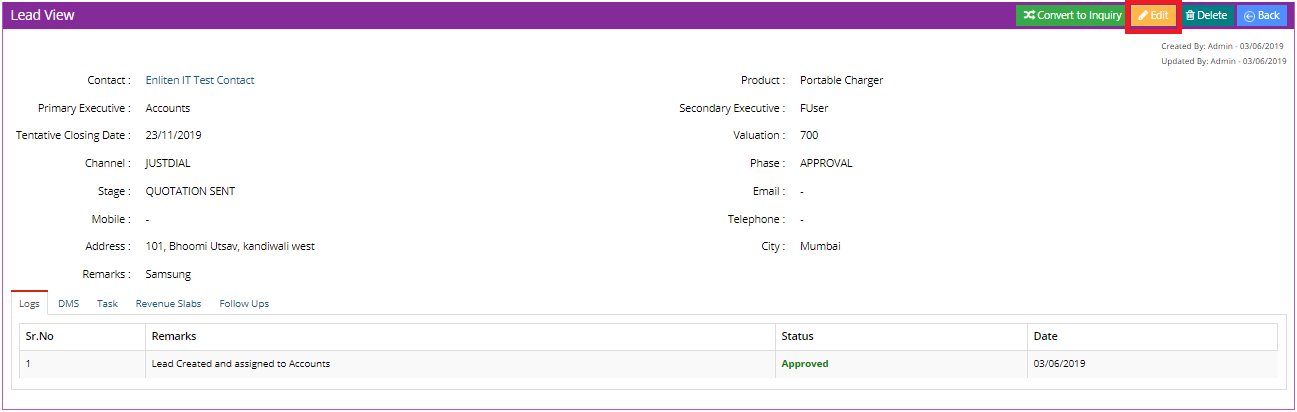
- Delete: To delete the lead, click on the Delete button.
- To go back to the previous screen, press the Back button.
1.4.1 Logs
The user can view logs of the lead in this tab. Each log contains remarks, the status of the lead and the date of the log.

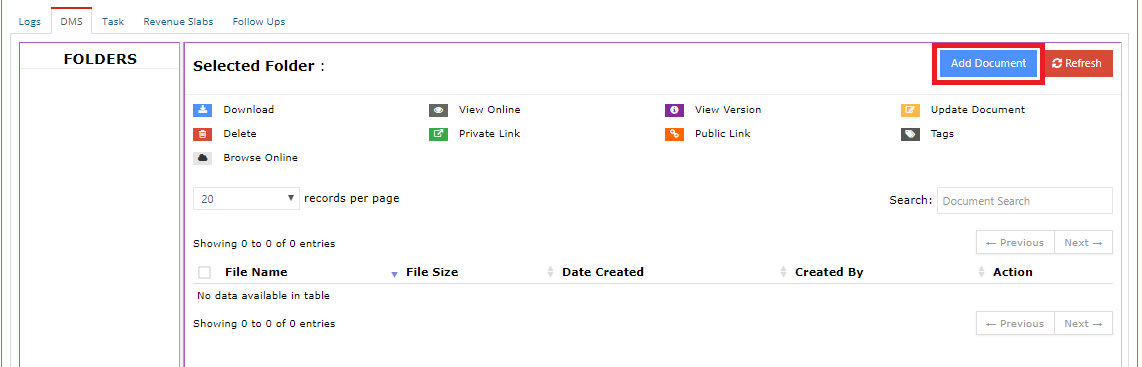
1.4.2 DMS
The user can attach additional documents to a lead using Edifybiz's DMS functionality.
To add a new document, the user can click on the Add Document button and refresh the list of added documents by clicking on the Refresh button.
The user can navigate through different folders in the Folders column.
The details of a document include the File Name, the Size of the File, the Date of Creation and the user who created the document.
The actions that can be taken on a document include:
- Download: To download the document.
- View Online: This opens the document in a new tab.
- View Version: Allows the user to view previous versions of the document.
- Update Document: Allows the user to revise or update a document.
- Delete: Enables the user to delete a document.
- Private Link: This generates a link to the document. This document is password protected.
- Public Document: This generates a link to the document which can be viewed by anyone who posseses the link.
- Tags: This enables the user to add a tag to the document.
1.4.3 Task
The user can create a task and view existing tasks corresponding to a lead in this tab.
To create a new task, the user can click on the Create Task button and refresh the list of added tasks by clicking on the Refresh button.

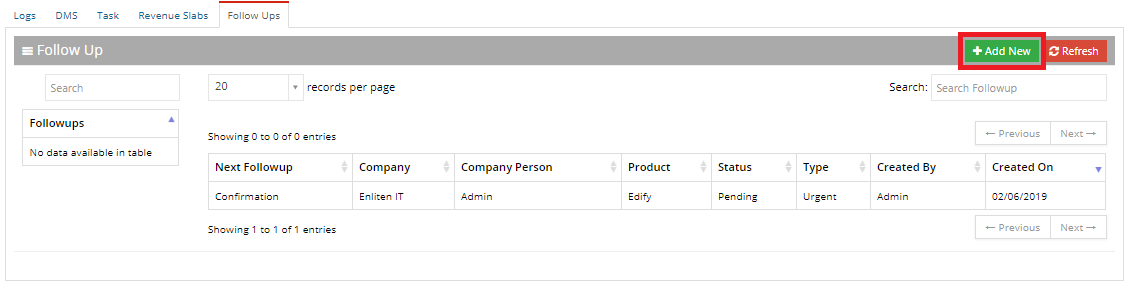
1.4.4 Follow Up
The user can create a followup and view previous followups in the tab. The user can add a Contact, Contact Person and Product in the Follow Up.
To create a new follow up, the user can click on the Add New button and refresh the list of added follow ups by clicking on the Refresh button.
2. Heat Map
This sub-module allows the user to generate a lead heat map.
Once the user clicks on Heat Map, the user is asked to mention different parameters to generate the heat map. These parameters are the following:
- Contact Name: The user can generate a heat map corresponding to multiple contacts using this field.
- Product Name: The user can generate a heat map corresponding to multiple products using this field.
- Executive Name: The user can view the heat map for leads assigned to a specific executive using this field.
- Customer Label: This field allows the user to select multiple customers according to the label assigned to them.
- Product Label: This field allows the user to select multiple products according to the label assigned to them.
- Heat Map Type: A heat map could be of two types, Product Wise and Contact Wise
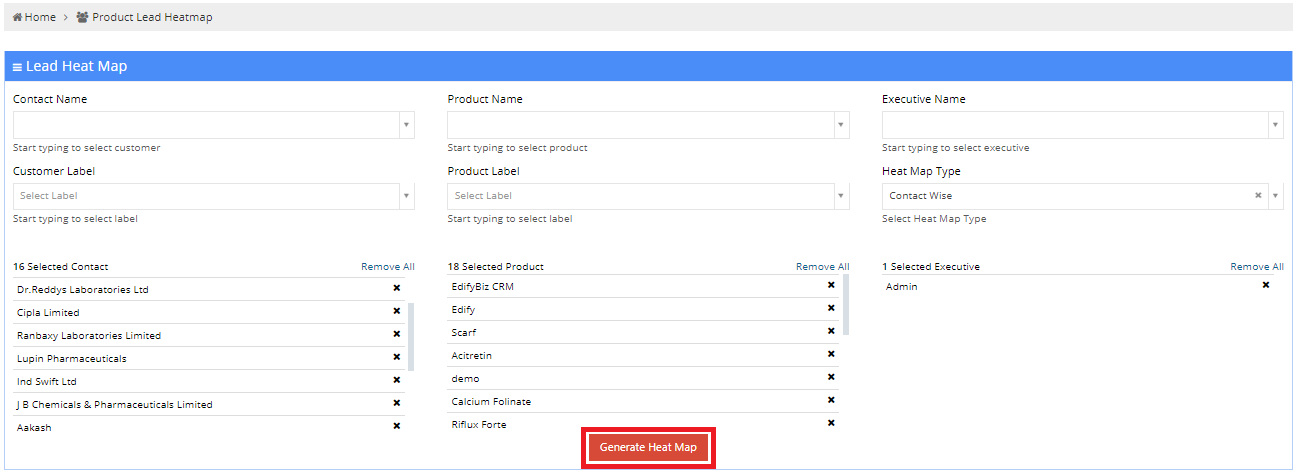
A heat map is generated according to the entered parameters. The user can analyze leads using this feature. This makes it easier for a company to manage and keep track of its leads.
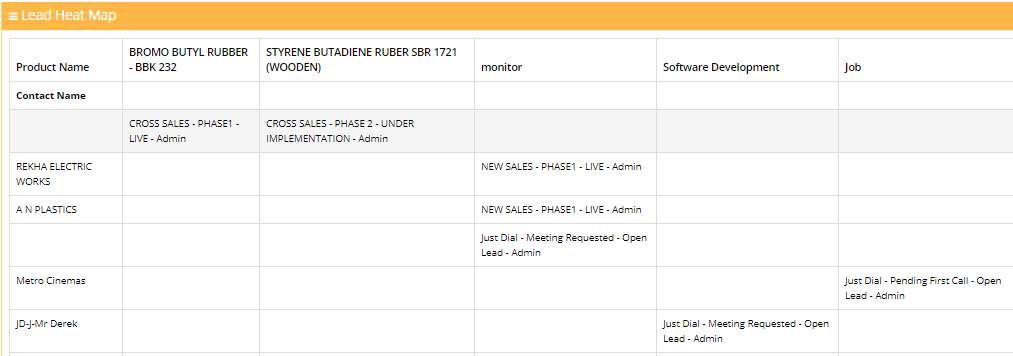
An example of a heat map is shown in the below image.
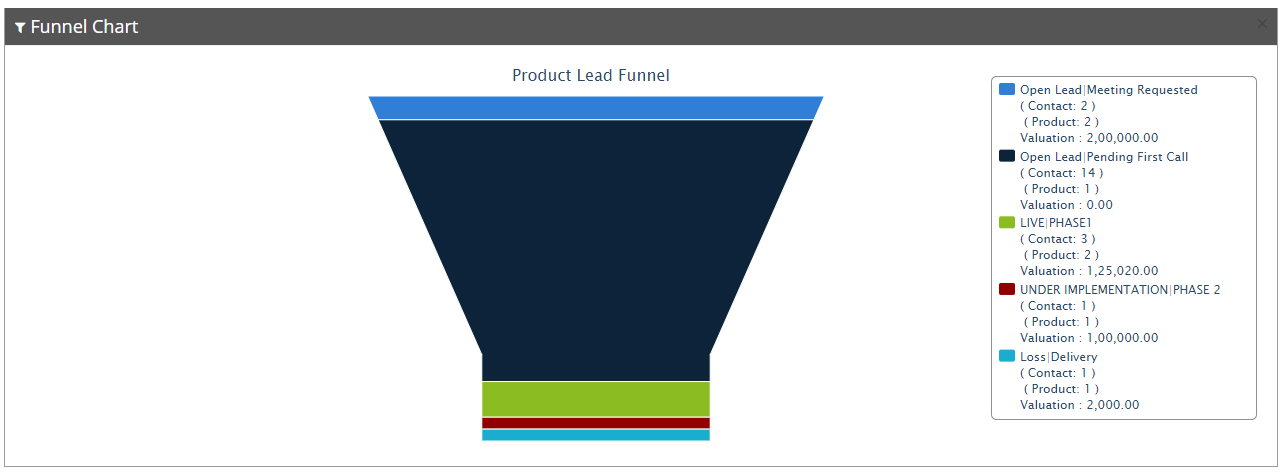
3. Lead Funnel
This sub-module allows the user to generate a lead funnel. This allows the user to analyze different leads and see their statuses.
Once the user clicks on Lead Funnel, the user is asked to mention different parameters to draw a lead funnel. These parameters are the following:
- Funnel Type: The funnel could be of two types, Sales Funnel and Revenue Funnel.
- Channel: This allows the user to draw a funnel according to the channel via which the lead was obtained.
- Phase: The field allows the user to generate a funnel based on the phase of the lead.
- Primary Executive: This allows the user to draw the funnel comprising leads assigned to the selected primary executive of the lead.
- Secondary Executive: This allows the user to draw the funnel comprising leads assigned to the selected secondary executive of the lead.
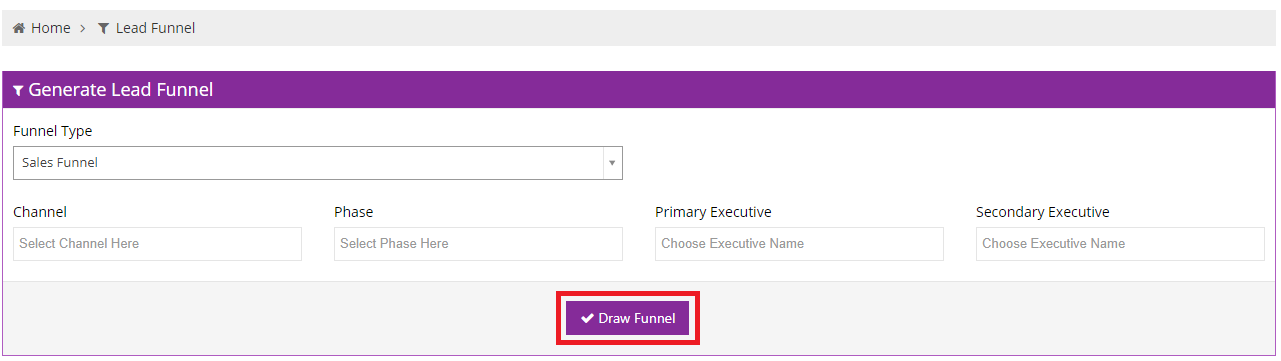
A lead is generated according to the entered parameters. The user can analyze leads using this feature. This makes it easier for a company to manage and keep track of the progress of its leads.
The top of the funnel depicts leads in the initial stages. The bottom of the funnel shows leads in their final stages.
An example of a lead funnel is shown in the below image.