The Payment module of EdifyBiz provides an efficient way in which a company can manage its payments. This module also enables the user to analyze all the payments the company has made and received.
To access the Payment module, click on Payment in the sidebar.

- Dashboard
- Received
- Paid
- Bank
- Cash
- Book List
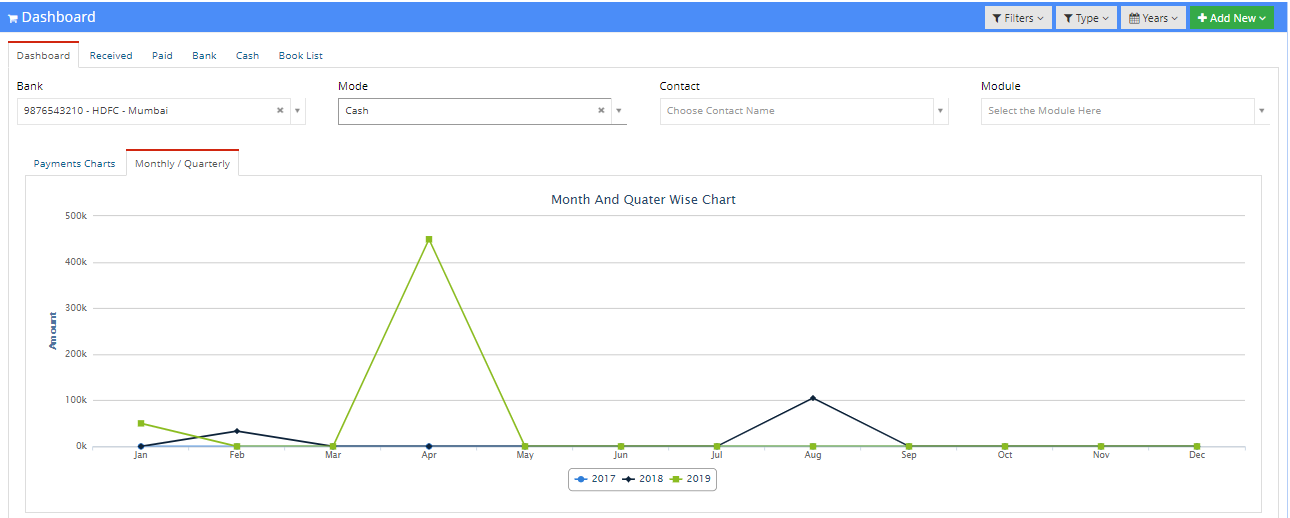
Dashboard
The user can select the four parameters for which data is to be viewed using their repective dropdowns.
These parameters are as follows:
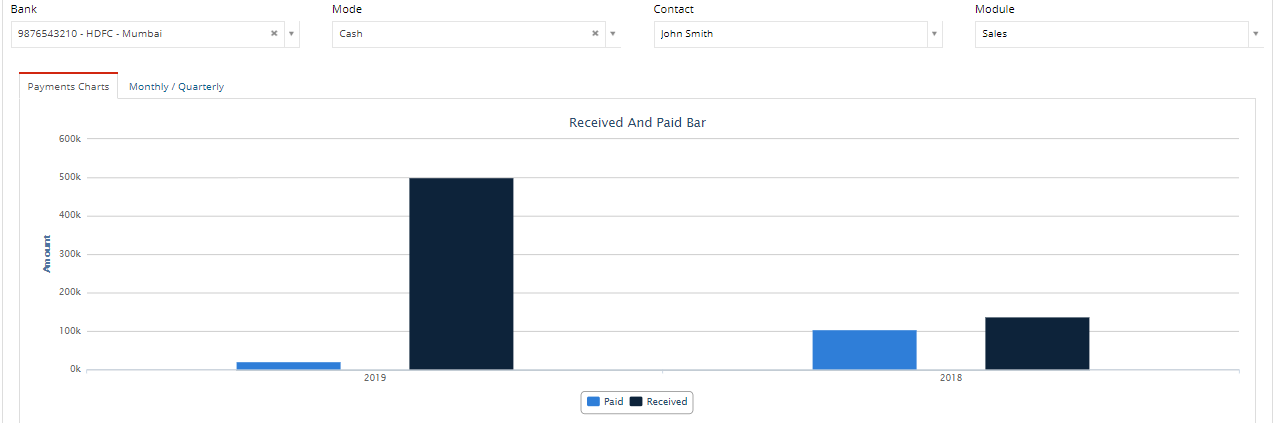
- Bank: The user can select the name of the bank and the bank account via which the payments were made/received from this dropdown.
- Mode: Using this dropdown, the user can select the mode of payment.
- Contact: This dropdown allows the user to select the name of the contact with whom the transaction was done.
- Module: Using this dropdown, the user can select the module via which the transactions were completed.
- Payments Charts
- Monthly / Quarterly
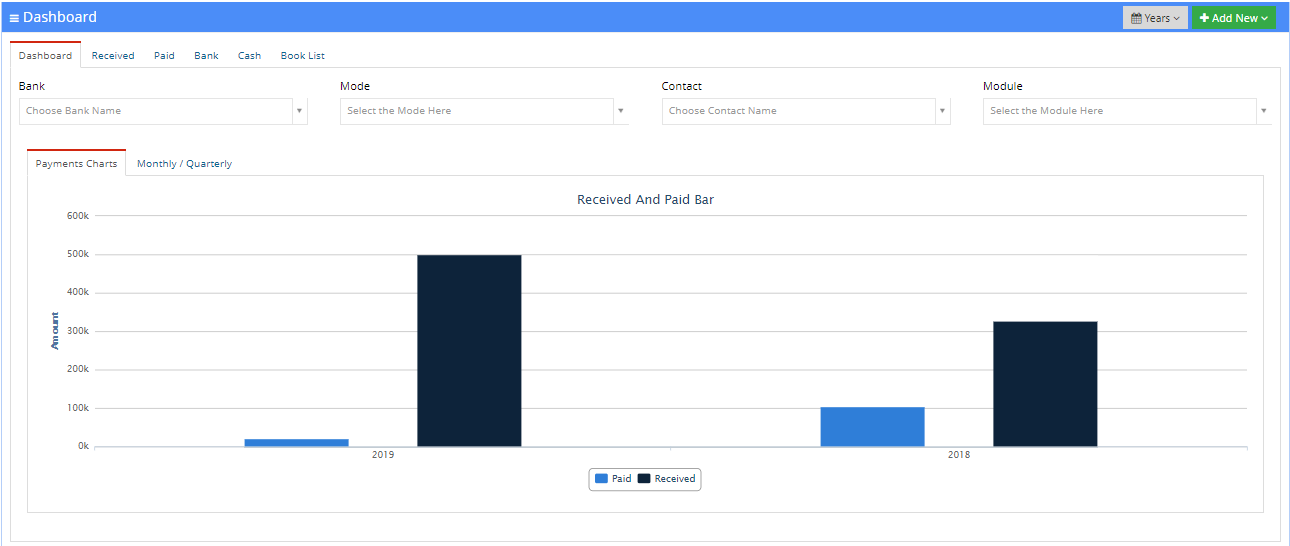
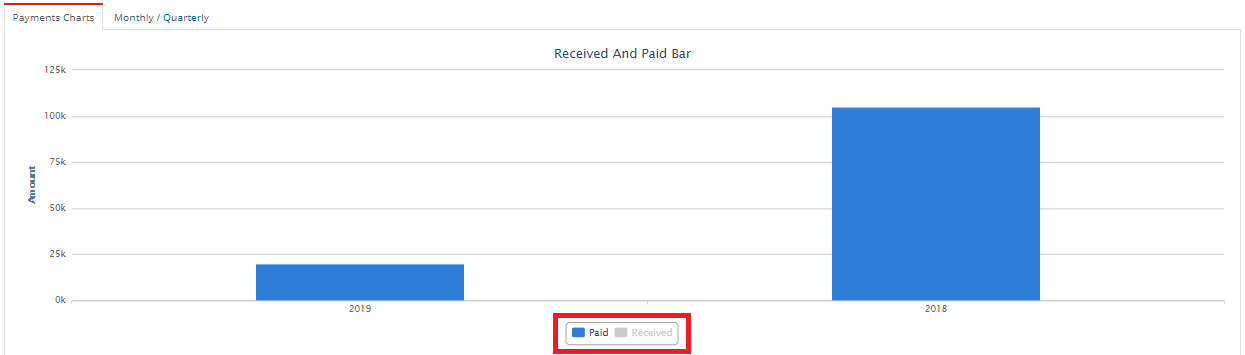
Payments Charts
In this tab, the user an view bar graphs for payments paid and received. This graph contains a bar for each year.This graph is drawn in accordance with the parameters selected from the above dropdowns.

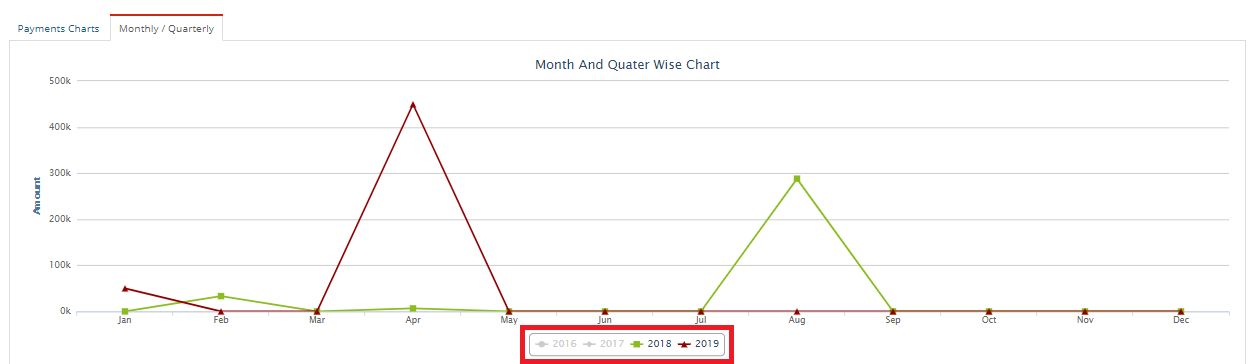
Monthly / Quarterly
The user can view a line graph for monthly or quarterly payments paid/received in the selected number of years in this tab.This graph is drawn in accordance with the parameters selected from the above dropdowns.


Received
To export entries to Tally, press the Export button.
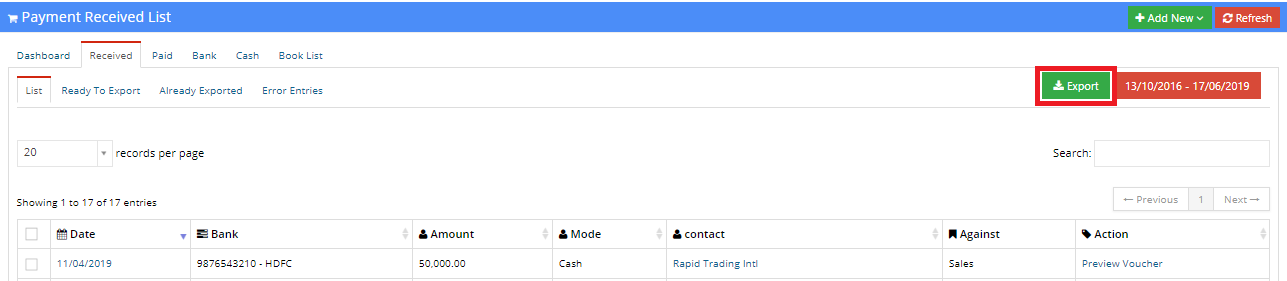
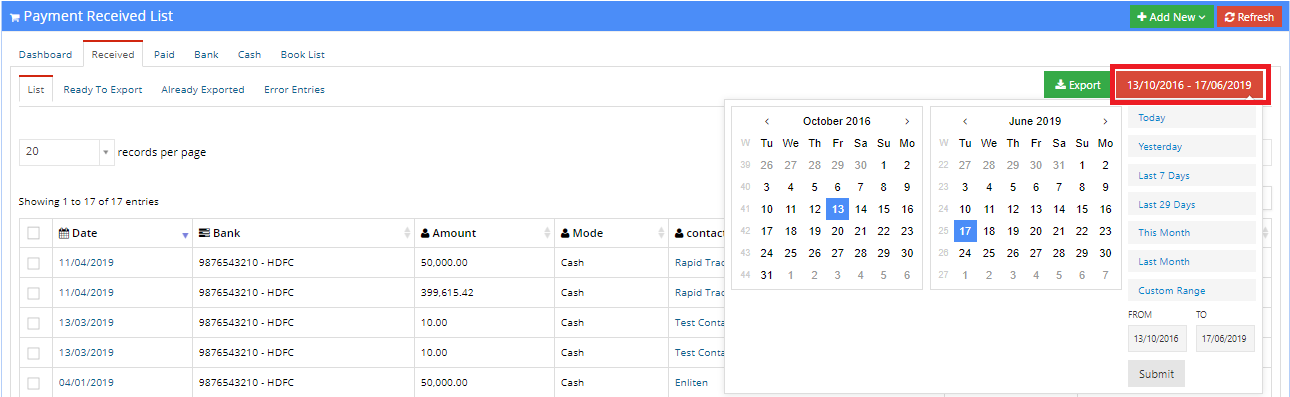
- List: This tab shows the listing of all payments received.
- Ready To Export: This tab only shows records that have not been exported to Tally are ready to be exported.
- Already Exported: This tab only shows records that have already been exported to Tally.
- Error Entries: In this tab, the user can view entries that caused errors while exporting to Tally and were not exported as a result.
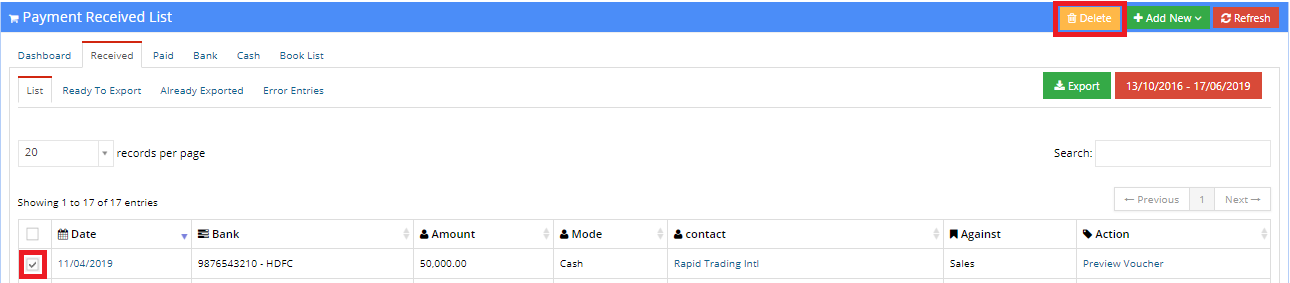
The listing contains the following columns:
- Date: This displays the date on which the payment was received.
Upon clicking on a date, the user can view and edit previously received payments from the contact. The user can also attach documents to the payment.
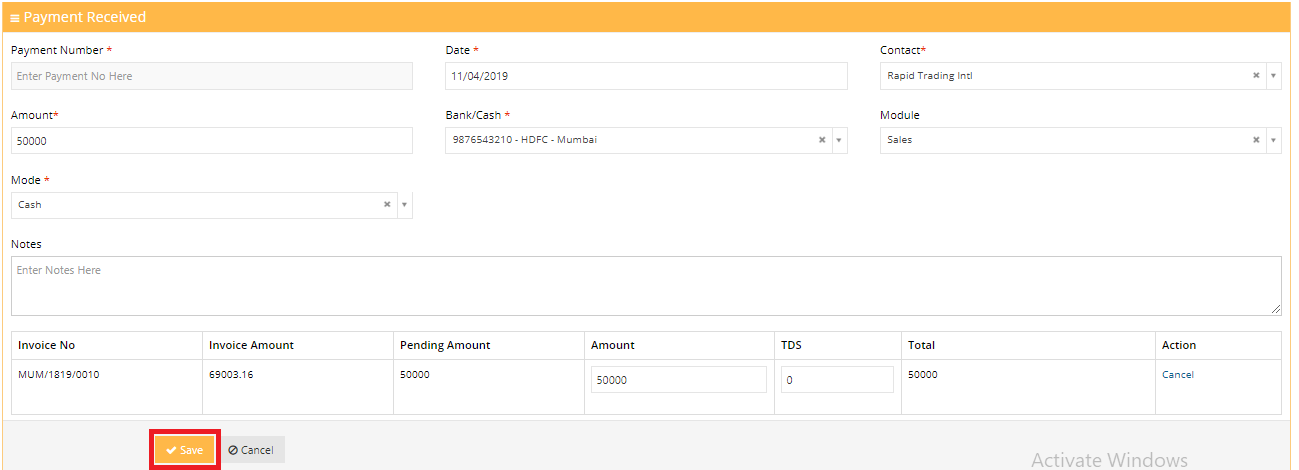
The user is now displayed a form with fields containing already existing data. The user can make changes to the data and then press Save to save the changes to the record. To discard the changes made, press the Cancel button.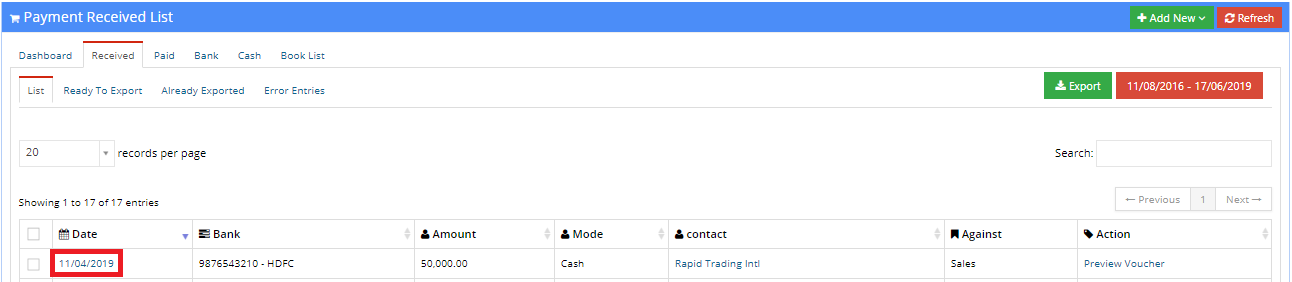
- Bank: This column displays the bank name and account nummber into which the amount was credited.
- Amount: This displays the amount received.
- Mode: This column displays the mode of transaction.
- Contact: This column displays the contact from which the payment was received. Upon clicking on a contact, the user is directed to the Contact module where details about the selected contact can be viewed.
- Against: This column displays the module against which the payment was received.
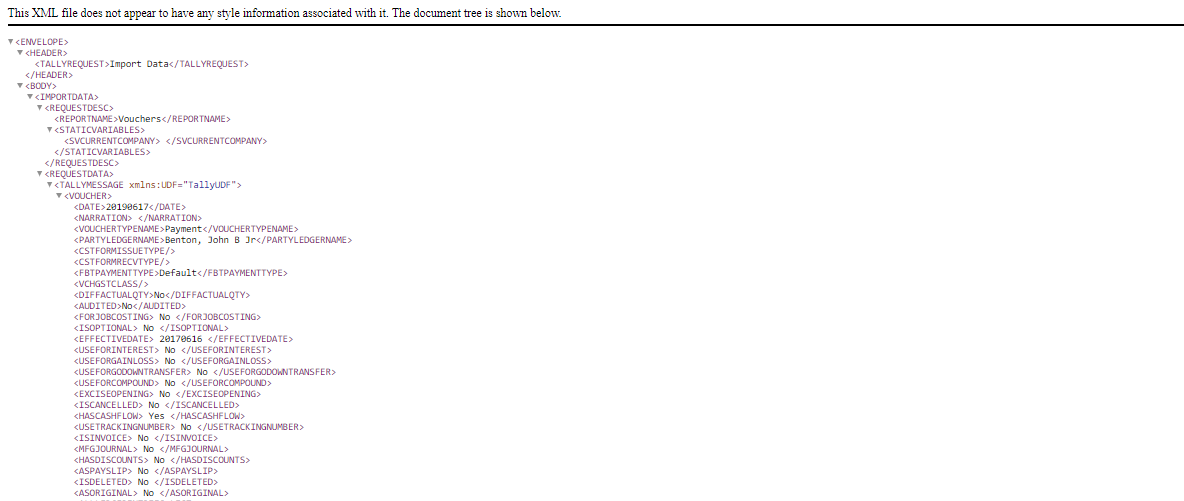
- Action: The user can press Preview Voucher in the Action column to preview how the Tally entry will look like.
To print this preview, press the Print button, press the Mark as Already Exported button if the entry has already been exported to Tally.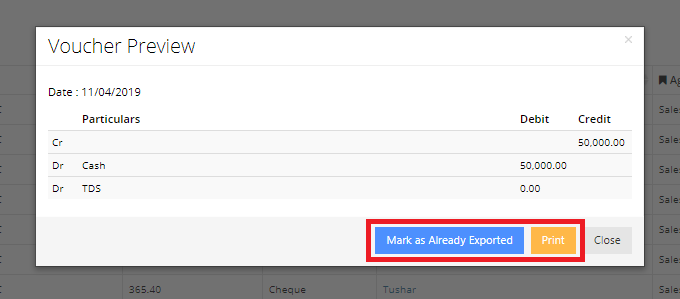
Paid
To export entries to Tally, press the Export button. This process is similar to the Received tab and has been explained above.
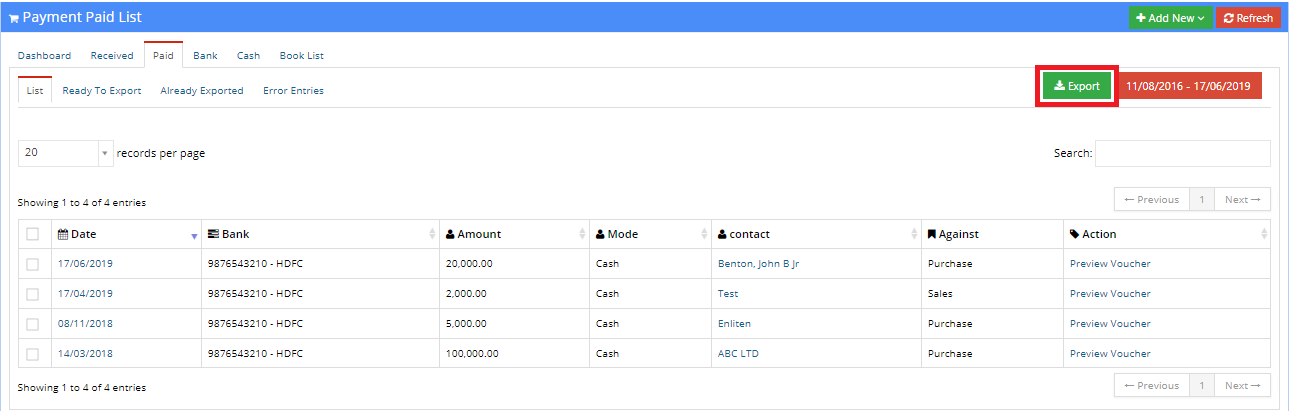
- List: This tab shows the listing of all outgoing payments.
- Ready To Export: This tab only shows records that have not been exported to Tally are ready to be exported.
- Already Exported: This tab only shows records that have already been exported to Tally.
- Error Entries: In this tab, the user can view entries that caused errors while exporting to Tally and were not exported as a result.
The listing contains the following columns:
- Date: This displays the date on which the payment was made.
Upon clicking on a date, the user can view and edit previously made payments to the contact. The user can also attach documents to the payment.
The user is now displayed a form with fields containing already existing data. The user can make changes to the data and then press Save to save the changes to the record. To discard the changes made, press the Cancel button.
- Bank: This column displays the bank name and account nummber from which the amount was debited.
- Amount: This displays the amount transferred.
- Mode: This column displays the mode of transaction.
- Contact: This column displays the contact to which the payment was made. Upon clicking on a contact, the user is directed to the Contact module where details about the selected contact can be viewed.
- Against: This column displays the module against which the payment was made.
- Action: The user can press Preview Voucher in the Action column to preview how the Tally entry will look like.
To print this preview, press the Print button, press the Mark as Already Exported button if the entry has already been exported to Tally.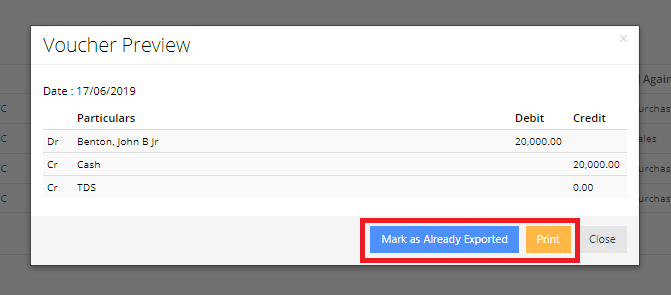
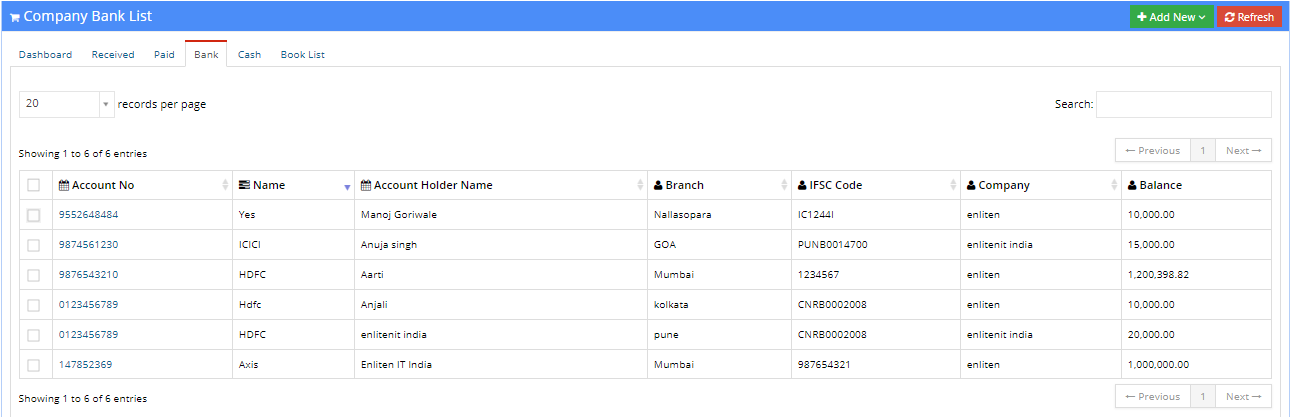
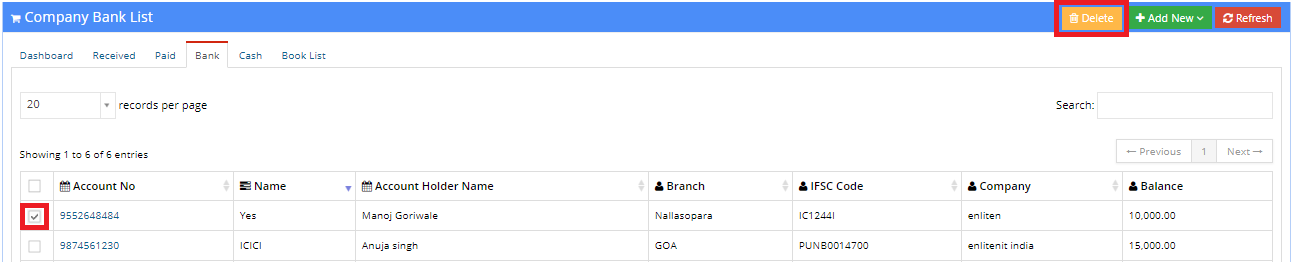
Bank
The user can search for a specific record using the search bar or vary the number of records per page using the dropdown in the top left corner. The listing contains the following columns:
- Account No: This column displays the number of the bank account.
- Name: This column displays the name of the bank in which the account exists.
- Account Holder Name: This column displays the name of the person in whose name that account was opened.
- Branch: This column displays the branch of the bank at which the account exists.
- IFSC Code: This column displays the IFSC code of the account.
- Company: This column displays the name of the company under which the account is registered.
- Balance: This column displays the balance amount in the account.

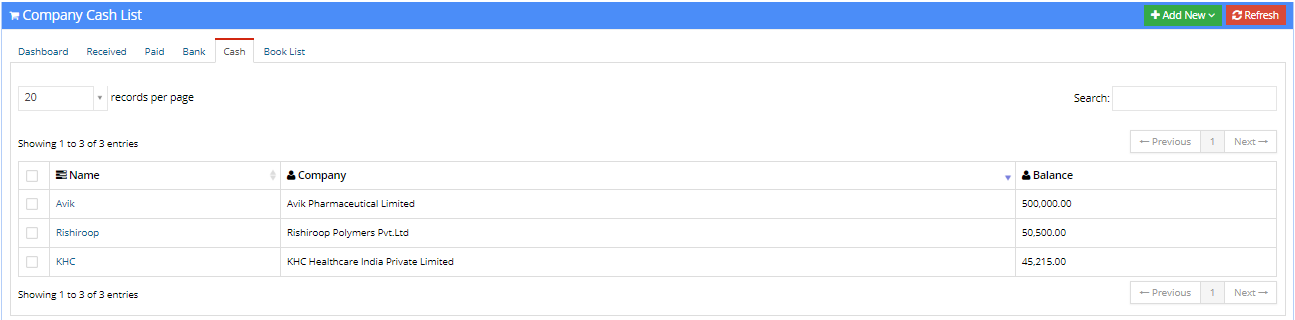
Cash
The user can search for a specific record using the search bar or vary the number of records per page using the dropdown in the top left corner. The listing contains the following columns:
- Name: This column displays the name under which the cash is stored.
- Company: This column displays the name of the company under which the cash is stored.
- Balance: This column displays the balance amount.


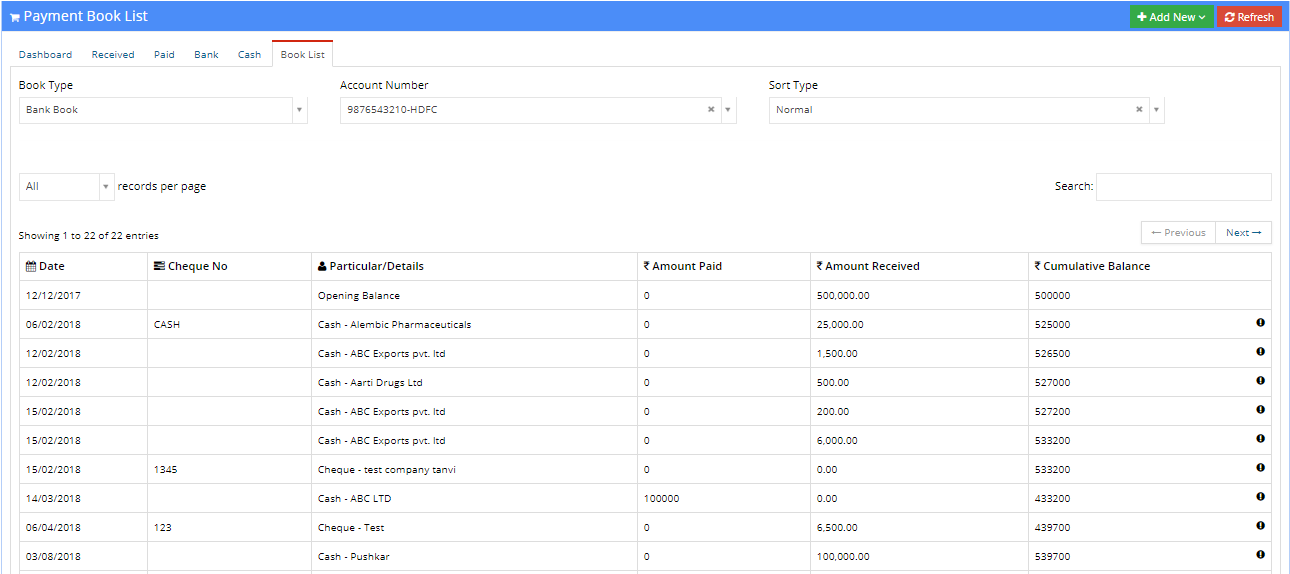
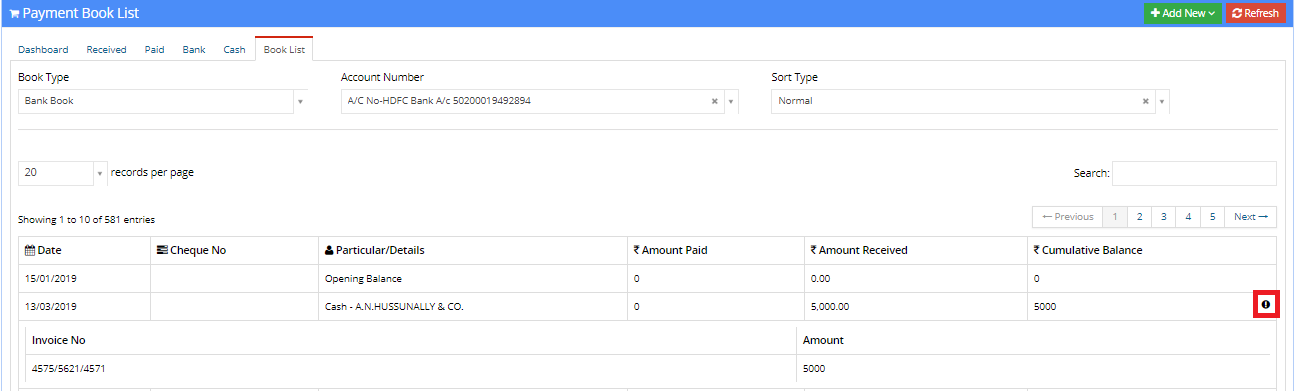
Book List
The three parameters are:
- Book Type: The book could be of two types, Bank Book and Cash Book. Transactions will be displayed in accordance to the selected book type.
- Account Number: The user can select the account number to/from which payments were made.
- Sort Type: The listing can be sorted as per the type selected from this dropdown.
The book list comprises of the following columns:
- Date: This displays the date on which the transaction took place.
- Cheque No: This displays the cheque number if applicable.
- Particular / Details: This column displays the mode and contact with whom the transaction took place. Additionally, the opening balance can be viewed as the first record.
- Amount Paid: This displays the amount paid to the contact.
- Amount Received: This displays the amount received form the contact.
- Cumulative Balance: This displays the cumulative balance after completion of the transaction.
Add New
To add a new entry, use the Add New dropdown button located in the top right corner of the screen.
Following this, the user can select from the following options to add new data:
- Received
- Paid
- Contra Entry
- Add Bank
- Add Cash
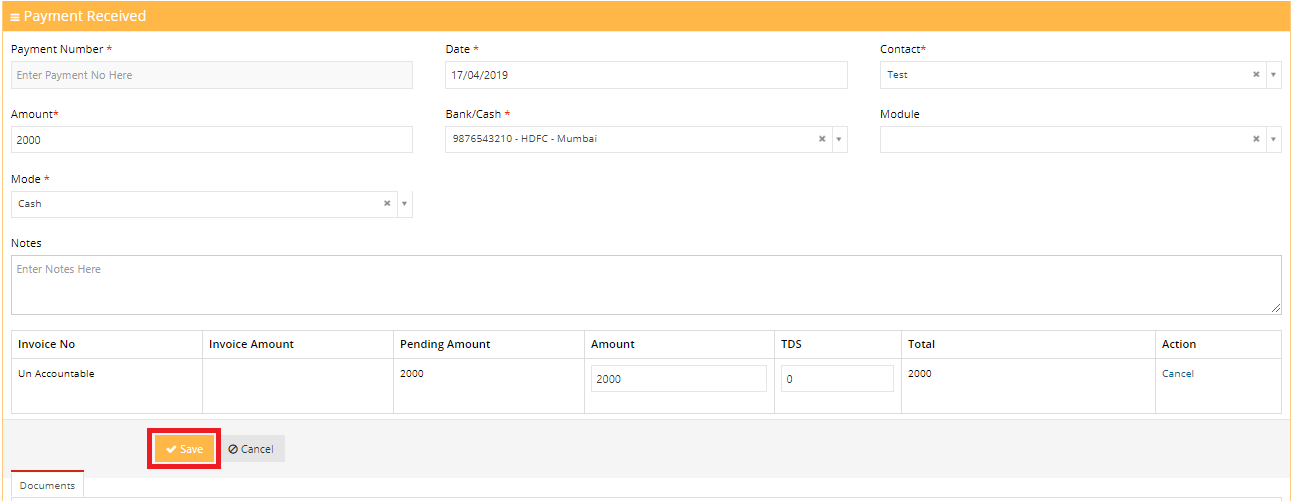
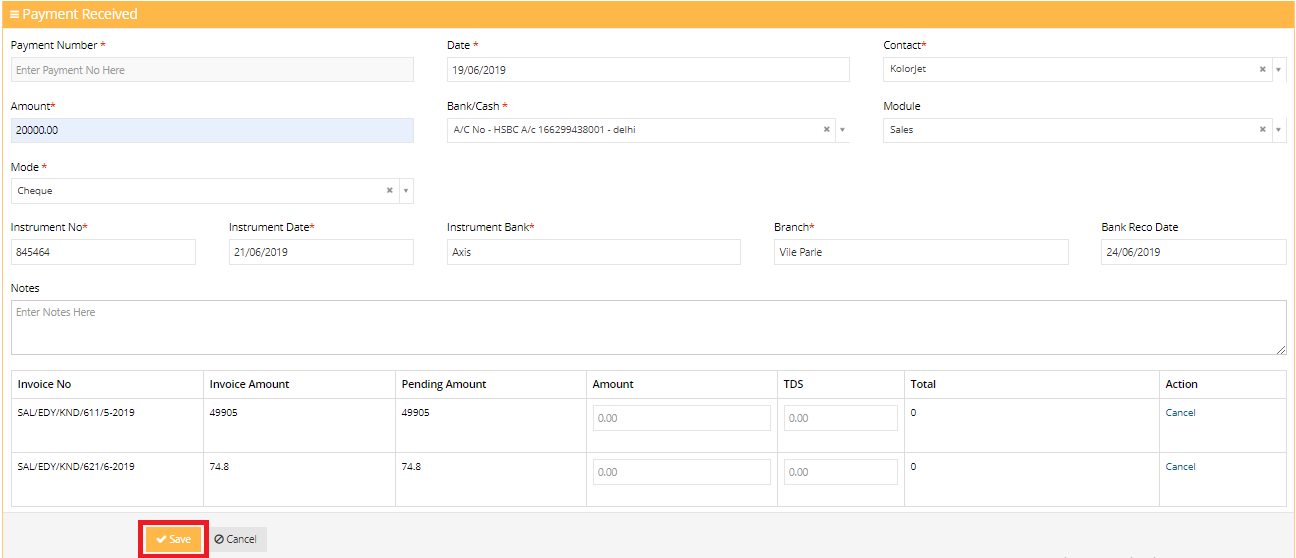
Add New Payment Received

The following fields are to be filled:
- Payment Number: This field stores a unique payment number. This is auto-generated.
- Date: This field stores the date on which the payment was made.
- Contact: This field stores the name of the contact from which the payment was received.
- Amount: The user enters the amount received in this field.
- Bank / Cash: The user selects the bank details in this field.
- Module: This field stores the module against which the payment was received.
- Mode: The user can select the mode of payment in this field. This could be one of the following : Cash, Cheque, DD, NEFT.
If the payment mode is cash, the user is not asked to fill the following fields.
- Instrument Number: This asks for the number of the banking instrument.
- Instrument Date: This field stores the date on which the instrument was issued.
- Instrument Bank: This field stores the bank via which the instrument was issued.
- Branch: This field stores the branch of bank via which the instrument was issued.
- Bank Reco Date: This field stores the bank reconcilliation date for the instrument.
- Notes: The user can store additional notes to the payment in this field.
The user can set the payment off against existing invoices if any. These invoices are generated once the contact and module are selected.
Documents
In this tab, the user can upload and view different uploaded documents to the record of a payment.
The user can navigate through different folders in the Folders column on the left.
Once a folder is selected, the user can view the documents that exist in that folder.
The user can generate a link to the document by clicking on the Get Link button.
To get an overview of a document, the user can click on the name of the document.
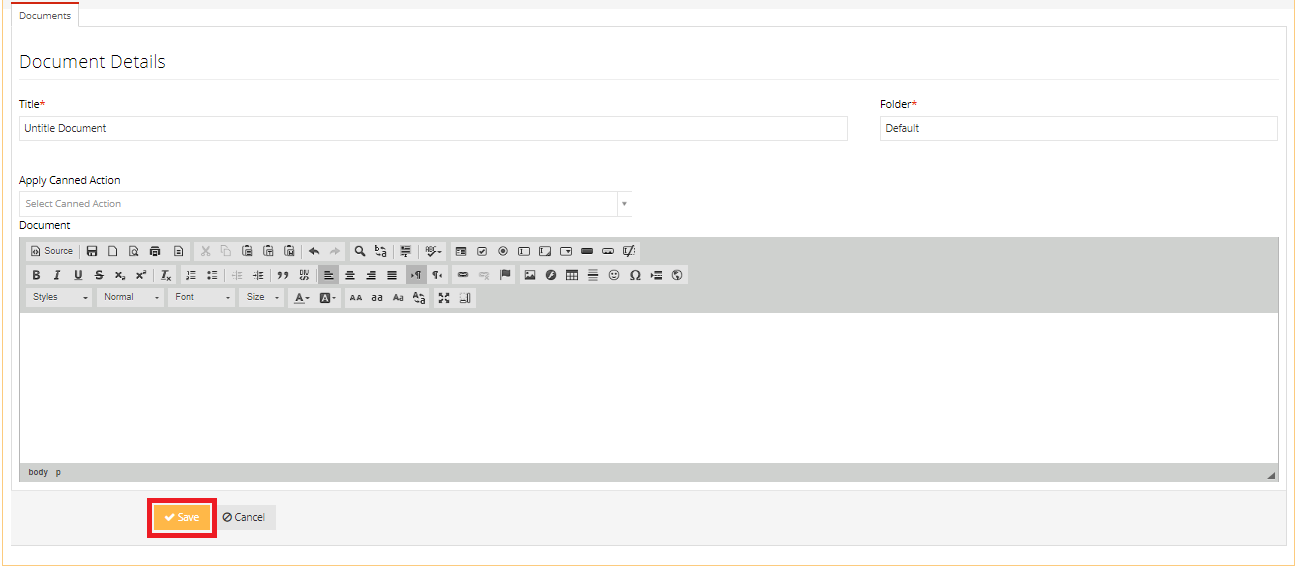
To add a new document to the selected folder, the user can click on the Add New button.

When the user clicks on the Add New button, the user is prompted to enter the document details. These details include the Document title, the Folder and Apply Canned Action.
Use Apply Canned Action to generate a document in accordance to a set template.
The user then is able to format the document using the CK Editor.
Upon finishing the above procedure, the user can press the Save button to save the document or cancel the document and go back to the previous screen by pressing the Cancel button.

After clicking on the name of a document, the user can see a preview of the document
Various actions can be taken on the document. These include:
- Mail the document to someone else.
- Revise the document.
- Delete the document.
- Edit the document.
- Print the document.

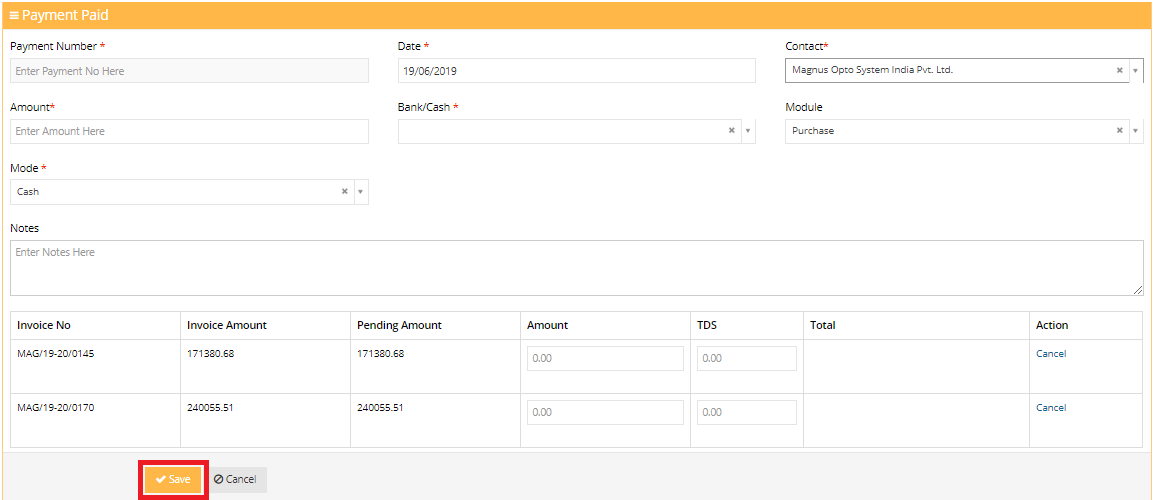
Add New Payment Paid

The following fields are to be filled:
- Payment Number: This field stores a unique payment number. This is auto-generated.
- Date: This field stores the date on which the payment was made.
- Contact: This field stores the name of the contact to which the payment was made.
- Amount: The user enters the amount sent in this field.
- Bank / Cash: The user selects the bank details in this field.
- Module: This field stores the module against which the payment was made.
- Mode: The user can select the mode of payment in this field. This could be one of the following : Cash, Cheque, DD, NEFT.
If the payment mode is cash, the user is not asked to fill the following fields.
- Instrument Number: This asks for the number of the banking instrument.
- Instrument Date: This field stores the date on which the instrument was issued.
- Instrument Bank: This field stores the bank via which the instrument was issued.
- Branch: This field stores the branch of bank via which the instrument was issued.
- Bank Reco Date: This field stores the bank reconcilliation date for the instrument.
- Notes: The user can store additional notes to the payment in this field.
The user can set the payment off against existing invoices if any. These invoices are generated once the contact and module are selected.
Documents
In this tab, the user can upload and view different uploaded documents to the record of a payment.
The user can navigate through different folders in the Folders column on the left.
Once a folder is selected, the user can view the documents that exist in that folder.
The user can generate a link to the document by clicking on the Get Link button.
To get an overview of a document, the user can click on the name of the document.
To add a new document to the selected folder, the user can click on the Add New button.

When the user clicks on the Add New button, the user is prompted to enter the document details. These details include the Document title, the Folder and Apply Canned Action.
Use Apply Canned Action to generate a document in accordance to a set template.
The user then is able to format the document using the CK Editor.
Upon finishing the above procedure, the user can press the Save button to save the document or cancel the document and go back to the previous screen by pressing the Cancel button.
After clicking on the name of a document, the user can see a preview of the document
Various actions can be taken on the document. These include:
- Mail the document to someone else.
- Revise the document.
- Delete the document.
- Edit the document.
- Print the document.

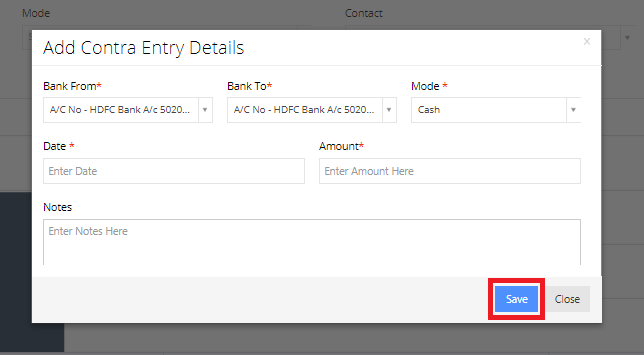
Add New Contra Entry

The following fields are to be filled by the user:
- Bank From: This field requests the user to select the bank details of the account from which the amount is being debited.
- Bank To: This field requests the user to select the bank details of the account to which the amount is being credited.
- Mode: The user can select the mode of payment in this field. This could be one of the following : Cash, Cheque, DD, NEFT.
If the payment mode is cash, the user is not asked to fill the following fields.
- Instrument Number: This asks for the number of the banking instrument.
- Instrument Date: This field stores the date on which the instrument was issued.
- Instrument Bank: This field stores the bank via which the instrument was issued.
- Branch: This field stores the branch of bank via which the instrument was issued.
- Bank Reco Date: This field stores the bank reconcilliation date for the instrument.
- Date: This field stores the date on which the payment was made.
- Amount: The user enters the transaction amount in this field.
- Bank / Cash: The user selects the bank details in this field.
- Notes: The user can store additional notes to the payment in this field.
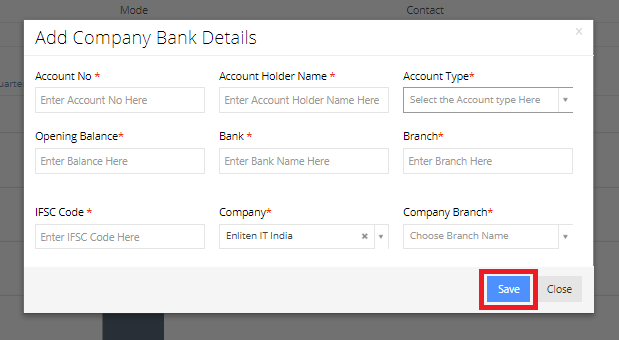
Add Company Bank Details

The following fields are to be filled by the user:
- Account Number: This field requests the enter the account number.
- Account Holder Name: This field requests the user enter the name of the holder of the account.
- Account Type: The user can select the type of account in this field. Eg: Savings, Current account. .
- Opening Balance: The user enters the opening balance of the account in this field.
- Bank: The name of the bank in which the account was opened is to be entered in this field.
- Branch: The branch of the bank at which the account was opened is to be entered here.
- IFSC Code: This field stores the IFSC Code of the bank account.
- Company: The user selects the company name under which the account was opened.
- Company Branch: The user selects the branch of the company for which the account is assigned.
- Set to Default: This checkbox is ticked if the account is to be set as the default account for the company.
- Tally Name: The user map the Tally name for the account in this field.
- SWIFT Code: The user enters the SWIFT Code of the account in this field.
After filling in necessary details, press the Save button to add the details.
Press Close to discard the entered values and close the pop-up box.
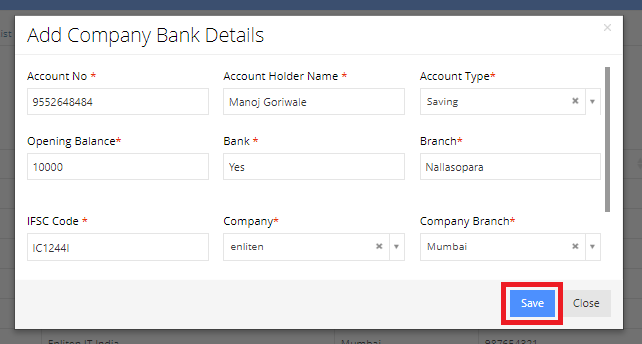
Add Company Bank Details
The following fields are to be filled by the user:
- Account Number: This field requests the user to enter the account number.
- Account Holder Name: This field requests the user enter the name of the holder of the account.
- Account Type: The user can select the type of account in this field. Eg: Savings, Current account. .
- Opening Balance: The user enters the opening balance of the account in this field.
- Bank: The name of the bank in which the account was opened is to be entered in this field.
- Branch: The branch of the bank at which the account was opened is to be entered here.
- IFSC Code: This field stores the IFSC Code of the bank account.
- Company: The user selects the company name under which the account was opened.
- Company Branch: The user selects the branch of the company to which the account is assigned.
- Set to Default: This checkbox is ticked if the account is to be set as the default account for the company.
- Tally Name: The user map the Tally name for the account in this field.
- SWIFT Code: The user enters the SWIFT Code of the account in this field.
After filling in necessary details, press the Save button to add the details.
Press Close to discard the entered values and close the pop-up box.
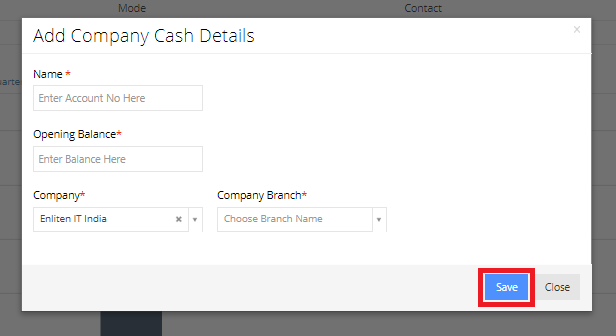
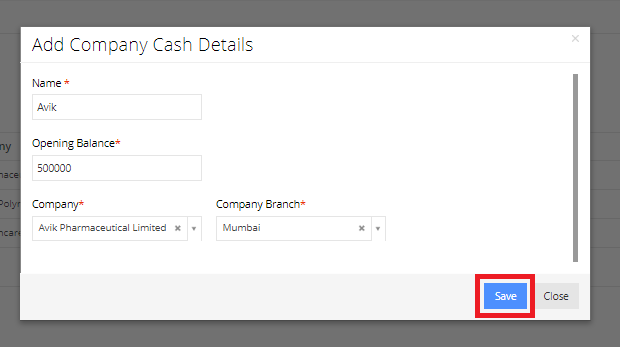
Add Company Cash Details

The following fields are to be filled by the user:
- Name: This field requests the user to enter the name of the entity holding the cash.
- Opening Balance: This field requests the user enter the opening balance of the cash.
- Company: The user selects the company name to which the cash belongs to.
- Company Branch: The user selects the branch of the company to which the cash is assigned.
After filling in necessary details, press the Save button to add the details.
Press Close to discard the entered values and close the pop-up box.