The Master Module of Edifybiz enables the user to set values to fields that can be used by other modules. Master is divided into the following sub-modules: City, State, Country, Event Type, Labels, Unit, Status, HSN/SAC.
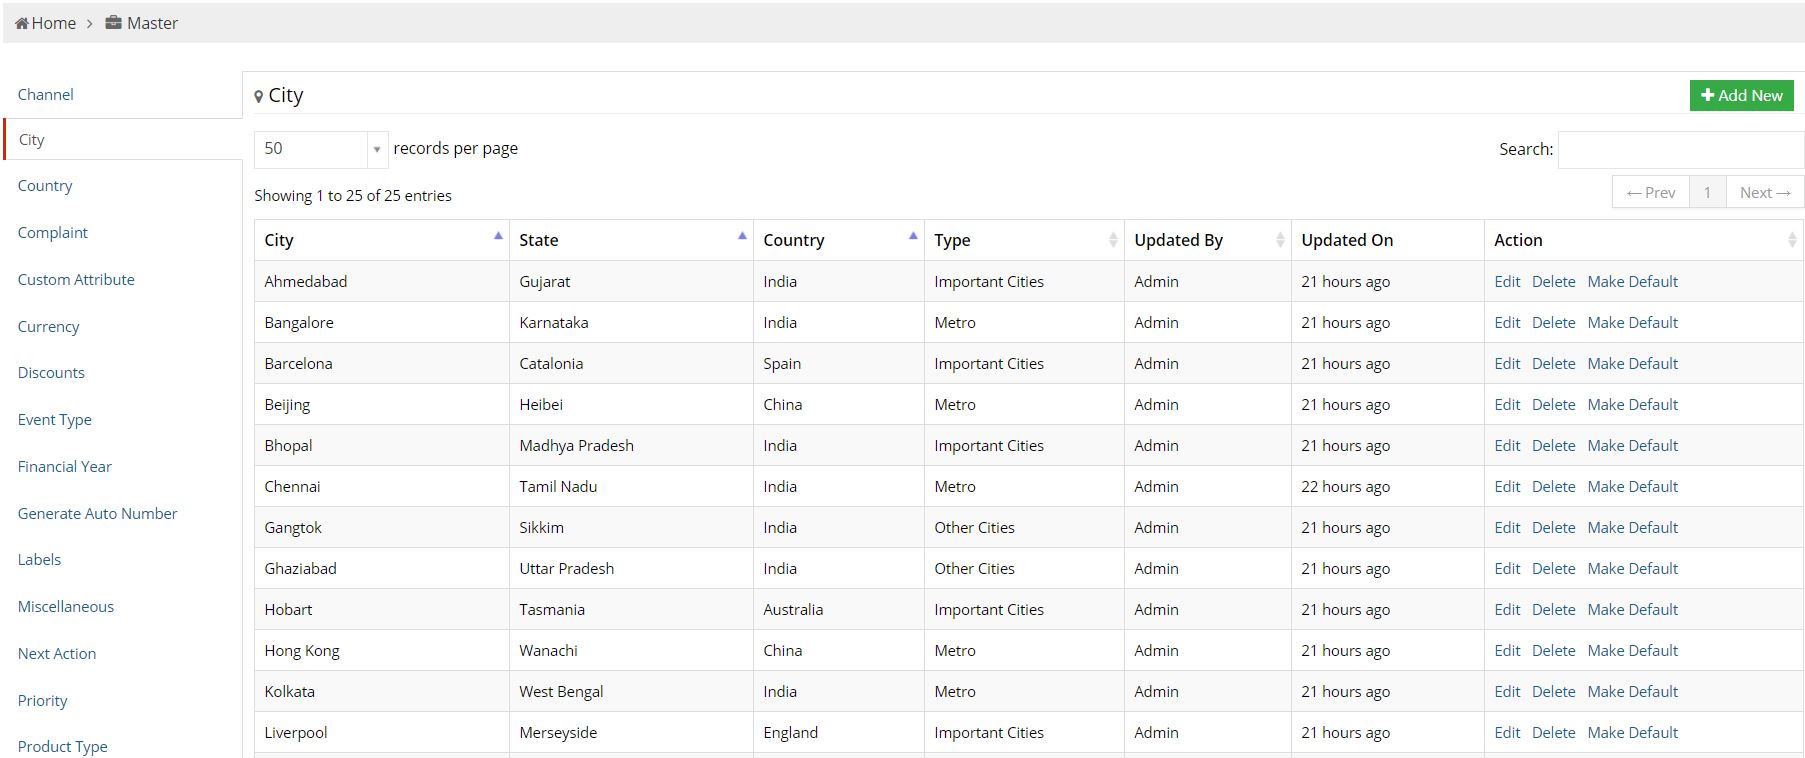
1. City
This sub-module helps the user set values of different cities that can be used in other modules.
After clicking on City, the user can see all the existing records that have already been added. The user can alter the amount of records per page and use the search bar to look for particular values.
The user can view the table of already added cities. It has the following seven columns:
- City :The City column displays the Name of the City.
- State :The State column displays the Name of the State where the city is located.
- Country :The Country column displays the Name of the Country where the state is located.
- Type :Displays the Type of the City, the city could be a metropolitan city, an important city or an other city.
- Updated By :The Updated By column displays the user who updated that particular record.
- Updated On :The Updated On column displays the date on which the particular record was updated.
- Action :The Action column displays the different actions that can be taken on a record.
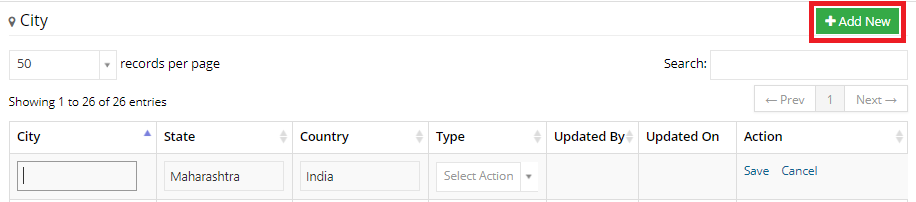
1.1 Add New
To add a new city, click on the Add New button located in the top right corner of the screen.
1.2 Actions
The three actions are as follows:
- Edit: Edit allows you to change the values of a record.
- Delete: Delete allows you to remove a record from the list.
- Make Default: Make Default is used to set a city as a default value.

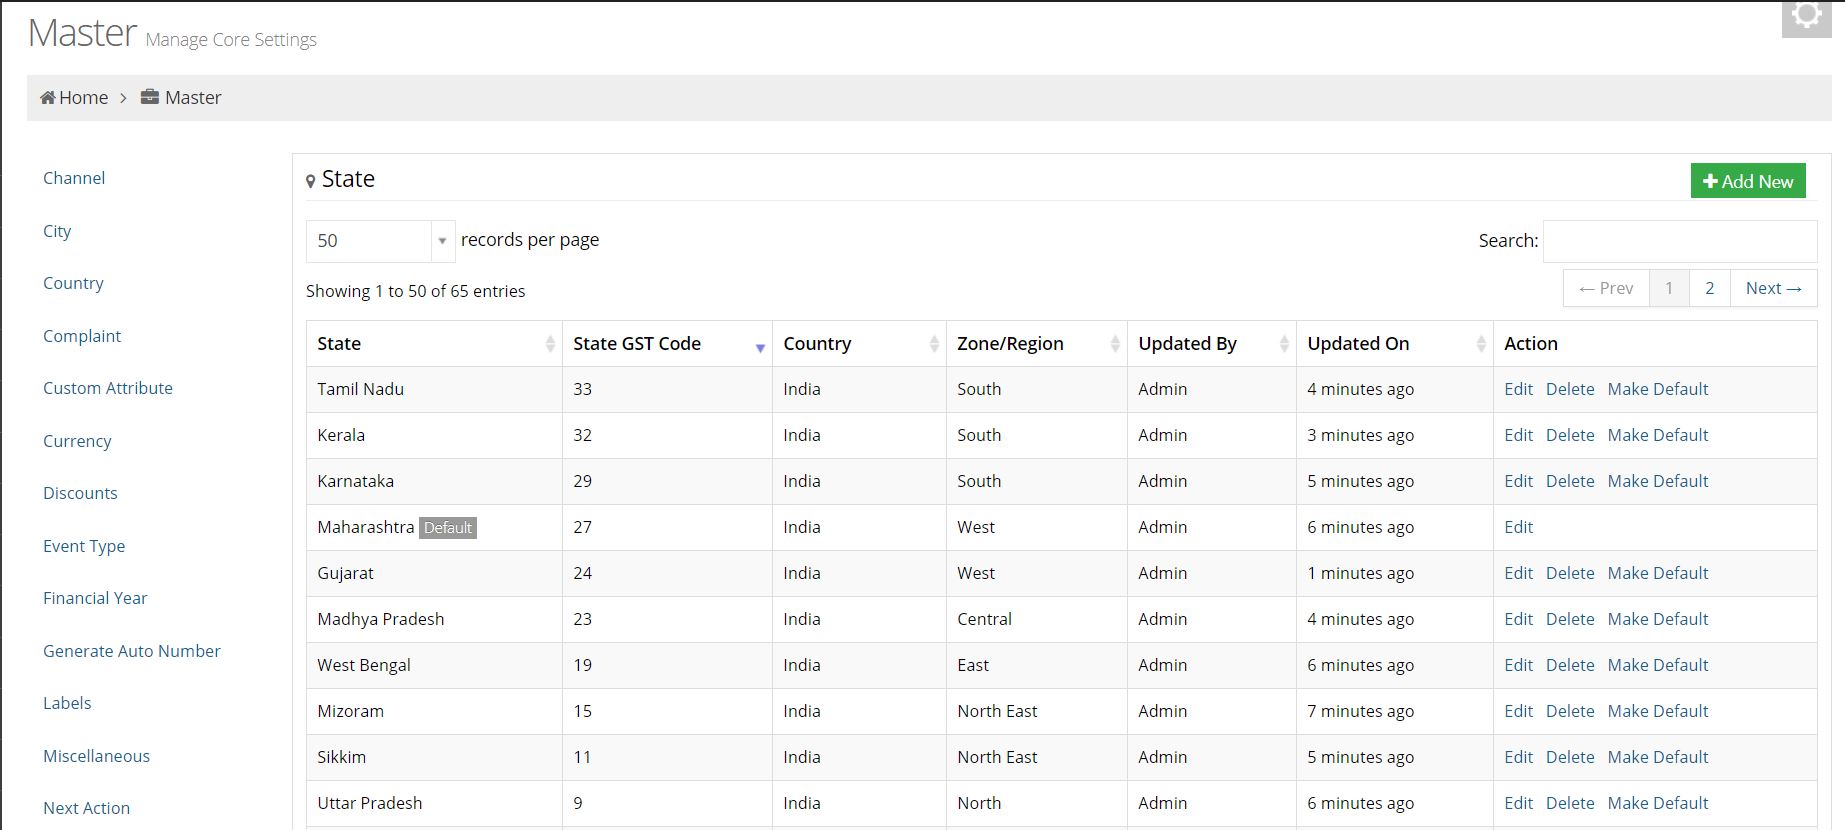
2. State
This sub-module helps the user set values of different states that can be used in other modules.
After clicking on State, the user can see all the existing records that have already been added. The user can alter the amount of records per page and use the search bar to look for particular values.
The user can view the table of already added states. It has the following seven columns:
- State :The State column displays the Name of the State.
- State GST Code :The State column displays the GST Code of the state
- Country :The Country column displays the Name of the Country where the state is located.
- Zone/Region :Displays the Zone or Region in which the particular state is located.
- Updated By :The Updated By column displays the user who updated that particular record.
- Updated On :The Updated On column displays the date on which the particular record was updated.
- Action :The Action column displays the different actions that can be taken on a record.
2.1 Add New
To add a new state, click on the Add New button located in the top right corner of the screen.

2.2 Actions
The three actions are as follows:
- Edit: Edit allows you to change the values of a record.
- Delete: Delete allows you to remove a record from the list.
- Make Default: Make Default is used to set a state as a default value.

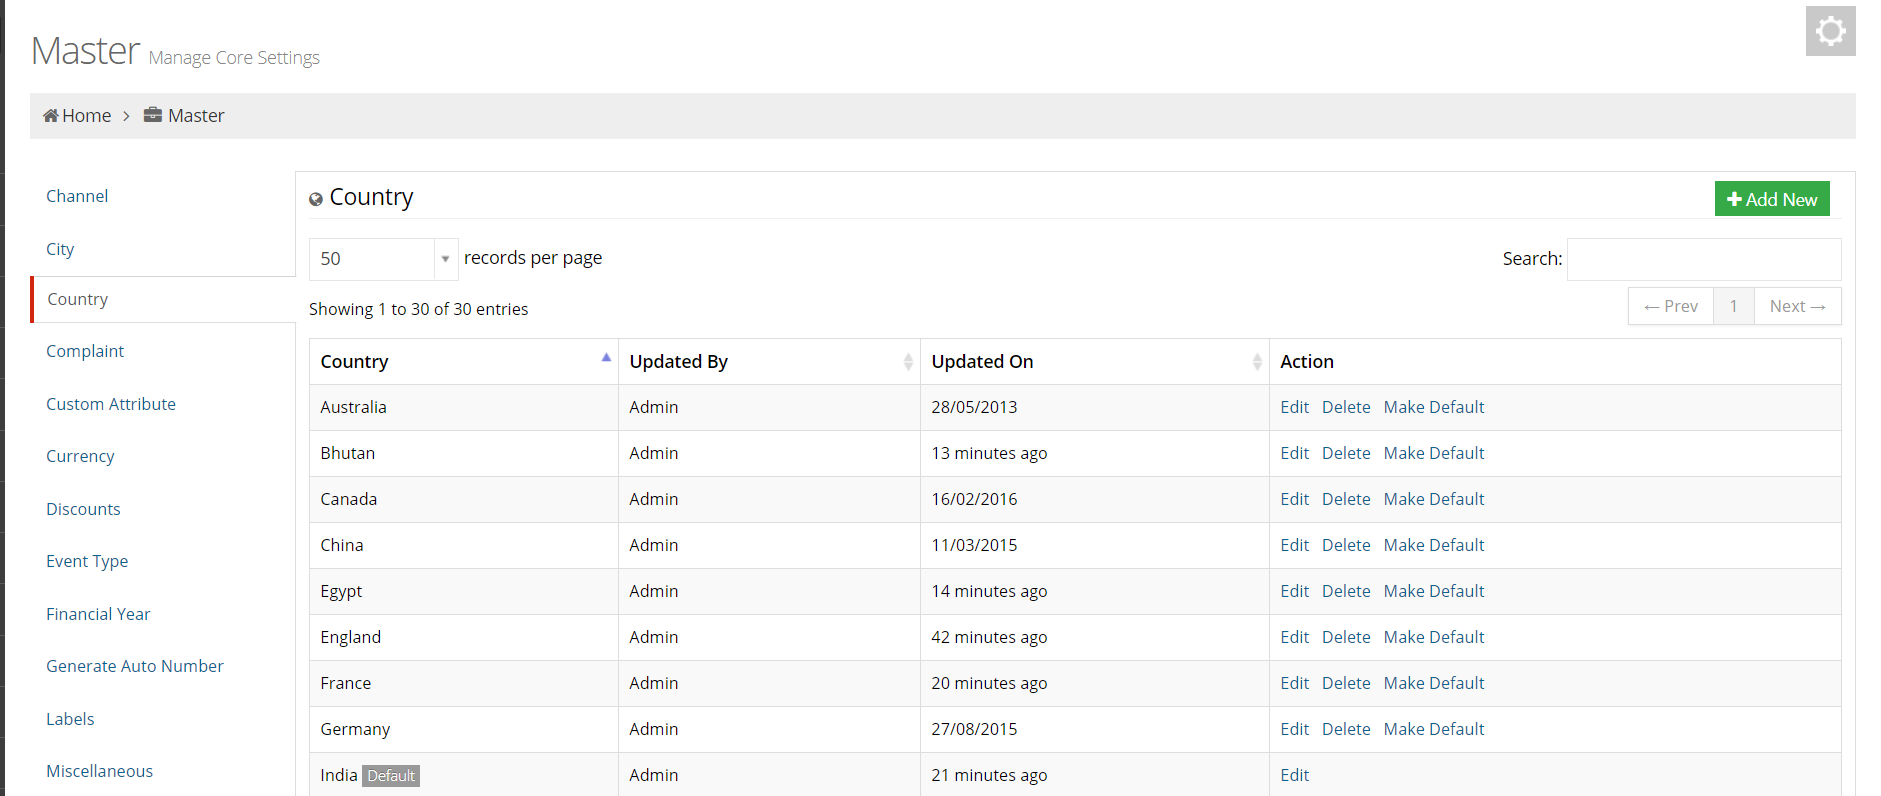
3. Country
This sub-module helps the user set values of different countries that can be used in other modules.
After clicking on Country, the user can see all the existing records that have already been added. The user can alter the amount of records per page and use the search bar to look for particular values.
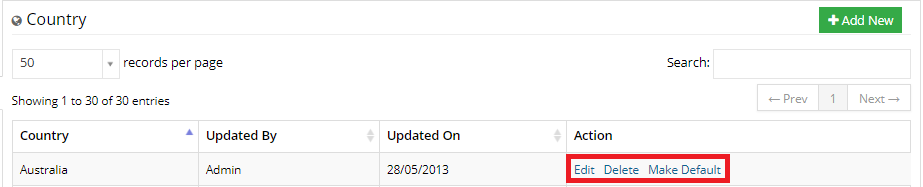
The user can view the table of already added countries. It has the following four columns:
- Country :The Country column displays the Name of the Country
- Updated By :The Updated By column displays the user who updated that particular record.
- Updated On :The Updated On column displays the date on which the particular record was updated.
- Action :The Action column displays the different actions that can be taken on a record.
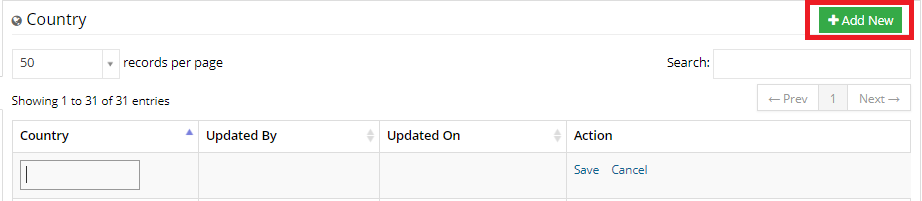
3.1 Add New
To add a new country, click on the Add New button located in the top right corner of the screen.
3.2 Actions
The three actions are as follows:
- Edit: Edit allows you to change the values of a record.
- Delete: Delete allows you to remove a record from the list.
- Make Default: Make Default is used to set a country as a default value.
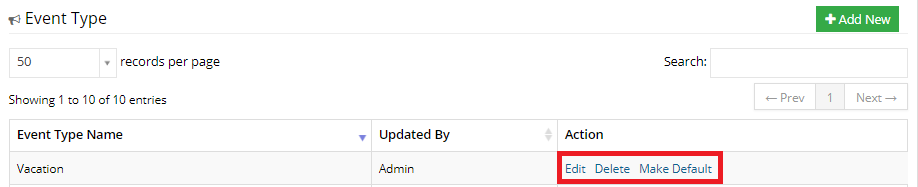
4. Event Type
The user can set different types of events which can be used while creating a calendar.
After clicking on Event Type, the user can see all the existing event types. The user can alter the amount of records per page and use the search bar to look for particular events.
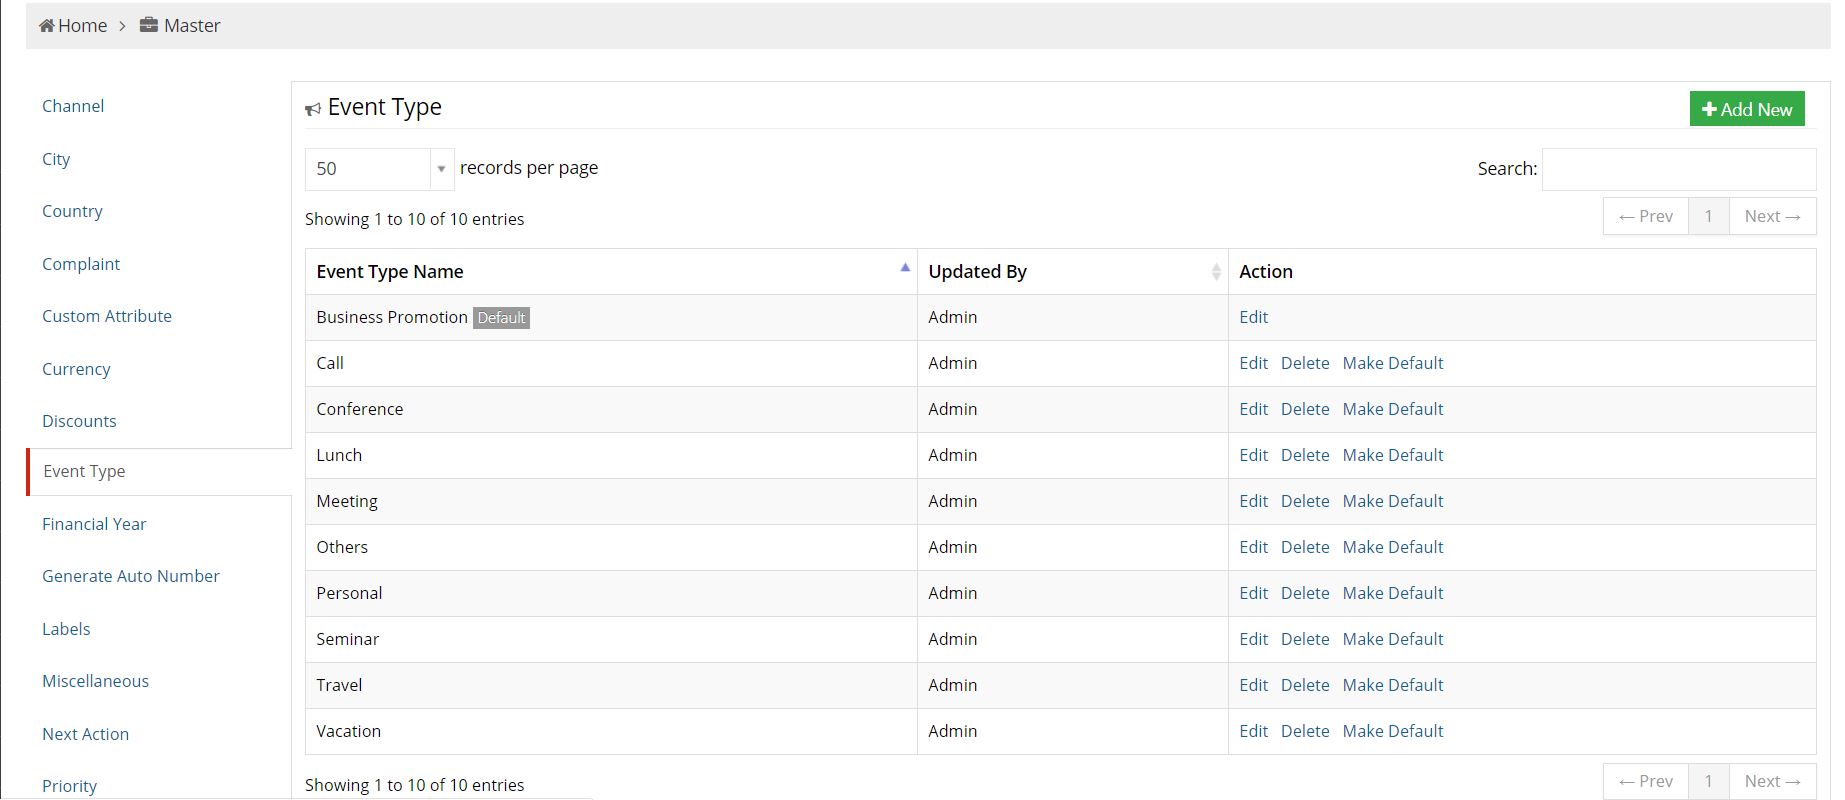
The user can view the table of already added event types. It has the following three columns:
- Event Type Name :The Country column displays the Name of the Country
- Updated By :The Updated By column displays the user who updated that particular record.
- Action :The Action column displays the different actions that can be taken on a record.
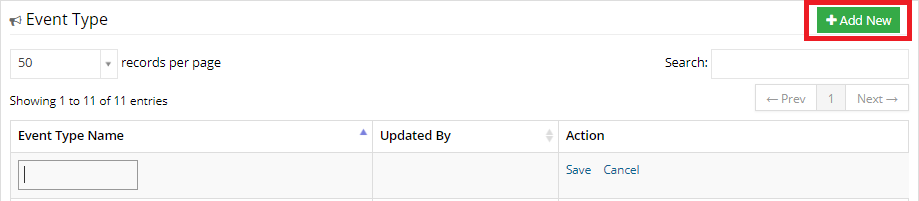
4.1 Add New
To add a new event type, click on the Add New button located in the top right corner of the screen.
4.2 Actions
The three actions are as follows:
- Edit: Edit allows you to change the values of a record.
- Delete: Delete allows you to remove a record from the list.
- Make Default: Make Default is used to set a default event type.
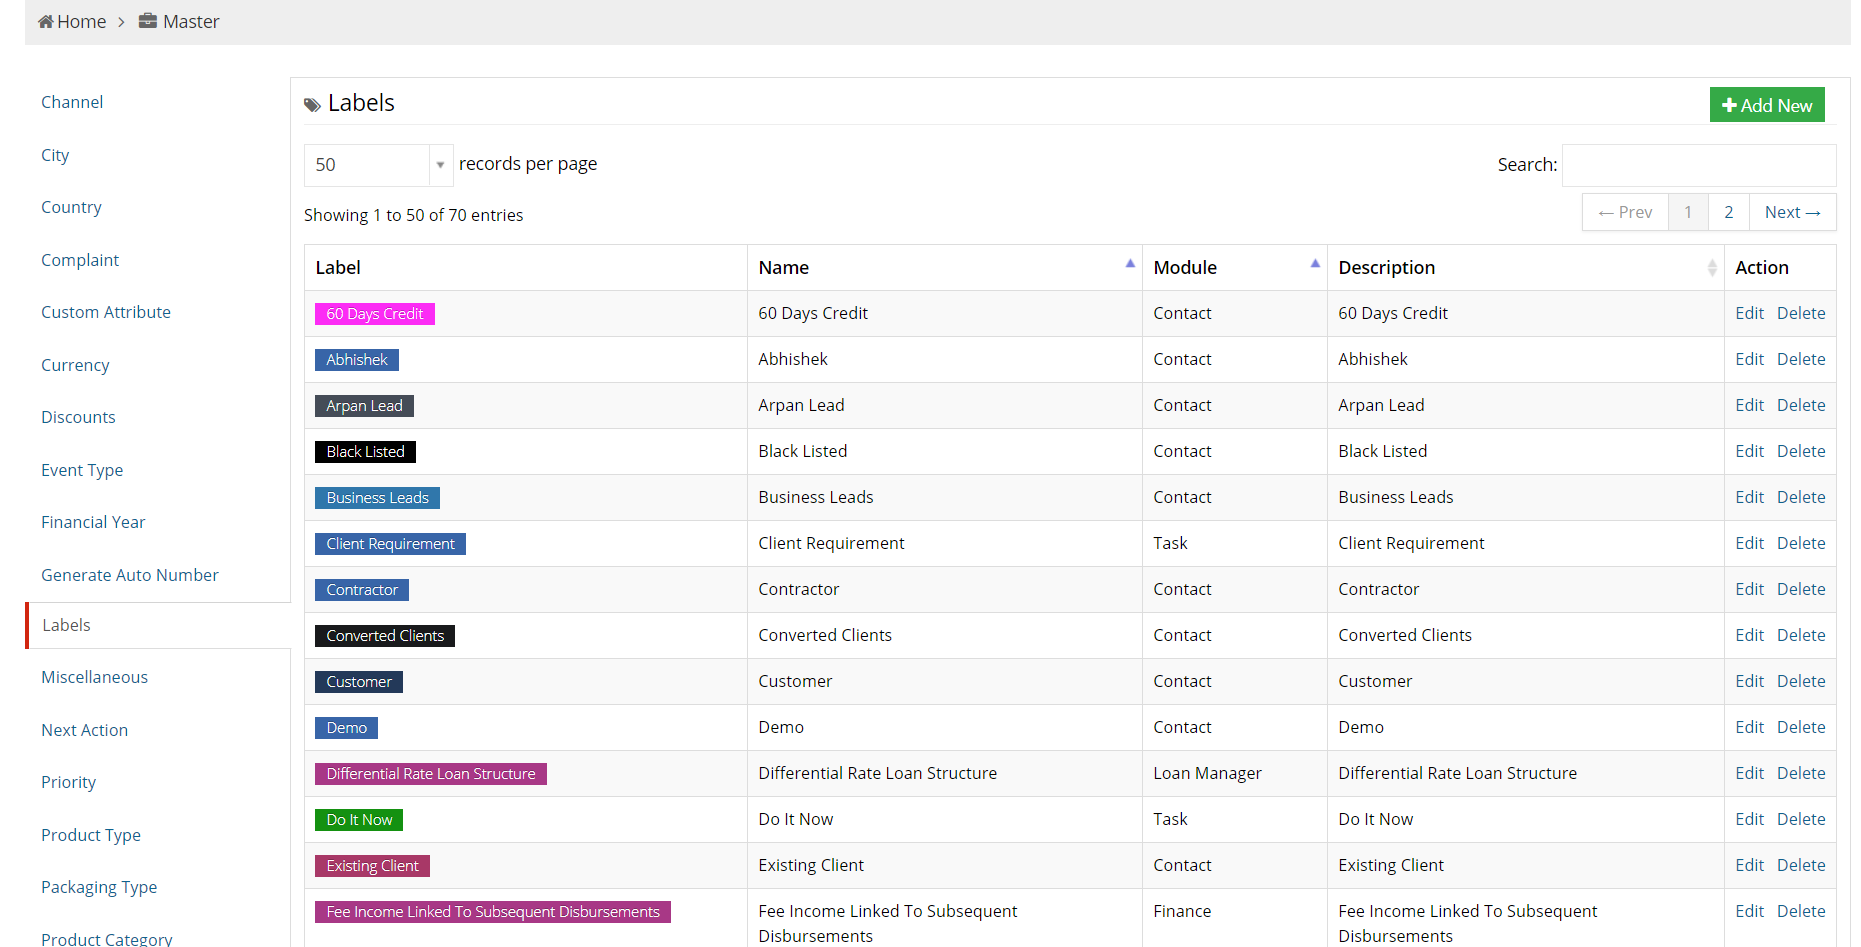
5. Labels
The user make labels in this sub-module and assign these labels to different modules to filter the data as and when needed.
After clicking on Labels, the user can see all the existing labels. The user can alter the amount of records per page and use the search bar to look for particular labels.
The user can view the table of already added labels. It has the following five columns:
- Label :The Label column shows the user how the label appears.
- Name :The Name column displays the name of the label.
- Module :The Module column displays the module to which the given label is allocated.
- Description :The Description column gives a description of a label.
- Action :The Action column displays the different actions that can be taken on a record.
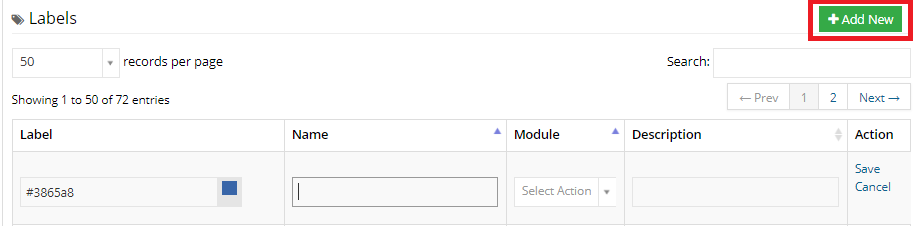
5.1 Add New
To make a new label, click on the Add New button located in the top right corner of the screen.
The user can assign a custom colour to the label, give a name to the label, assign it to a module and give the label a description.
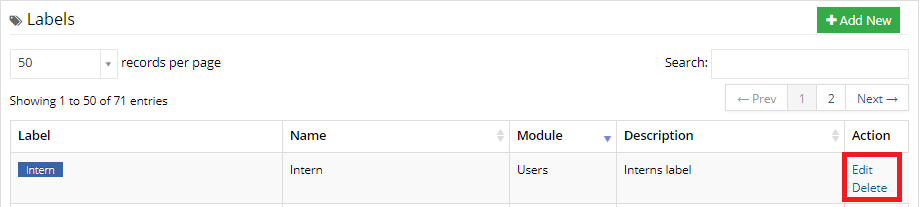
5.2 Actions
The two actions are as follows:
- Edit: Edit allows you to change the values of a record.
- Delete: Delete allows you to remove a record from the list.
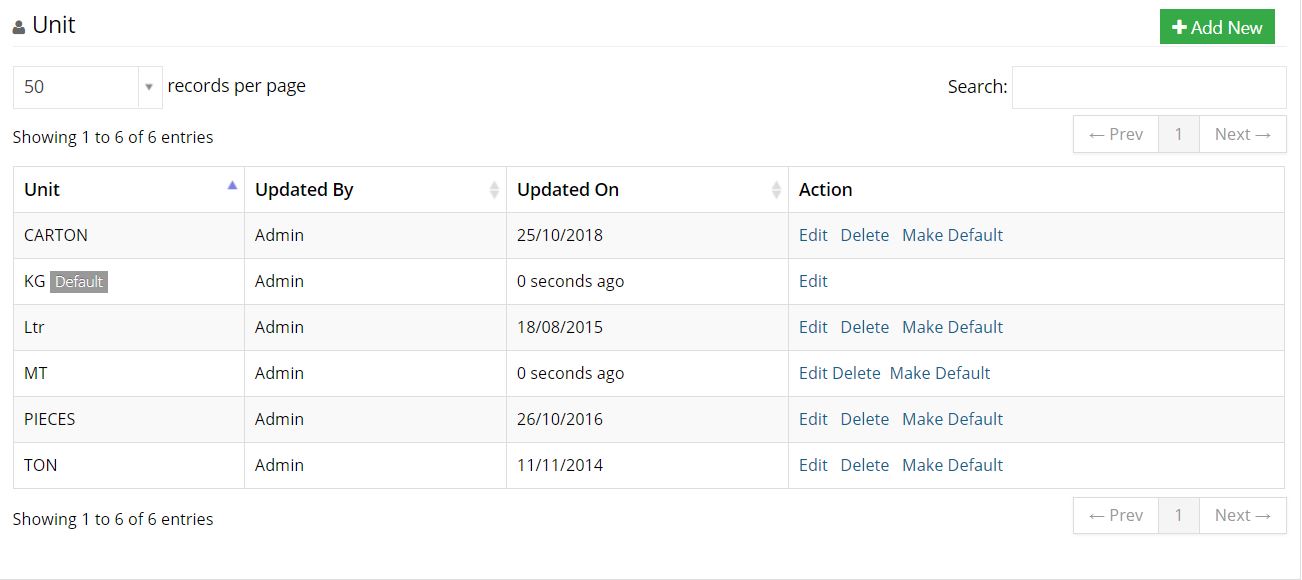
6. Unit
The user set units in this sub-module. These units may be accessed by other modules against a product.
After clicking on Unit, the user can see all the existing units. The user can alter the amount of records per page and use the search bar to look for particular units.
The user can view the table of already added units. It has the following four columns:
- Unit :The Unit column displays the Name of the Unit
- Updated By :The Updated By column displays the user who updated that particular record.
- Updated On :The Updated On column displays the date on which the particular record was updated.
- Action :The Action column displays the different actions that can be taken on a record.
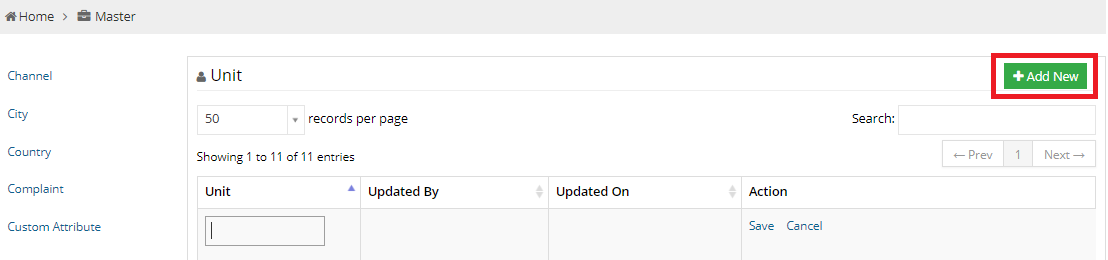
6.1 Add New
To add a new unit, click on the Add New button located in the top right corner of the screen.
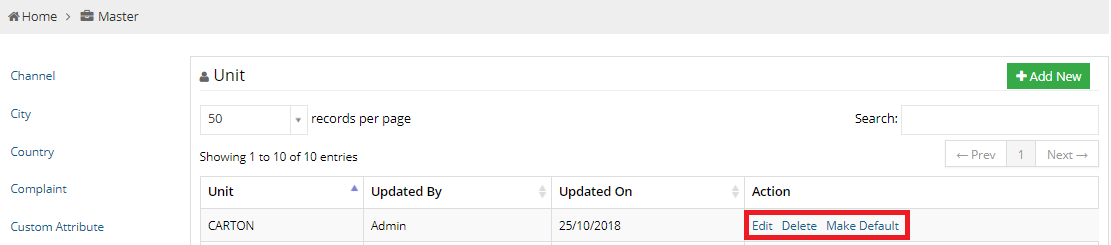
6.2 Actions
The three actions are as follows:
- Edit: Edit allows you to change the values of a record.
- Delete: Delete allows you to remove a record from the list.
- Make Default: Make Default is used to set a default unit.
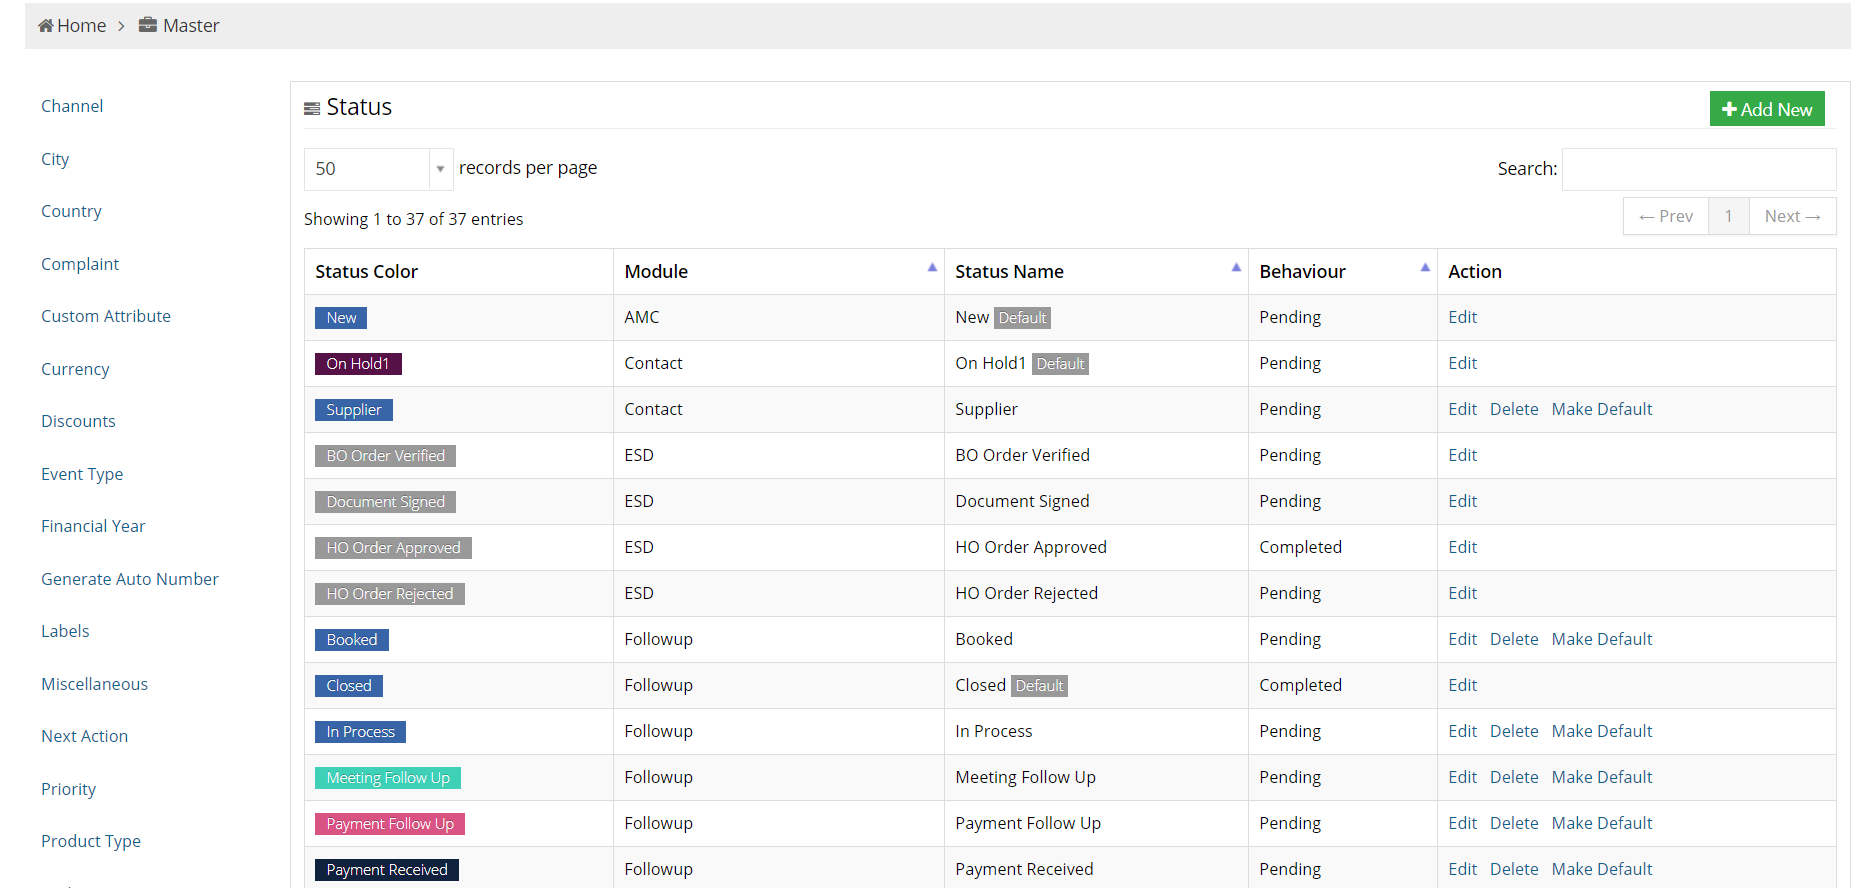
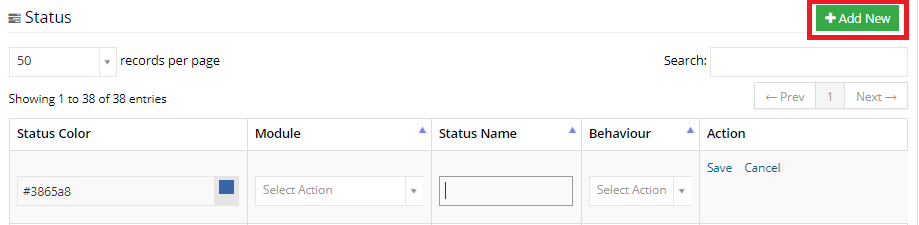
7. Status
The user can set statuses in this sub-module to filter the current status of each record as per the workflow defined for the modules respectively.
After clicking on Status, the user can see all the existing statuses. The user can alter the amount of records per page and use the search bar to look for particular units.
The user can view the table of already added statuses. It has the following four columns:
- Status Color :The Status Color column displays the colour in which the status appears.
- Module :The Module column displays the module to which the given status is allocated.
- Status Name :The Status Name column displays the name assigned to the status
- Behaviour :The Behaviour column displays the behaviour of a status. This could be set to pending or completed.
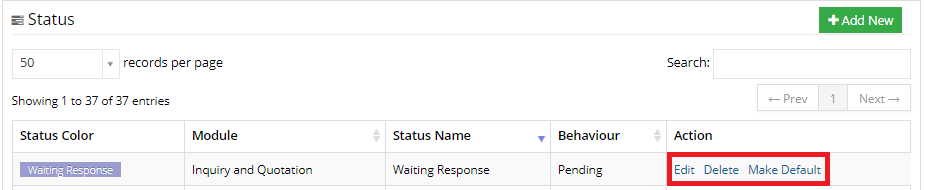
- Action :The Action column displays the different actions that can be taken on a record.
7.1 Add New
To add a new status, click on the Add New button located in the top right corner of the screen.
The user can assign a custom colour to the status, give a name to the status, assign it to a module and give the status a description.
7.2 Actions
The three actions are as follows:
- Edit: Edit allows you to change the values of a record.
- Delete: Delete allows you to remove a record from the list.
- Make Default: Make Default is used to set a default status.
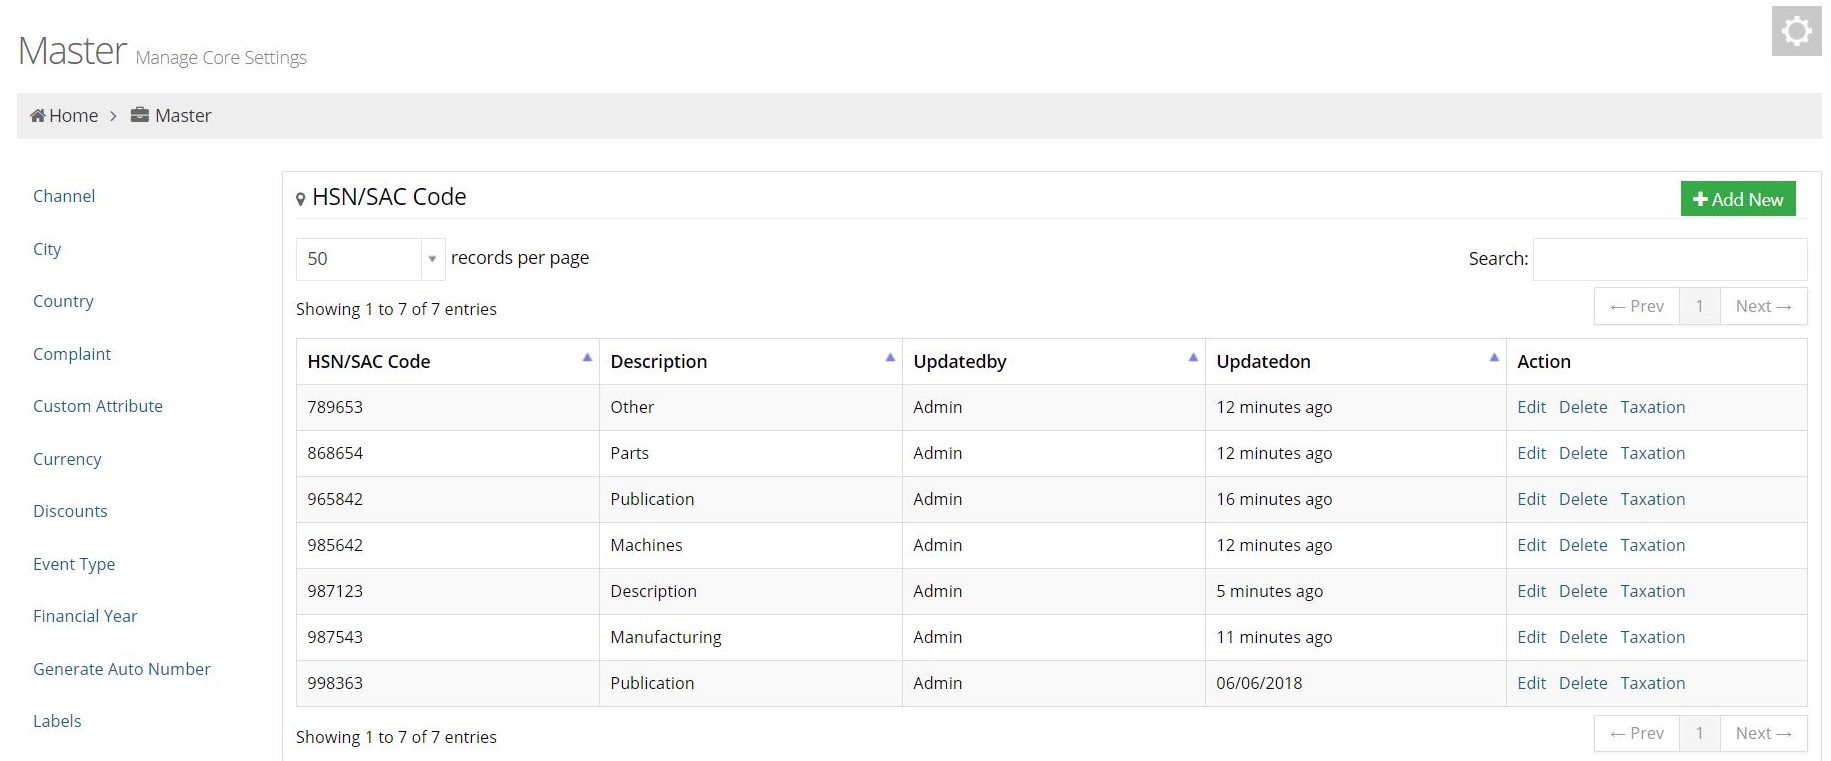
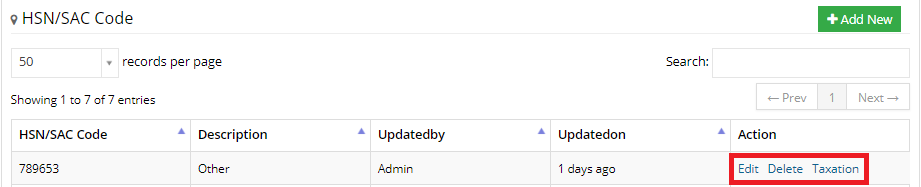
8. HSN/SAC
The user can add HSN/SAC codes for different products and also add GST rates for them. These may be used by other modules against a product.
After clicking on HSN/SAC, the user can see all the existing records. The user can alter the amount of records per page and use the search bar to look for particular records.
The user can view the table of already added records. It has the following five columns:
- HSN/SAC Code :The HSN/SAC Code column displays the HSN/SAC Code of the product
- Description :The Description displays the description of the product
- Updated By :The Updated By column displays the user who updated that particular record.
- Updated On :The Updated On column displays the date on which the particular record was updated.
- Action :The Action column displays the different actions that can be taken on a record.
8.1 Add New
To add a new record, click on the Add New button located in the top right corner of the screen.
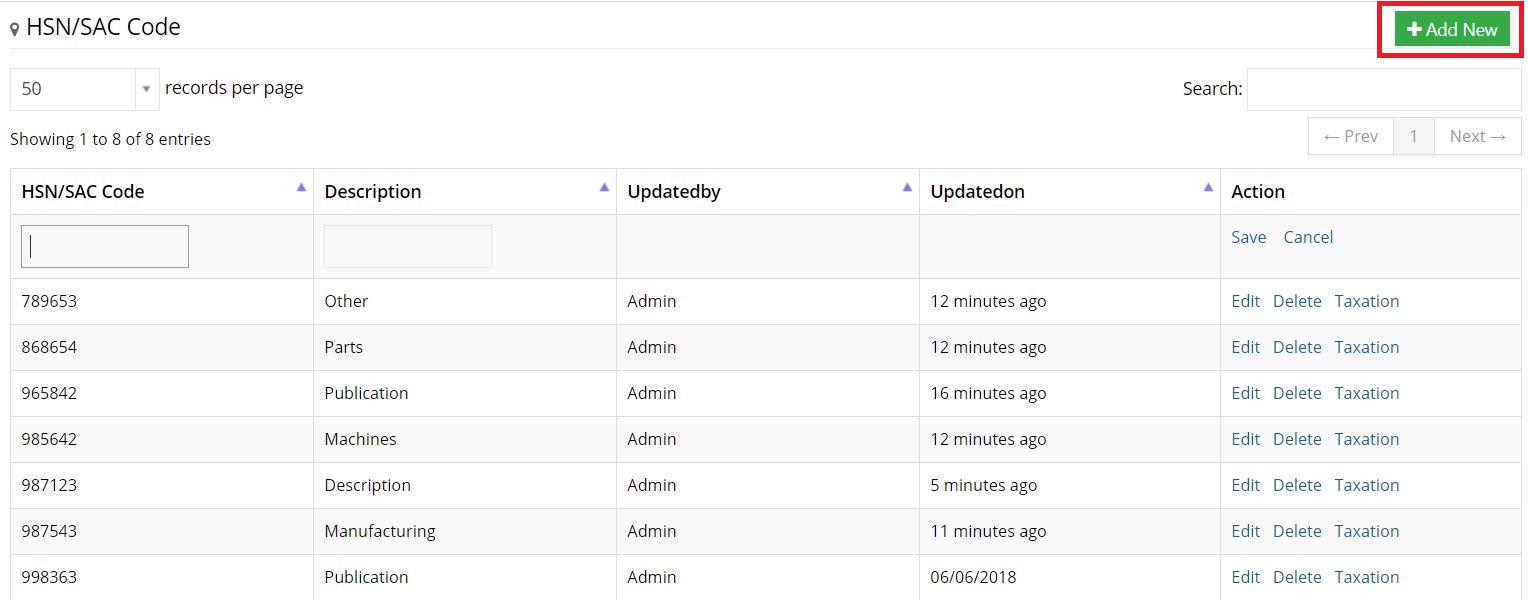
8.2 Actions
The three actions are as follows:
- Edit: Edit allows you to change the values of a record.
- Delete: Delete allows you to remove a record from the list.
- Taxation: Taxation allows the user to set GST rates of a product. This is further explained at the end of the module.
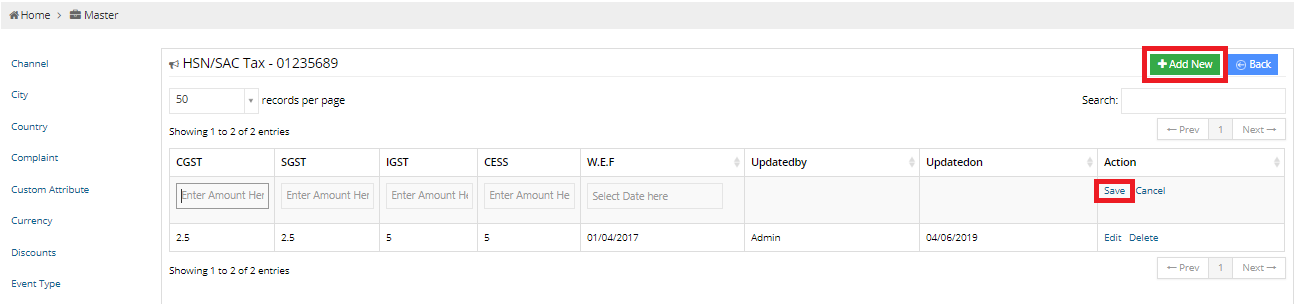
8.2.1 Taxation
The user can add GST rates of a product.
Upon clicking on Taxation in the Action column of the HSN/SAC sub-module the user can view the following columns:
- CGST: This displays the CGST rate of the product.
- SGST: This displays the SGST rate of the product.
- IGST: This displays the IGST rate of the product.
- Cess: This displays the Cess rate for the product.
- W.E.F: This displays the date from which the taxation rates are effective.
- Updated By :The Updated By column displays the user who updated that particular record.
- Updated On :The Updated On column displays the date on which the particular record was updated.
- Action :The Action column displays the different actions that can be taken on a record.
- Edit:Edit allows you to change the values of a record.
- Delete:Delete allows you to remove a record from the list.

Add new
To add a new record, click on the Add New button at the top right corner of the page. You can go back to the HSN/SAC page by clicking on the Back button.
Actions
The two actions that can be taken are:
