1.LEAD DATA
In this section, the user can see all existing leads and their details. These are divided into the following 4 categories:
- Open Pool List
- Team Pool List
- My Pool List
- Trashed Pool List
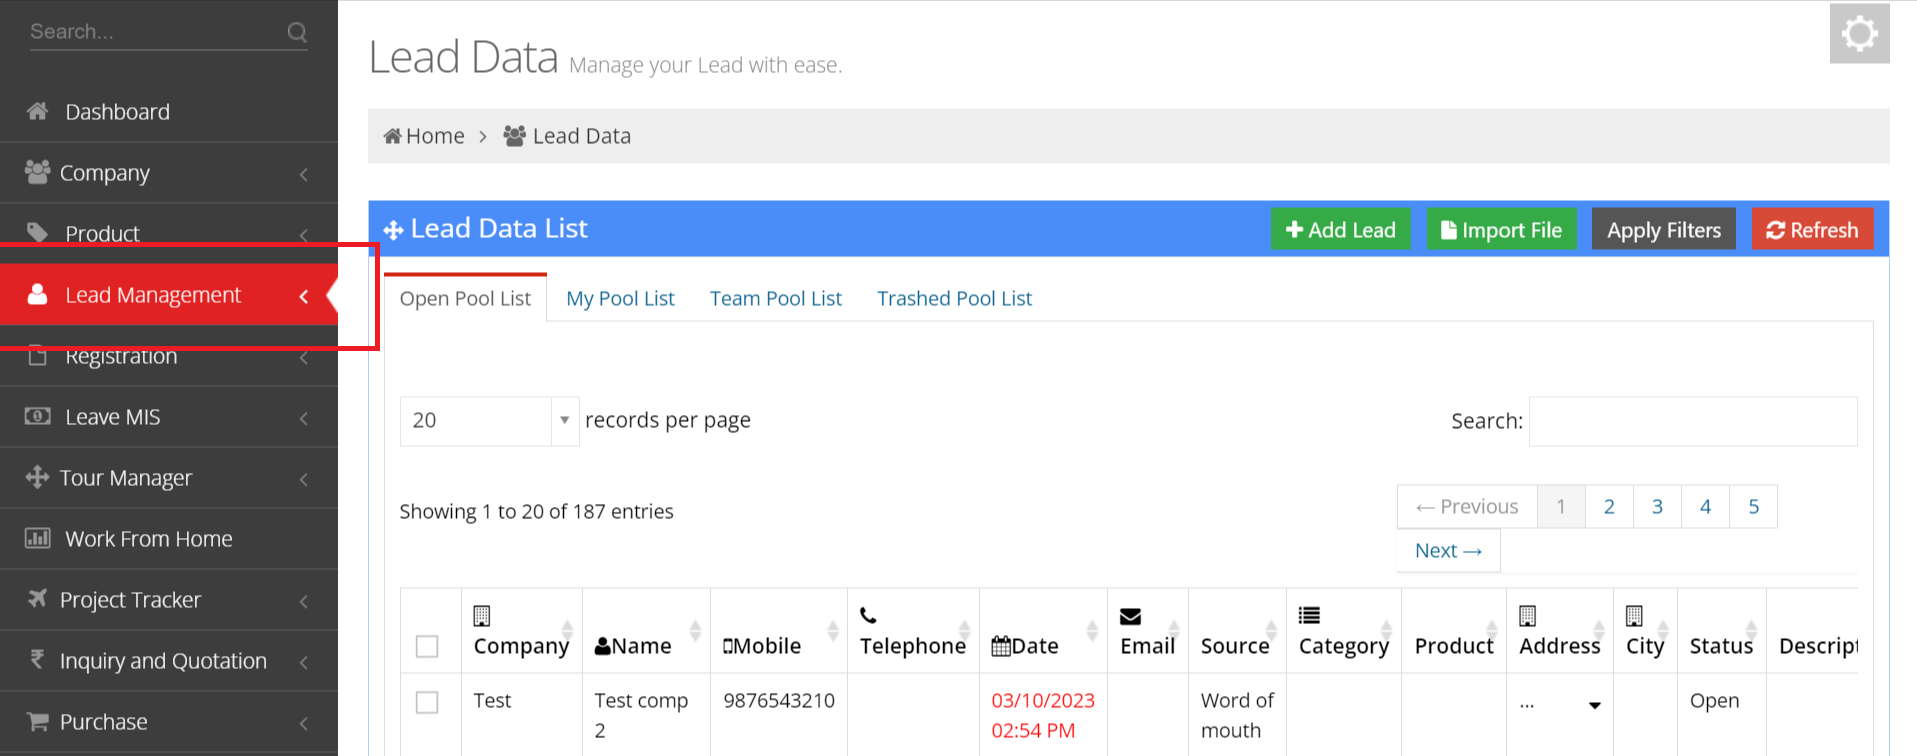
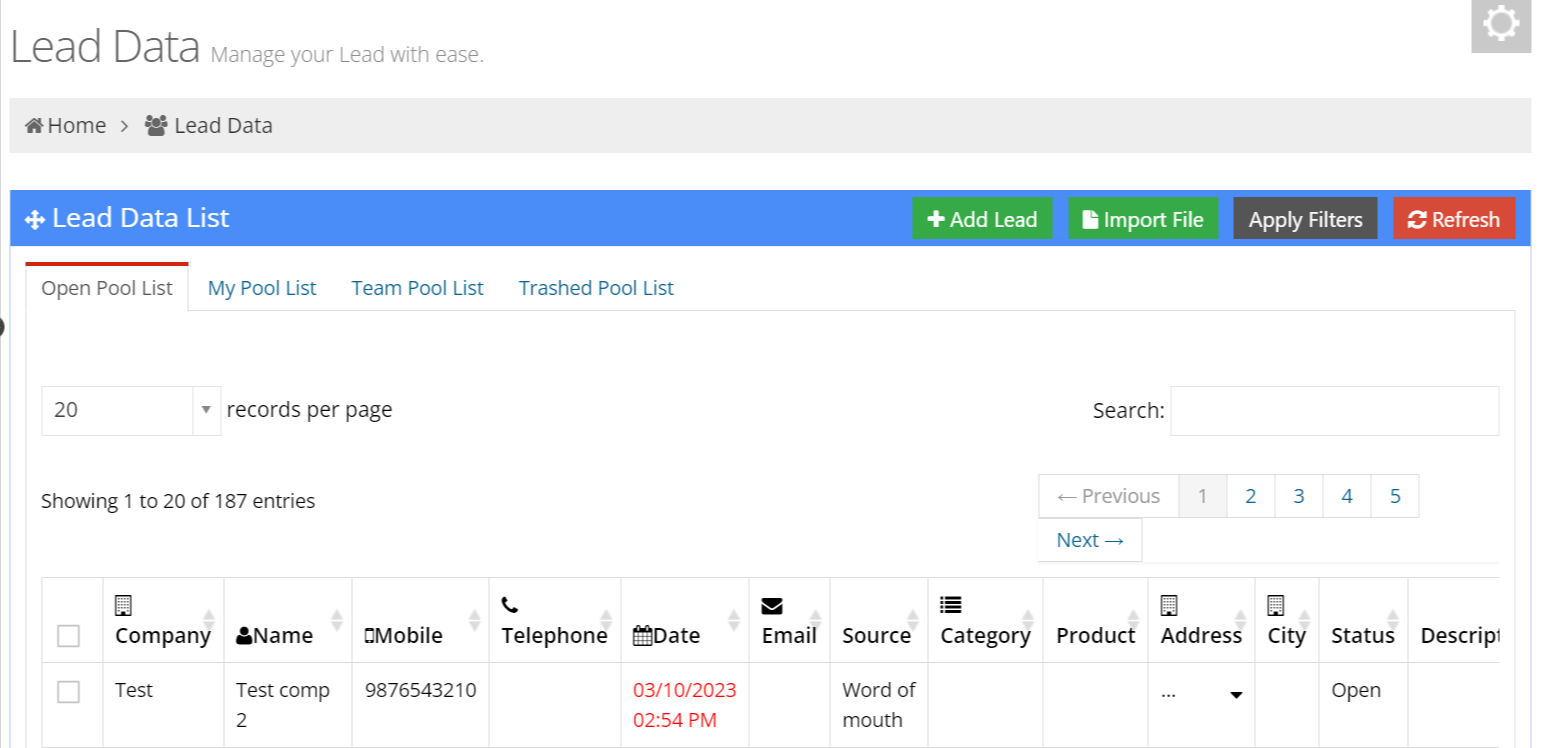
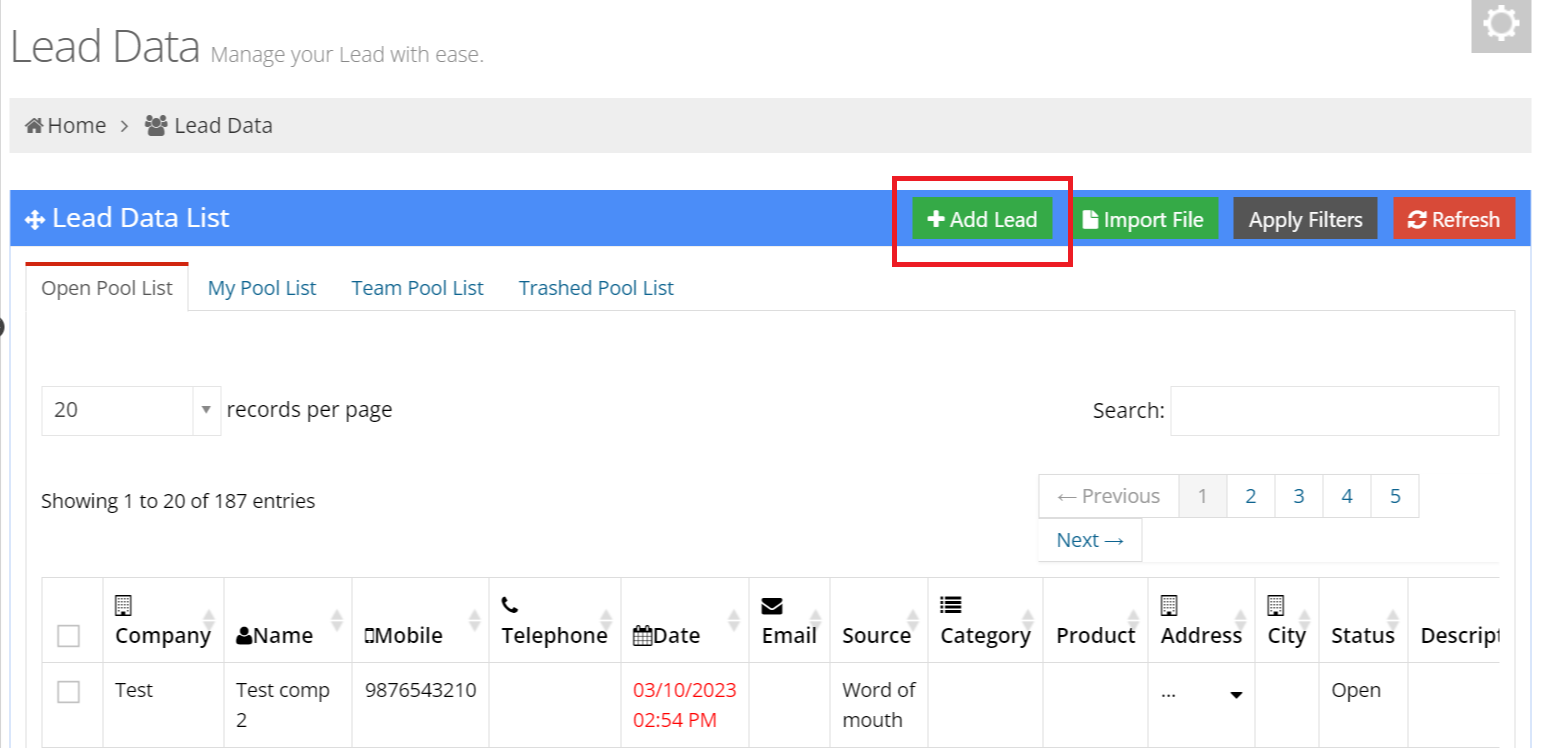
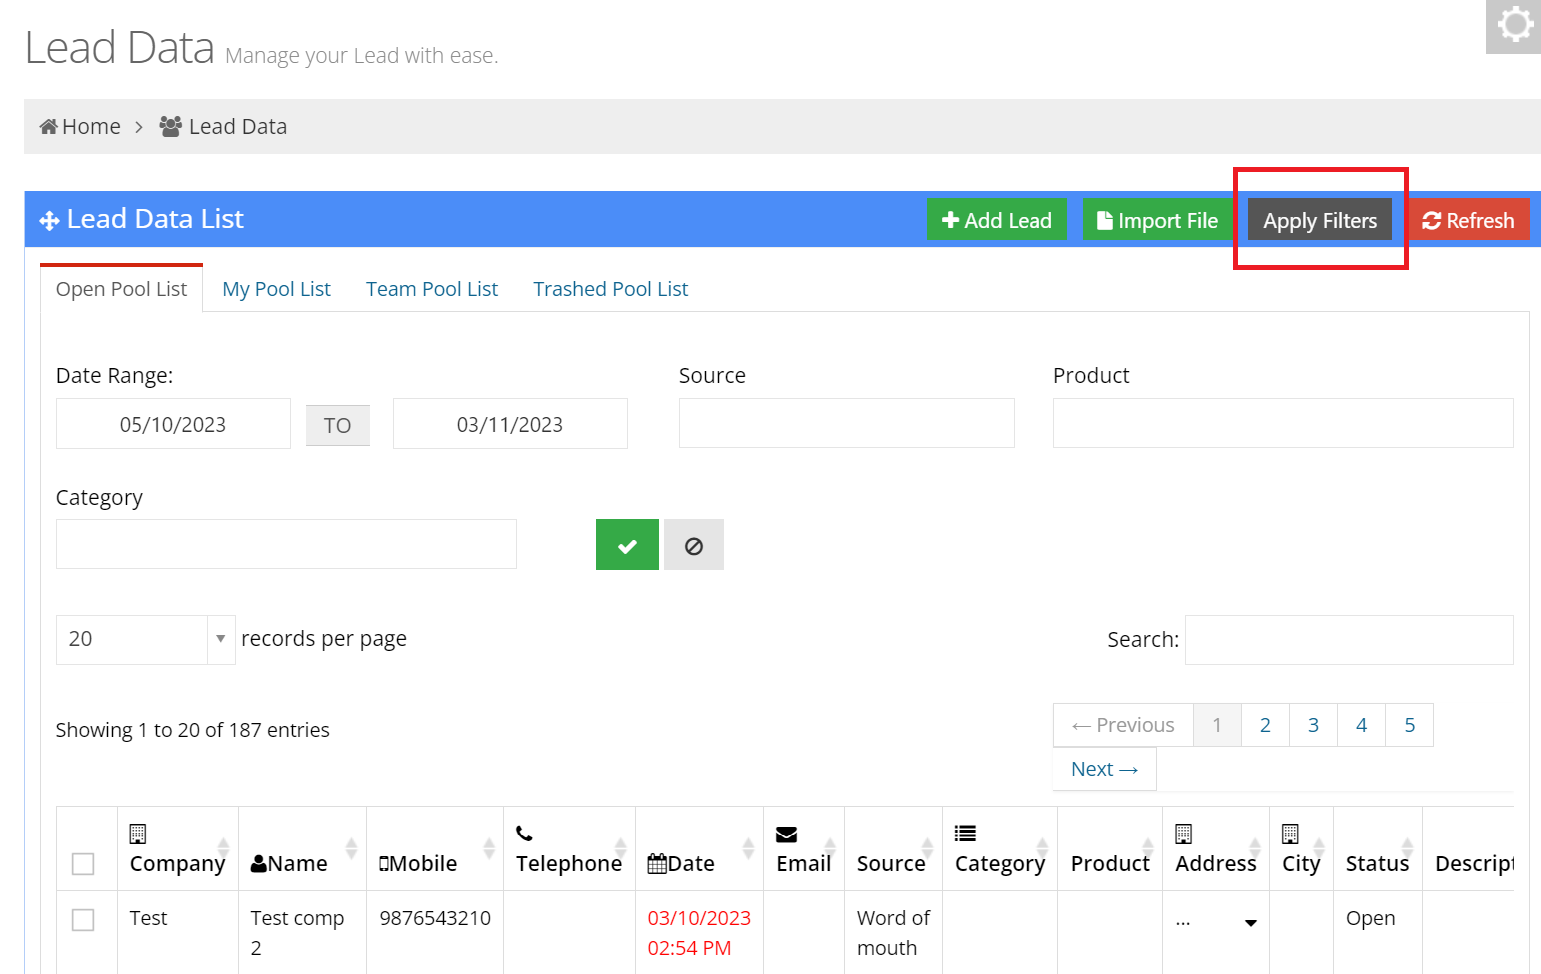
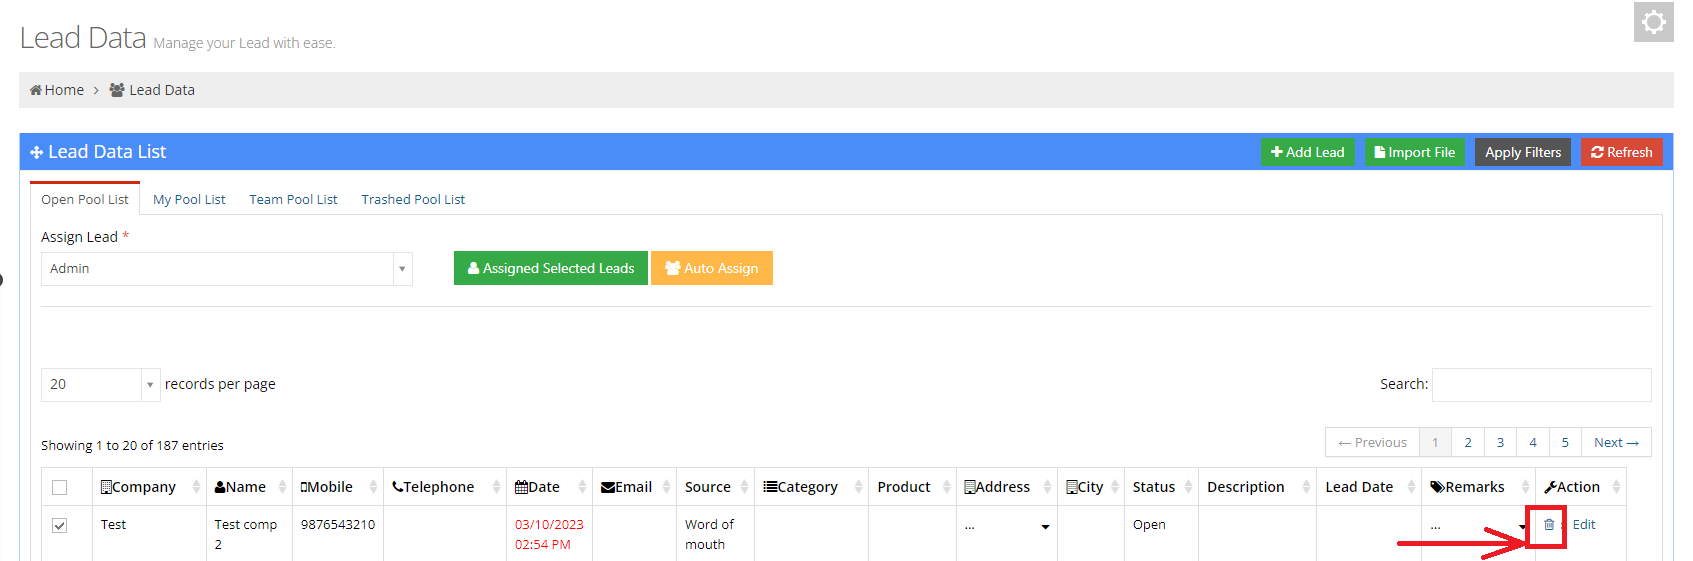
1.1 Open Pool List
This listing section is an open pool list, showing leads that have not yet been allocated to any specific user . Here, user have the option to assign different leads to users or remove a lead from the list.
The following fields need to be filled by the user:
- Name of the Company.
- Name of the Lead.
- Mobile Number of the contact person.
- Telephone Number of the company.
- Source of the lead.
- Category of the lead.
- Email ID of the contact person.
- Website of the company.
- Address of the office.
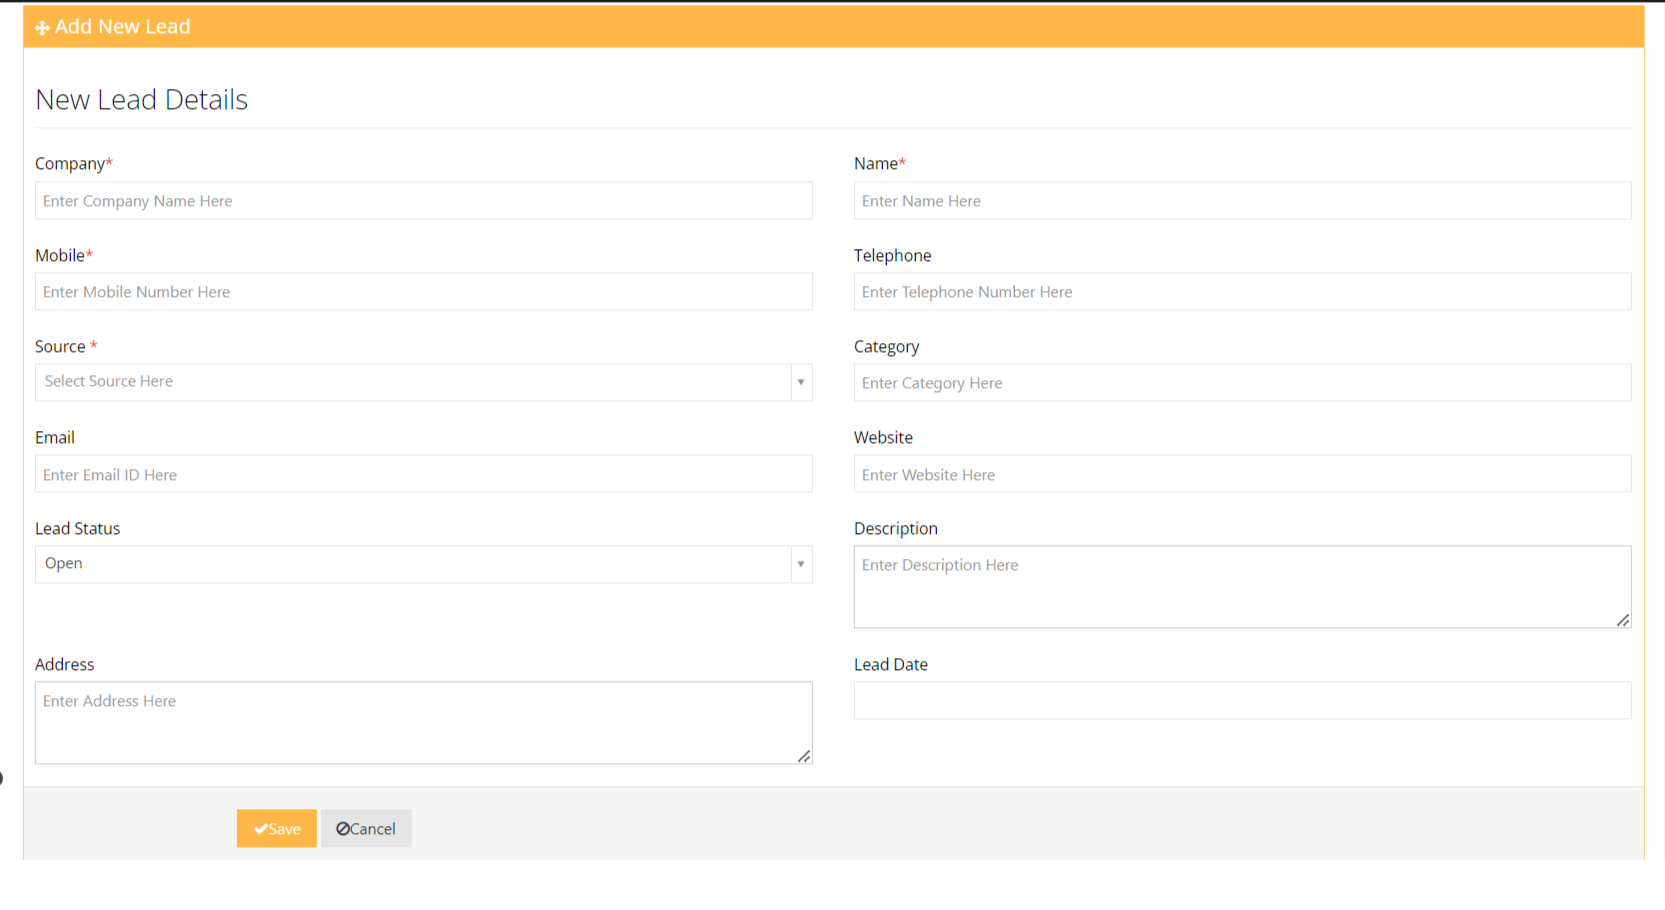
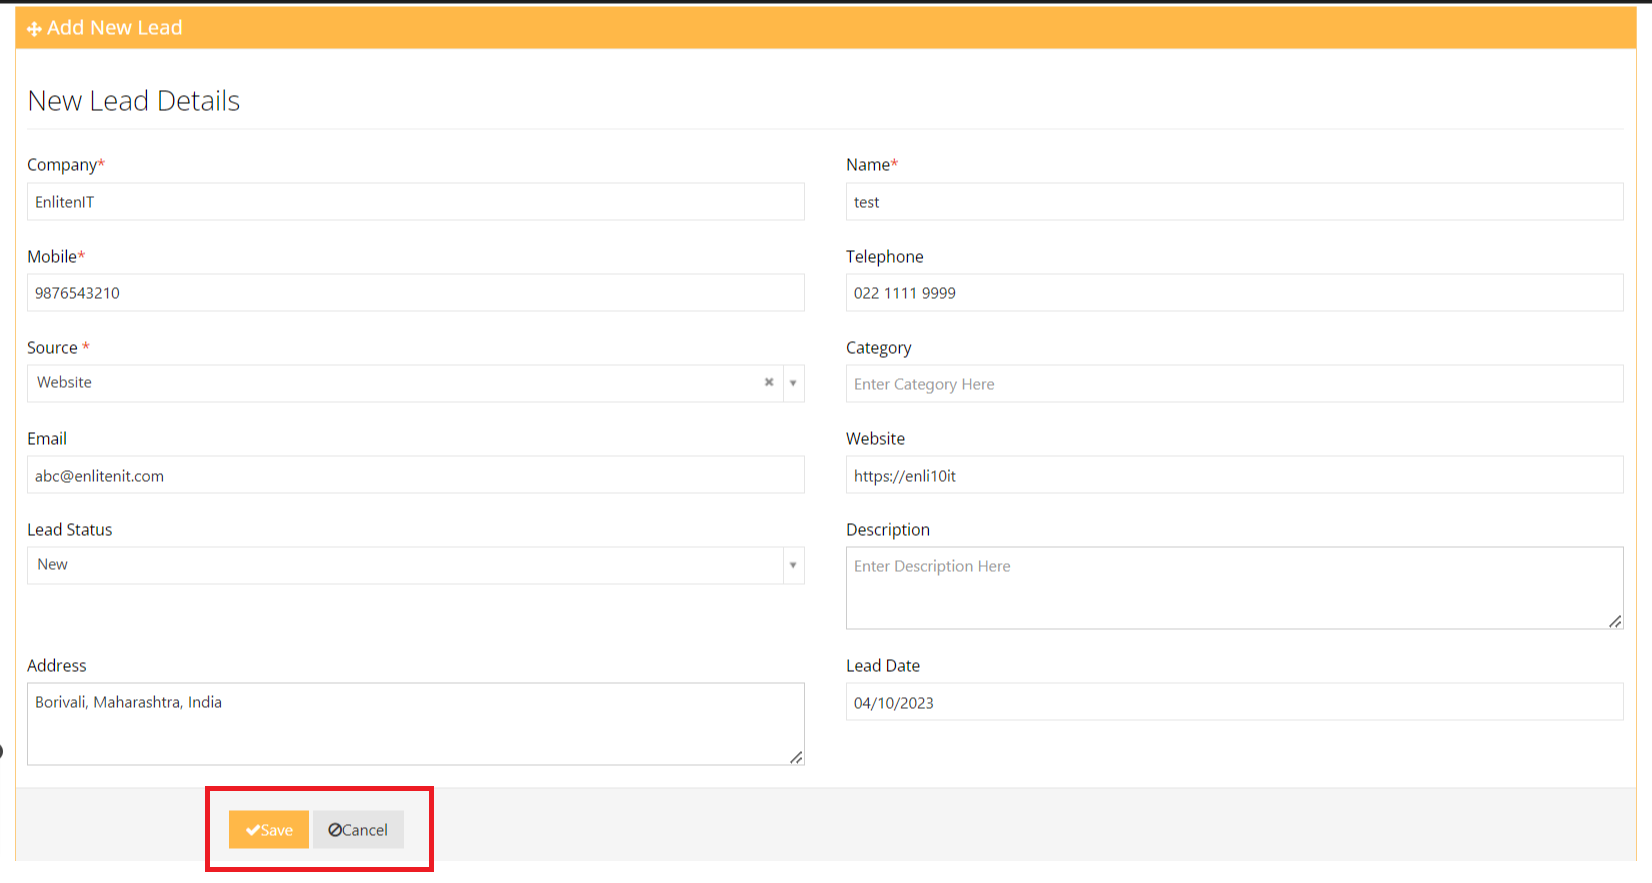
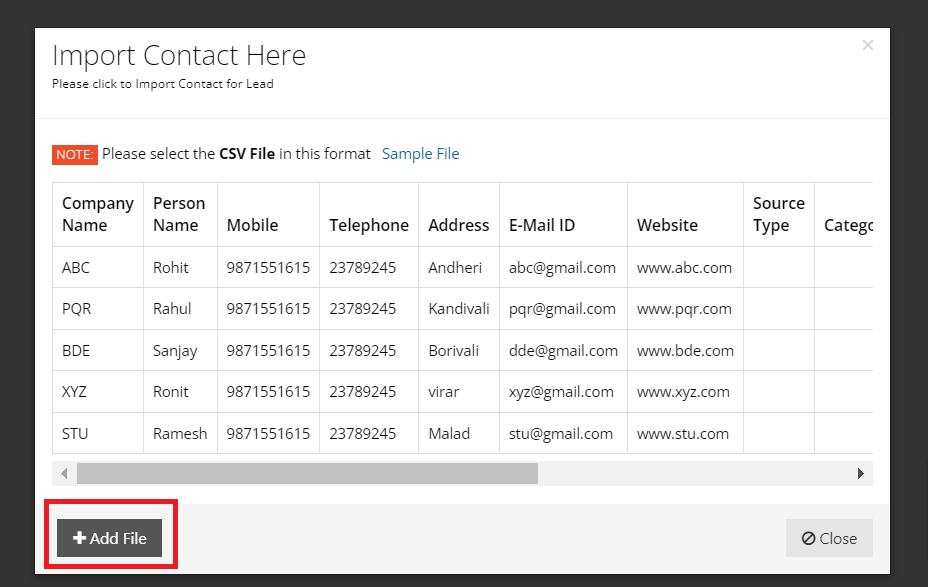
After filling in the details of the new lead, press the Save button to add the lead to the pool.
Press the Cancel button to cancel the changes and go back to the previous screen.
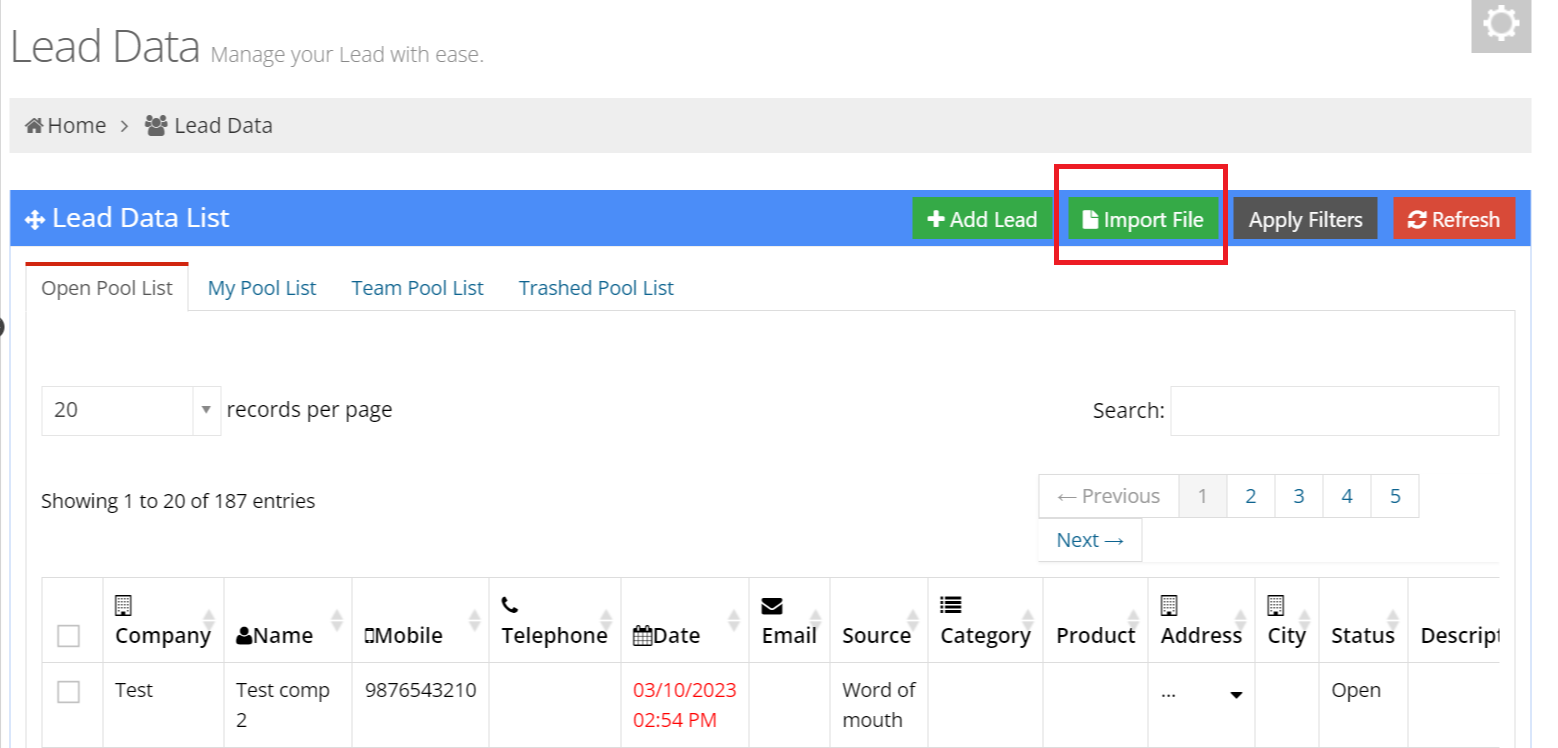
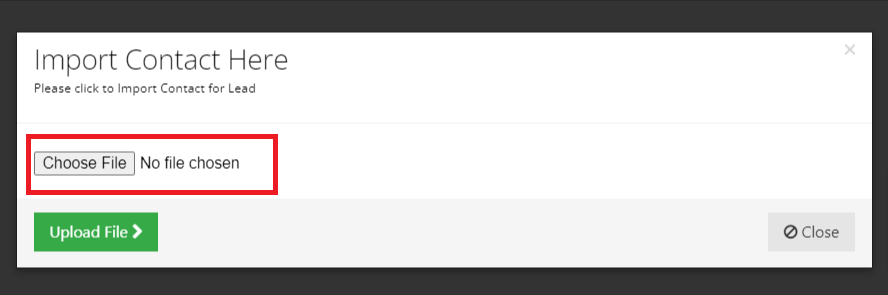
This file must be of a particular format as mentioned, a sample of this can also be downloaded.
- Date Range: User can pick a date range to see leads from that time.
- Source: User can filter leads by where they came from.
- Product: User can focus on leads related to a specific product.
- Category: User can sort leads into different categories.
Select the user and click on the Assign Selected Leads button.
The user to whom the lead was assigned can view it in the Product Leads module.
The 'Auto Assign' option automatically assigns leads in a 'first in, first out' order to individuals.
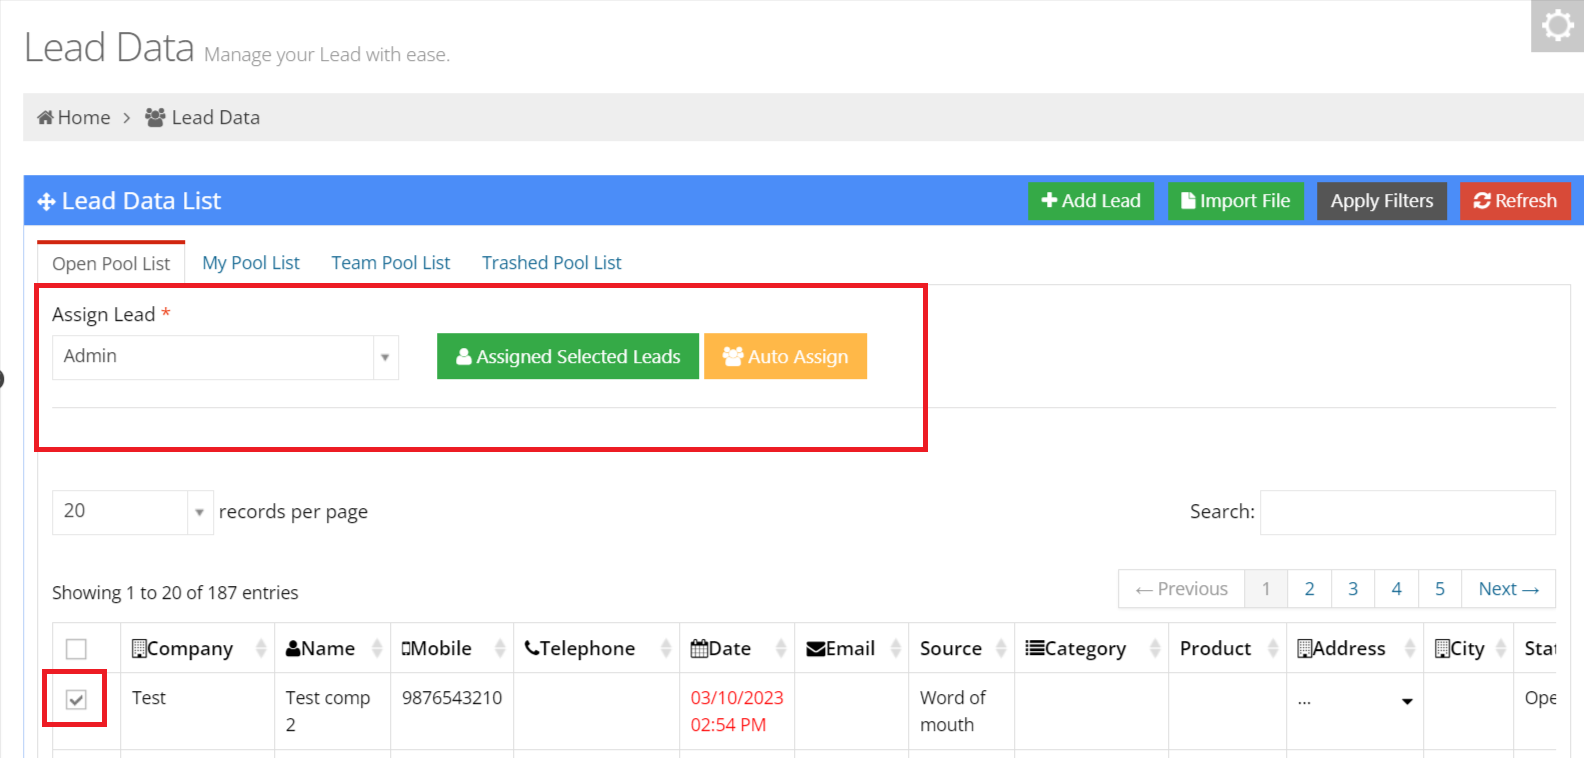
To delete a lead, select a lead and click on the delete button in the top right corner.
This could also be done by clicking on the delete icon in the Action column of a lead.
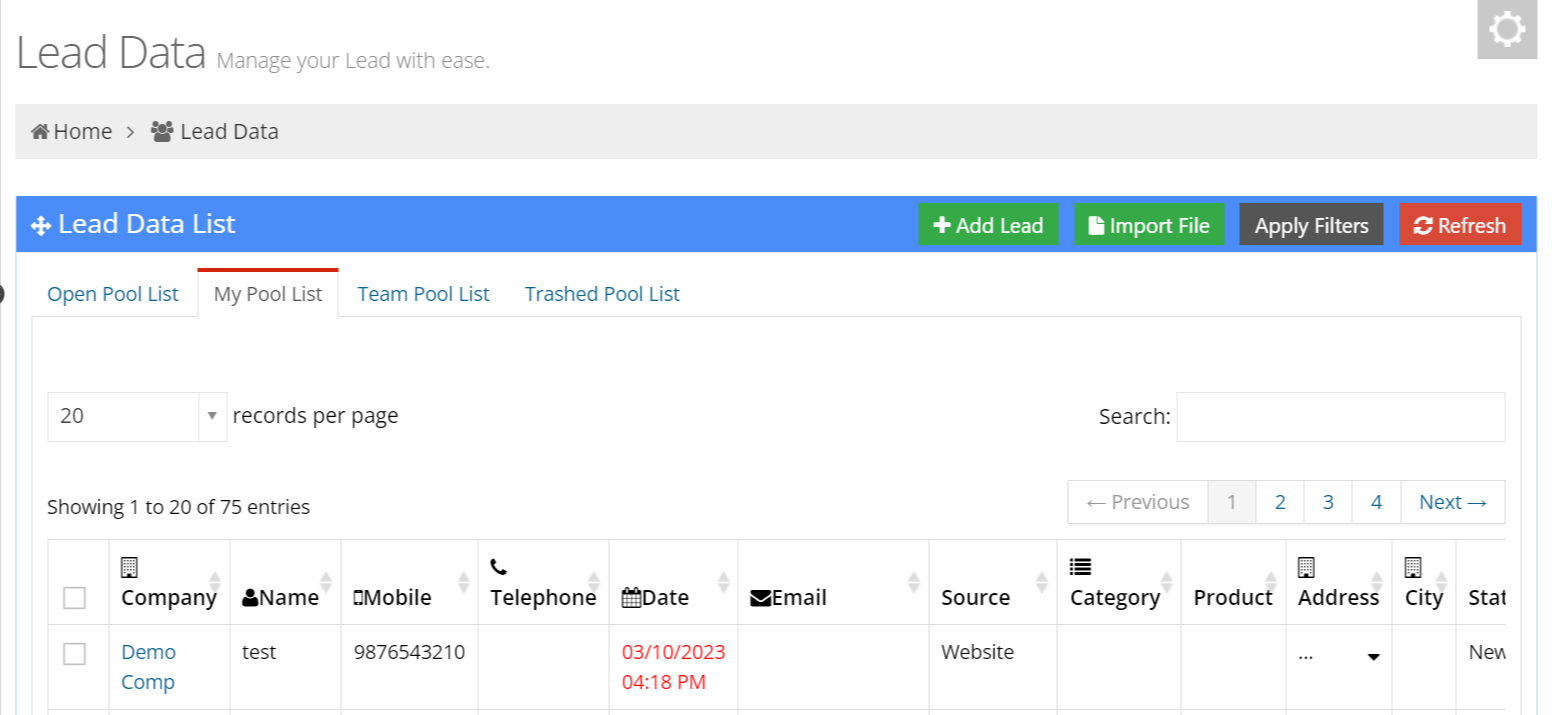
1.2 My Pool List
This section displays leads that have been assigned to the particular user.
The user can see the details of the lead
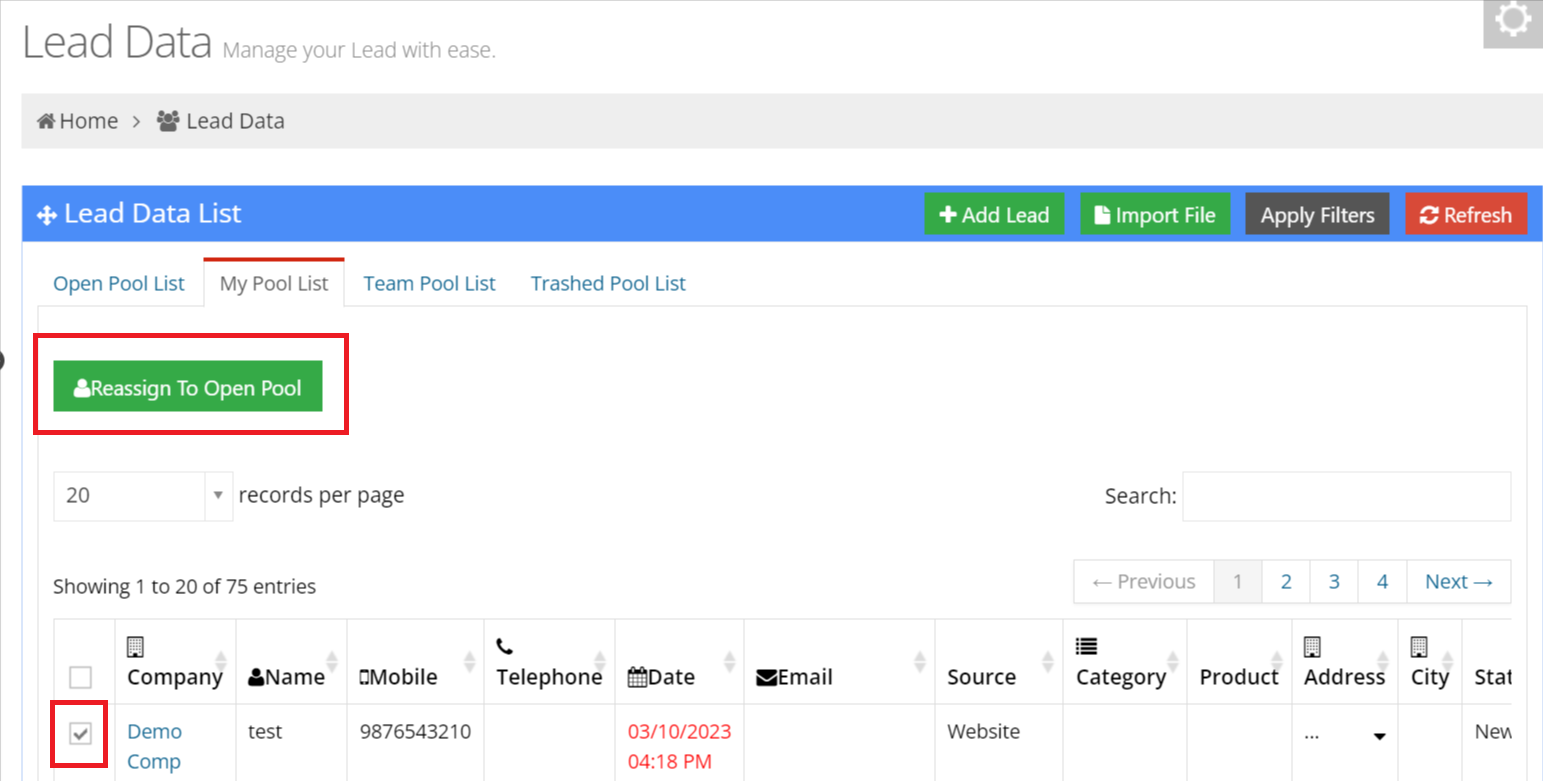
1.2.1 Reassign to Open Pool
To reassign a lead to the open pool, tick the checkboxes corresponding to the leads to be reassigned and click on the Reassign to Open Pool button.
This lead can now be seen in the Open Pool List.
1.3 Team Pool List
This section displays leads that have been assigned to the Team. The user can see the details of the lead with lead assigned to specific individuals and the corresponding actions.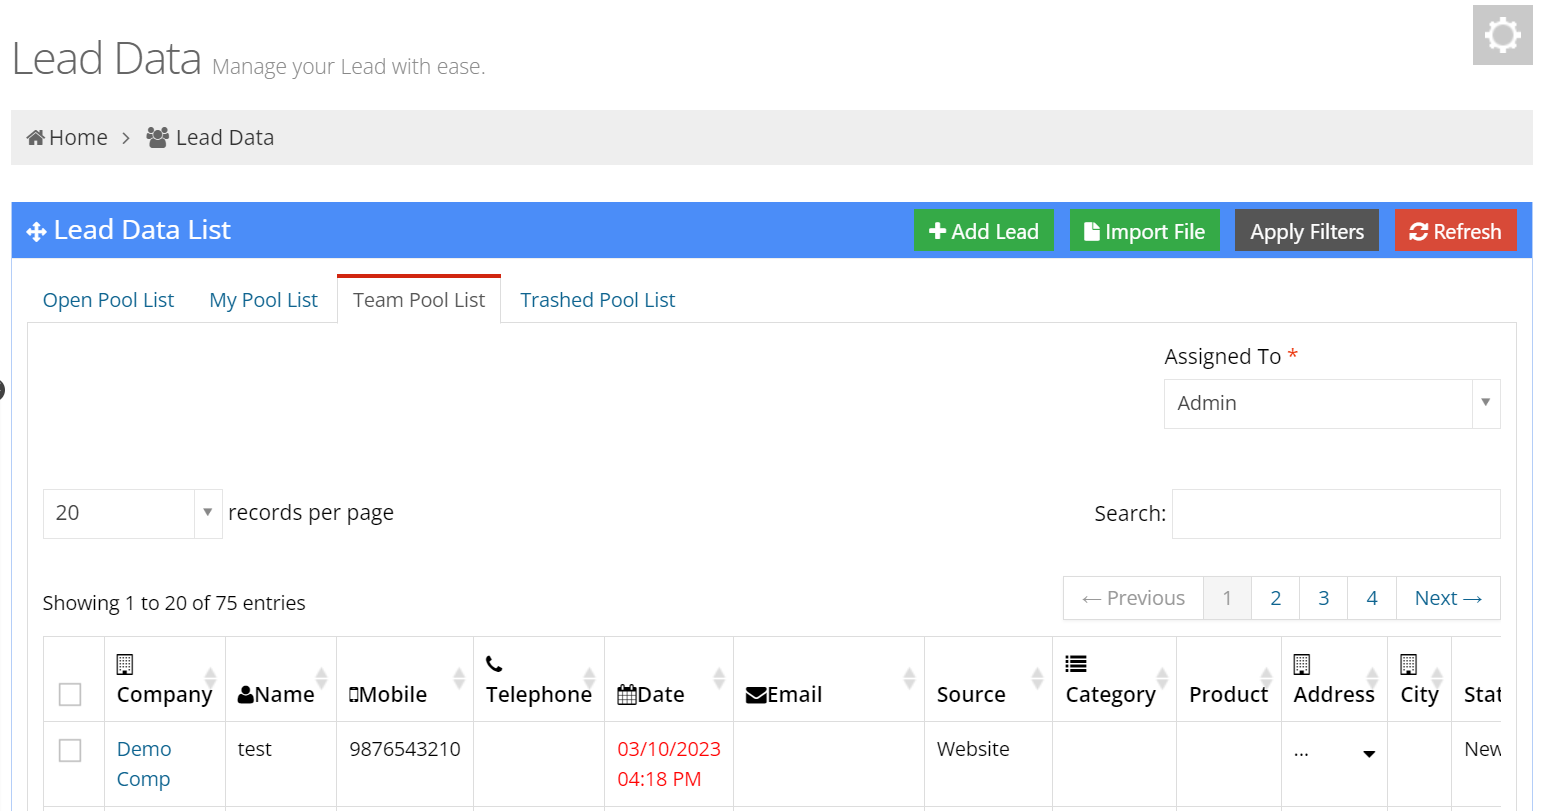
1.4 Trashed Pool List
This section displays those leads that had been previously deleted. The user has the option of restoring a trashed lead.
The user can see the details of the lead along with the user who trashed the lead, the time at which it was trashed and the reason it was deleted.
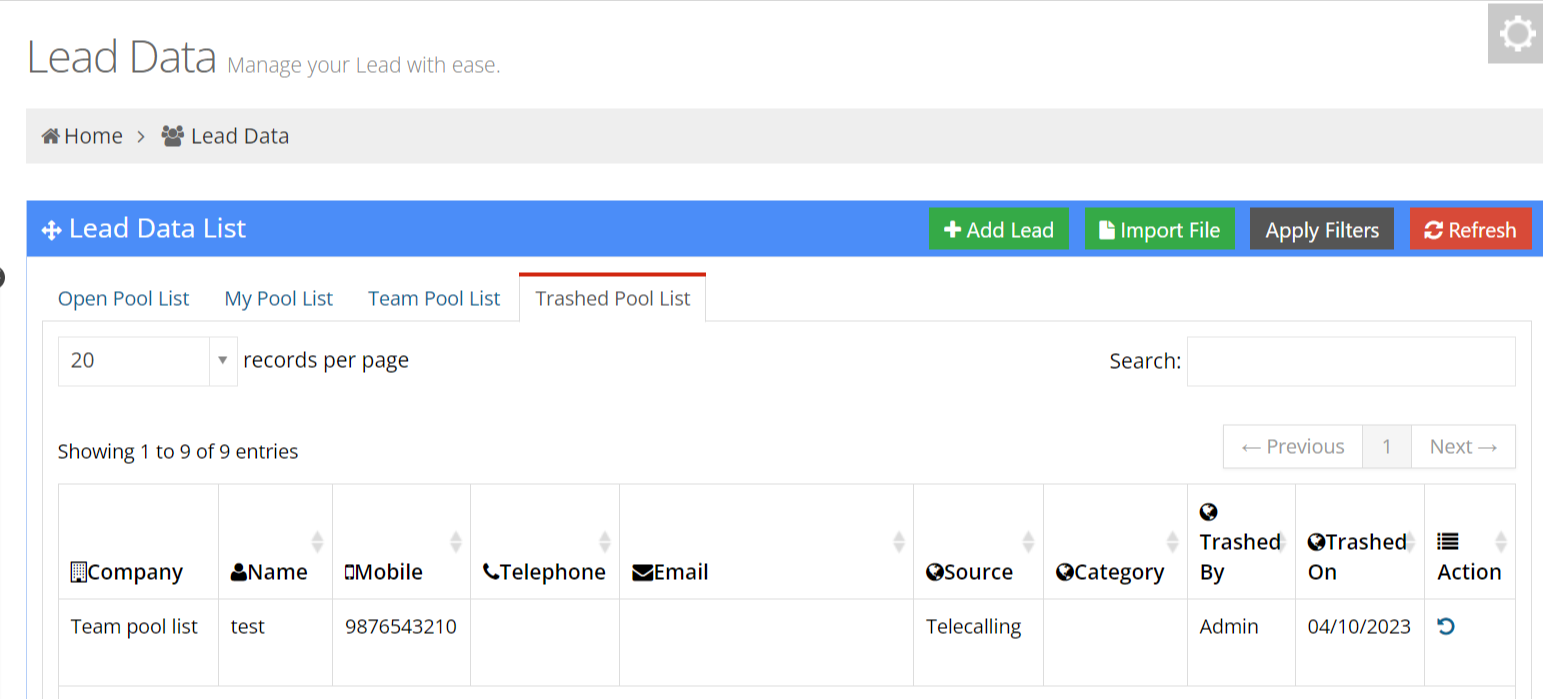
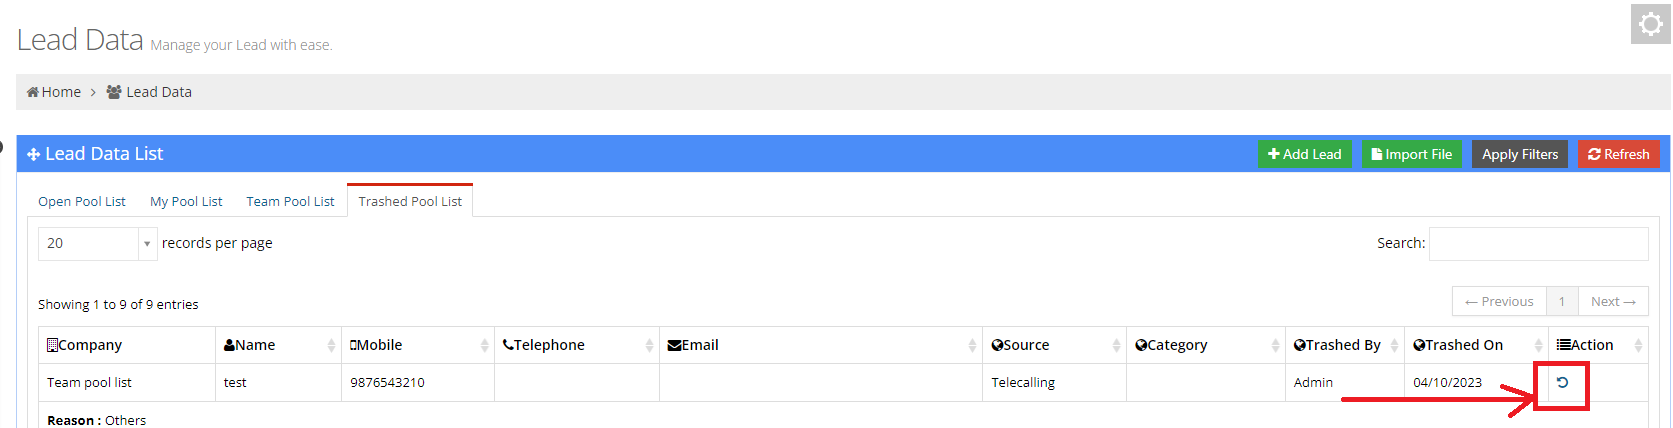
1.4.1 Restoring Trashed Leads
To restore a previously trashed lead, click on the ? icon in the Action column of the trashed lead to be restored. This lead will be added back to the open pool list, waiting to be assigned to an employee.
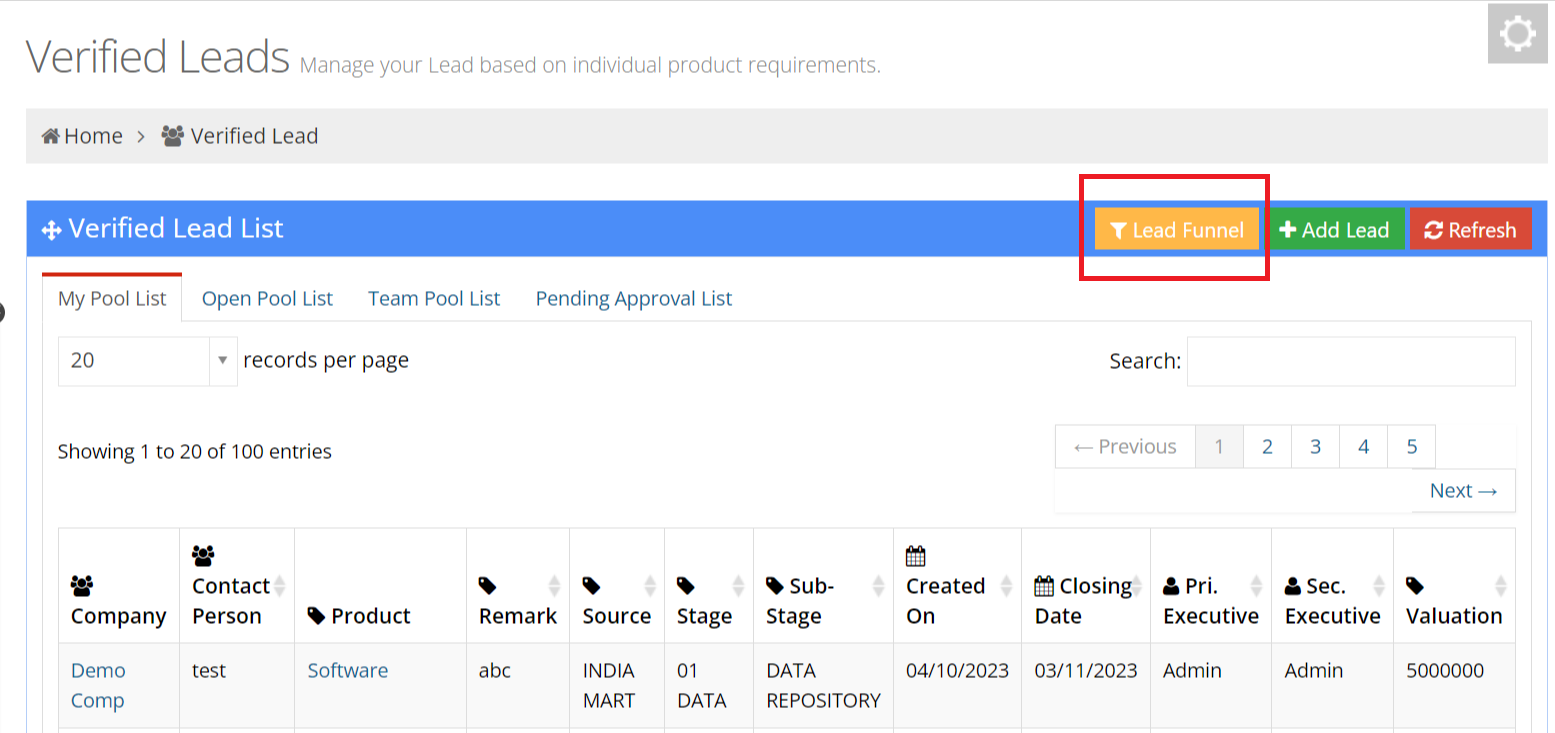
2. VERIFIED LEAD
A verified lead is a potential customer that has been carefully checked and confirmed, and EdifyBiz helps organize and nurture these leads. It can also enhance lead information by verifying contact details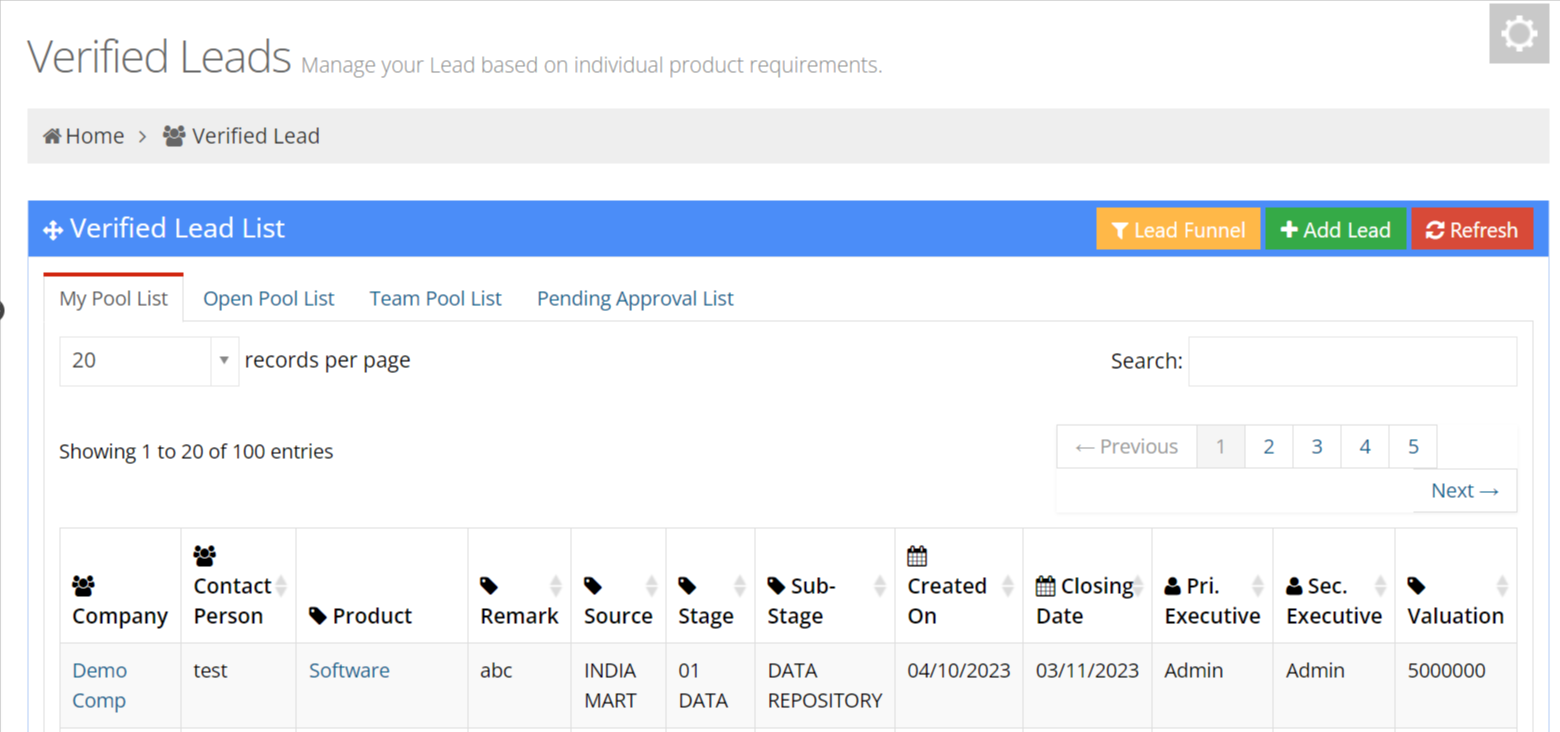
In this section user can create New lead manually.
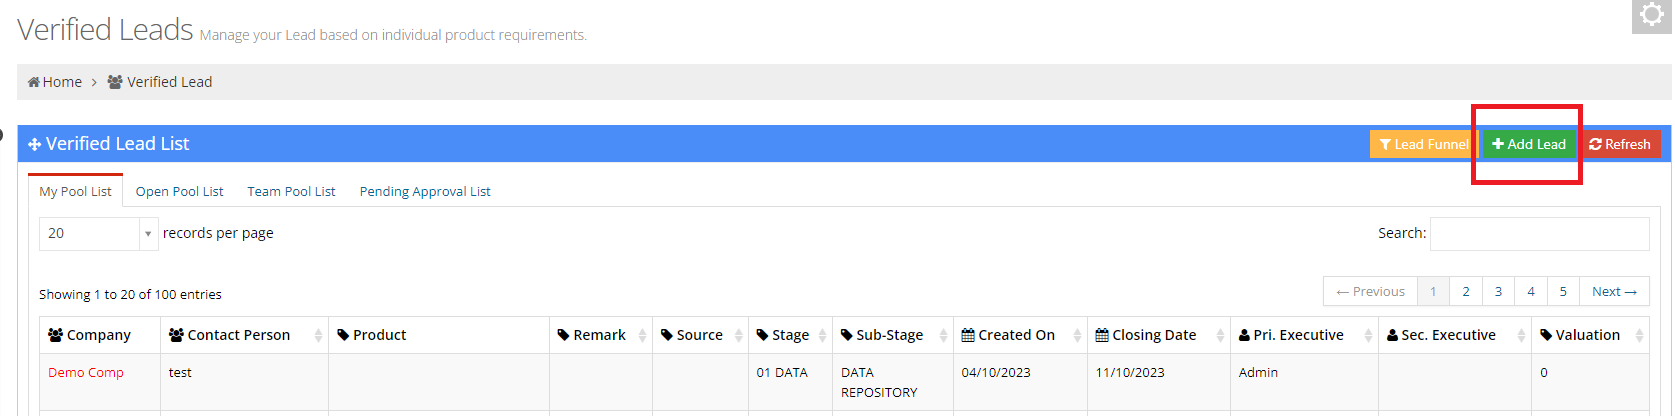
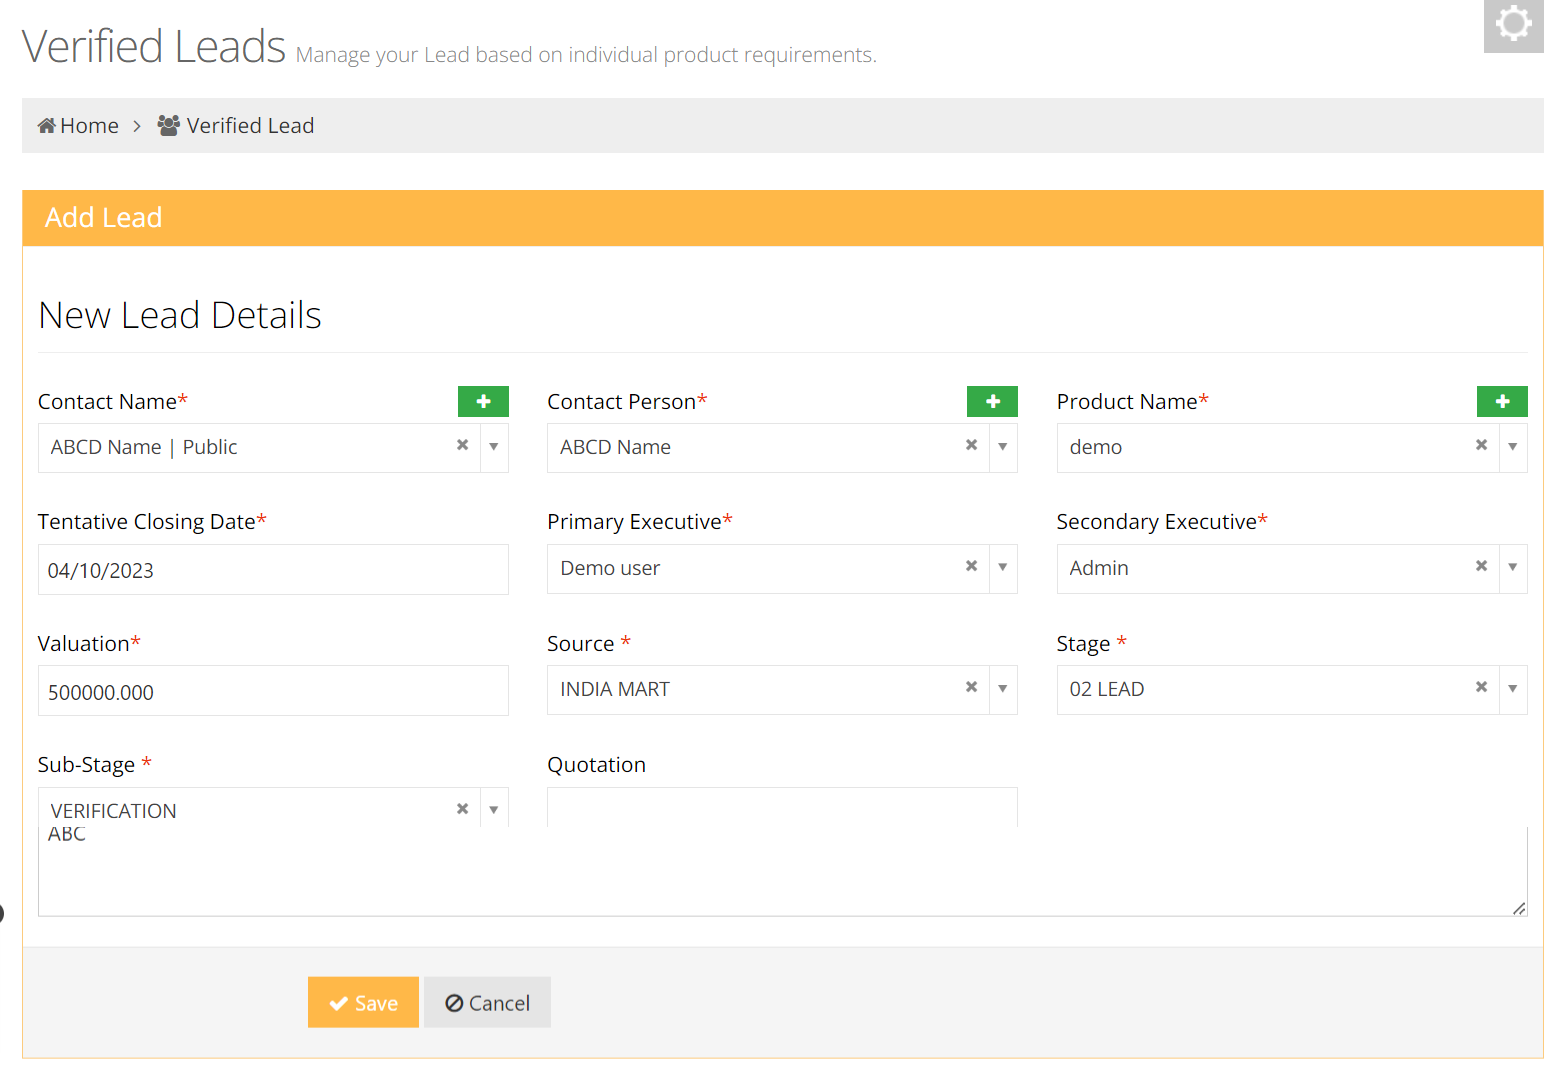
- Contact Name : Select Client Name here
- Product Name: Select Product Name here
- Tentative Closing Date : select Tentative Closing Date for the lead
- Primary Executive : Primary Executive will be the individual who got the lead
- Secondary Executive Name :Select the secondary executive's name here. Changes cannot be updated without the approval of the secondary executive.
- Valuation :The user can enter the valuation of the particular lead according to their requirements.
- Channel : Enter the Source channel of Lead
- Stage :Select appropriate stage from following Data, Lead, Engagement , Commit , Order
- Sub-Stage : Select sub stage accordingly
2.1 My Pool List
This section displays leads that have been assigned to the particular user. The user can see the details of the lead along.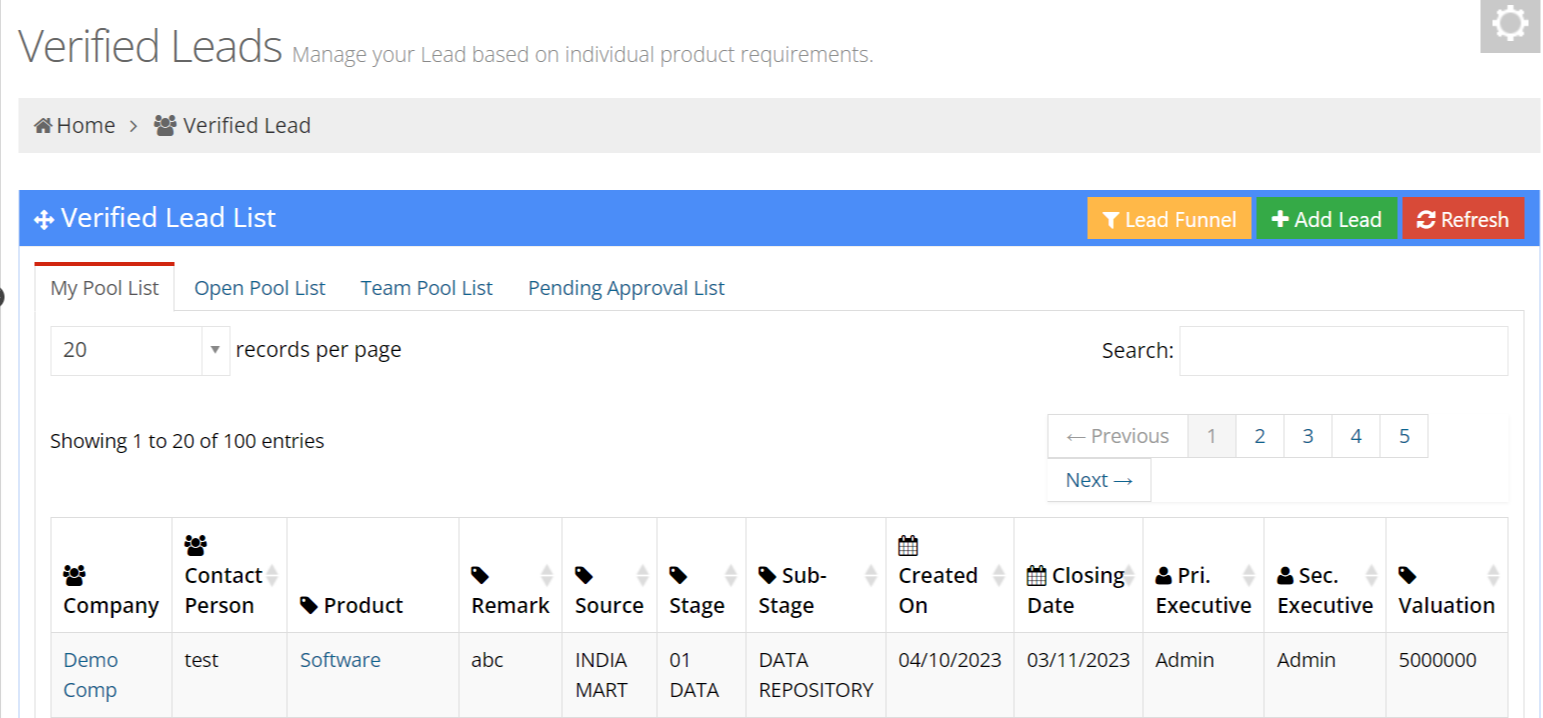
2.2 Team Pool List
This section displays leads that have been assigned to the Team. The user can see the details of the lead with lead assigned to specific individuals and the corresponding actions.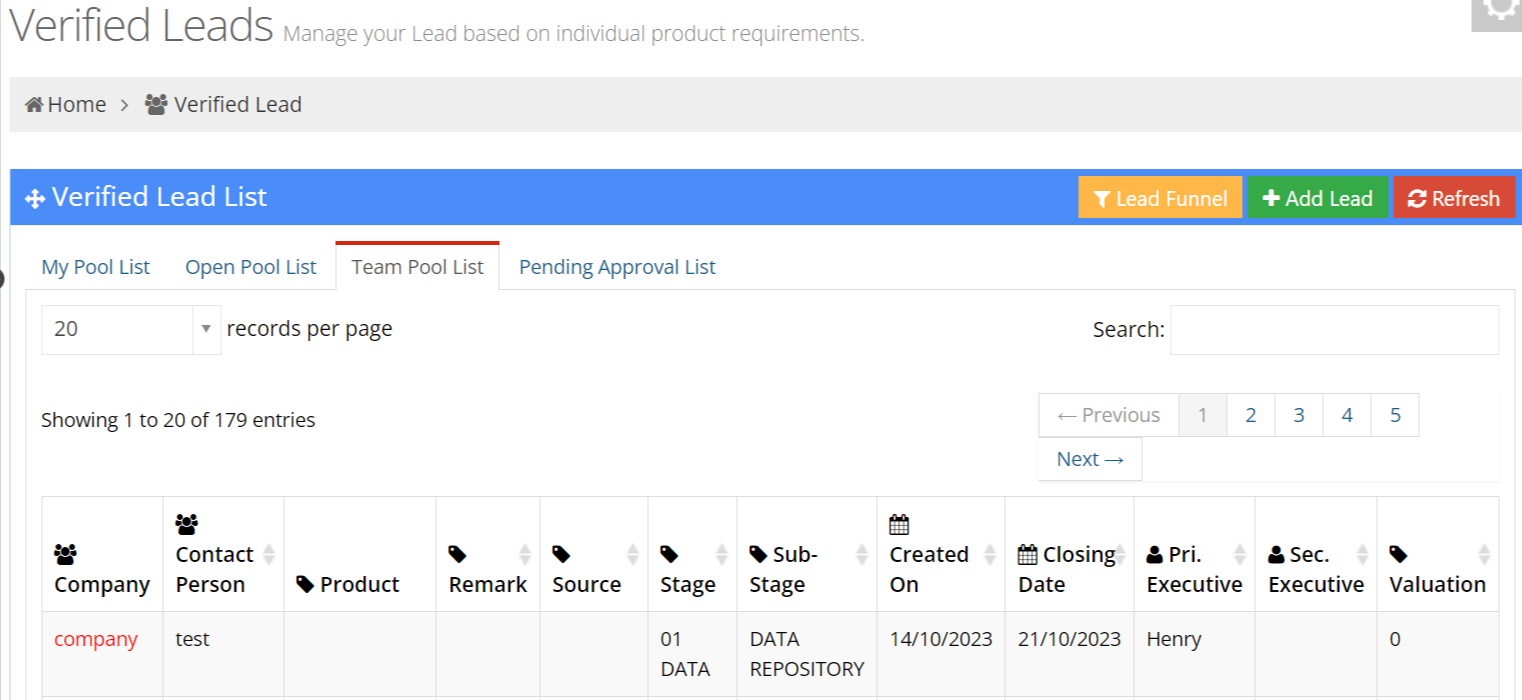
2.3 Pending Approval List
This section displays leads that are pending approval from the secondary Executive.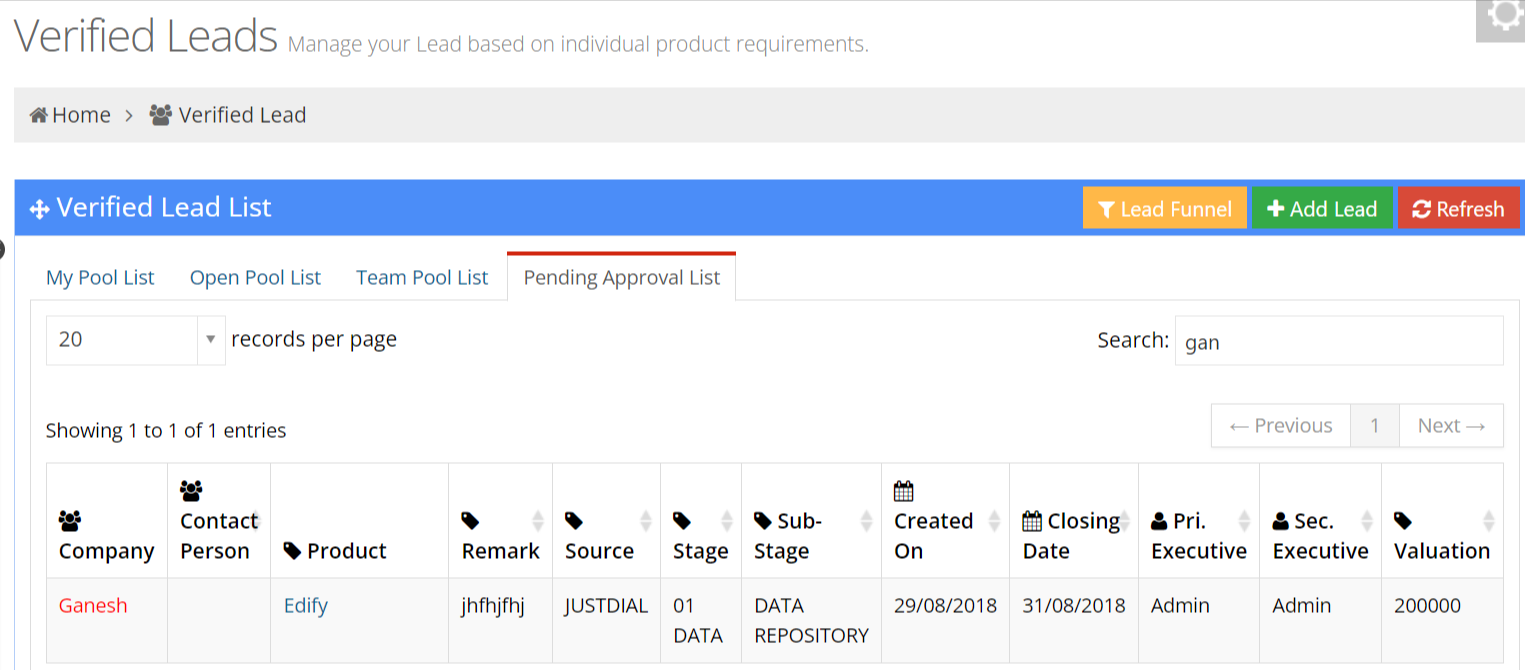
In EdifyBiz, a lead funnel is a visual representation or a structured framework to track and manage leads from the initial contact to conversion. It is a useful tool that helps organizations understand the different phases of the lead journey and spot potential dropoff or disengagement points for their leads. Businesses may improve their sales and marketing tactics and ultimately raise their lead conversion rates by identifying these drop-off points and making smart adjustments.
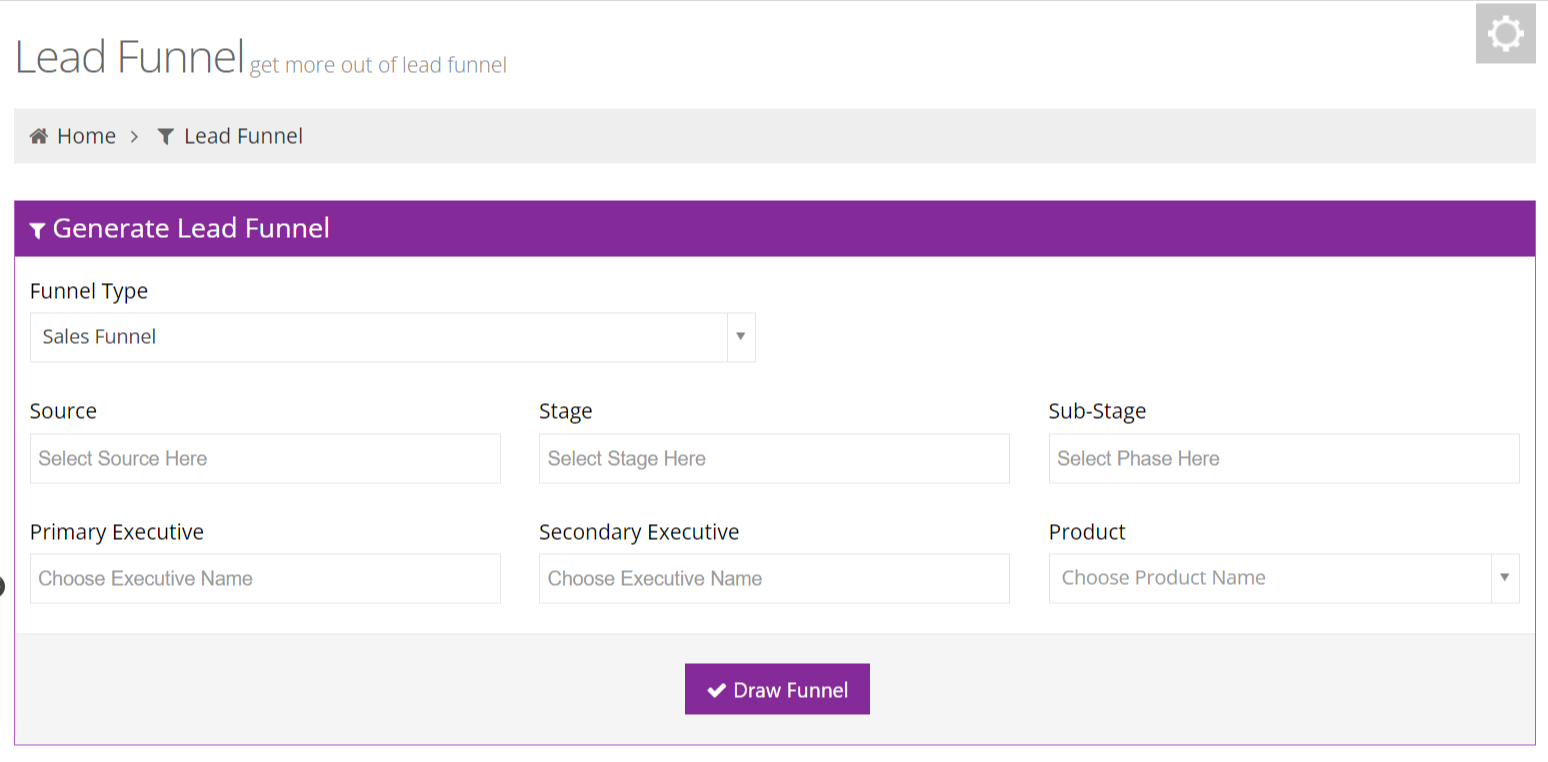
- Funnel Type: Select Funnel type.
- Source:Select Source name from list.
- Stage: Select apppropriate lead stage from following list i.e. Data, Lead, Engagement , Commit , Order
- Sub-Stage: select sub stage accordingly
- Primary Executive : Primary Executive will be the individual who got the lead
- Secondary Executive :Select the secondary executive's name here. Changes cannot be updated without the approval of the secondary executive.
- Product : Select product
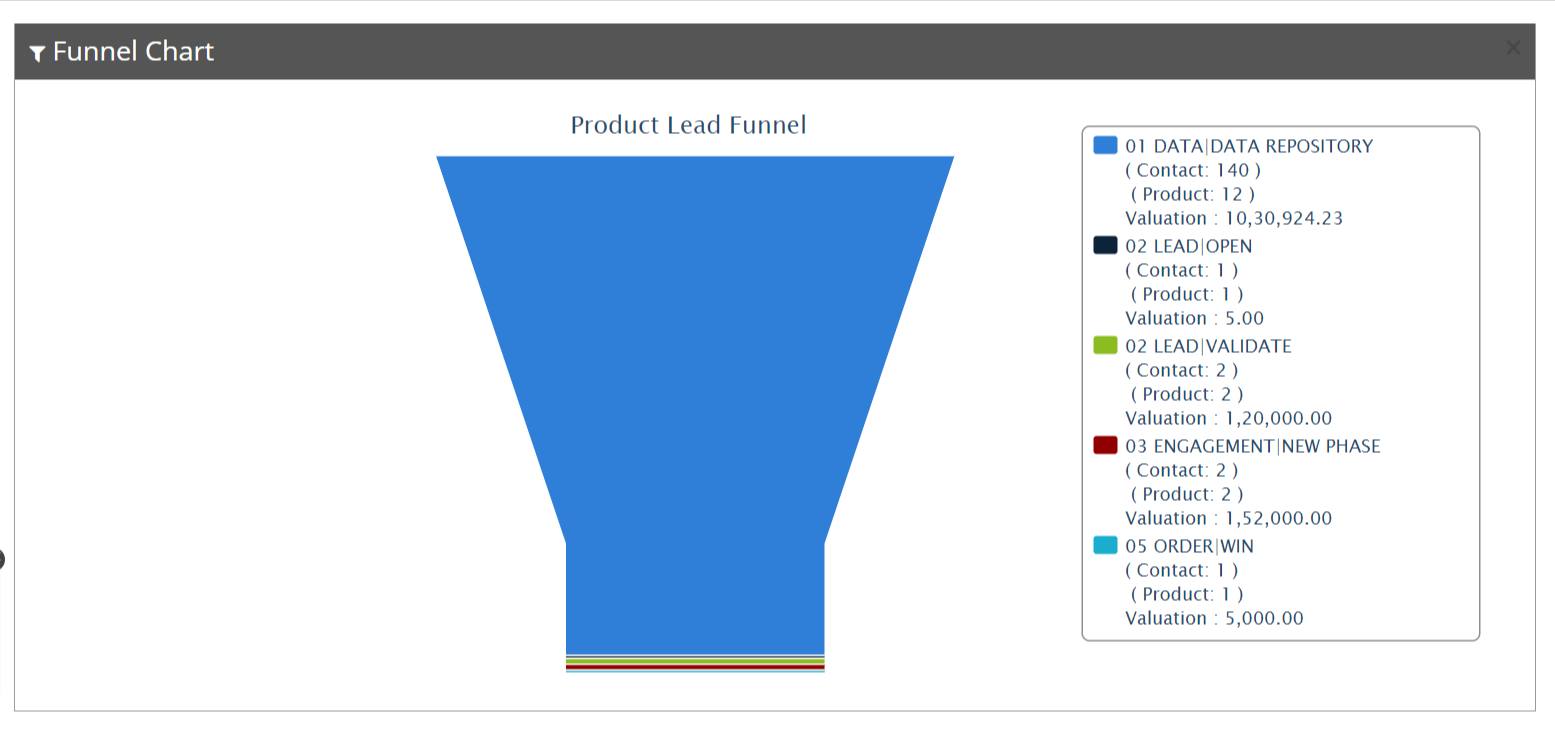
A funnel chart is a type of data visualization used to represent and visualize a progressive reduction of data as it moves through various stages or categories.

Once user recived successful Verified lead, the next step is to convert this lead into a more serious prospect by initiating an Inquiry. If the lead remains interested and is a potential customer, provide them with a formal quotation.
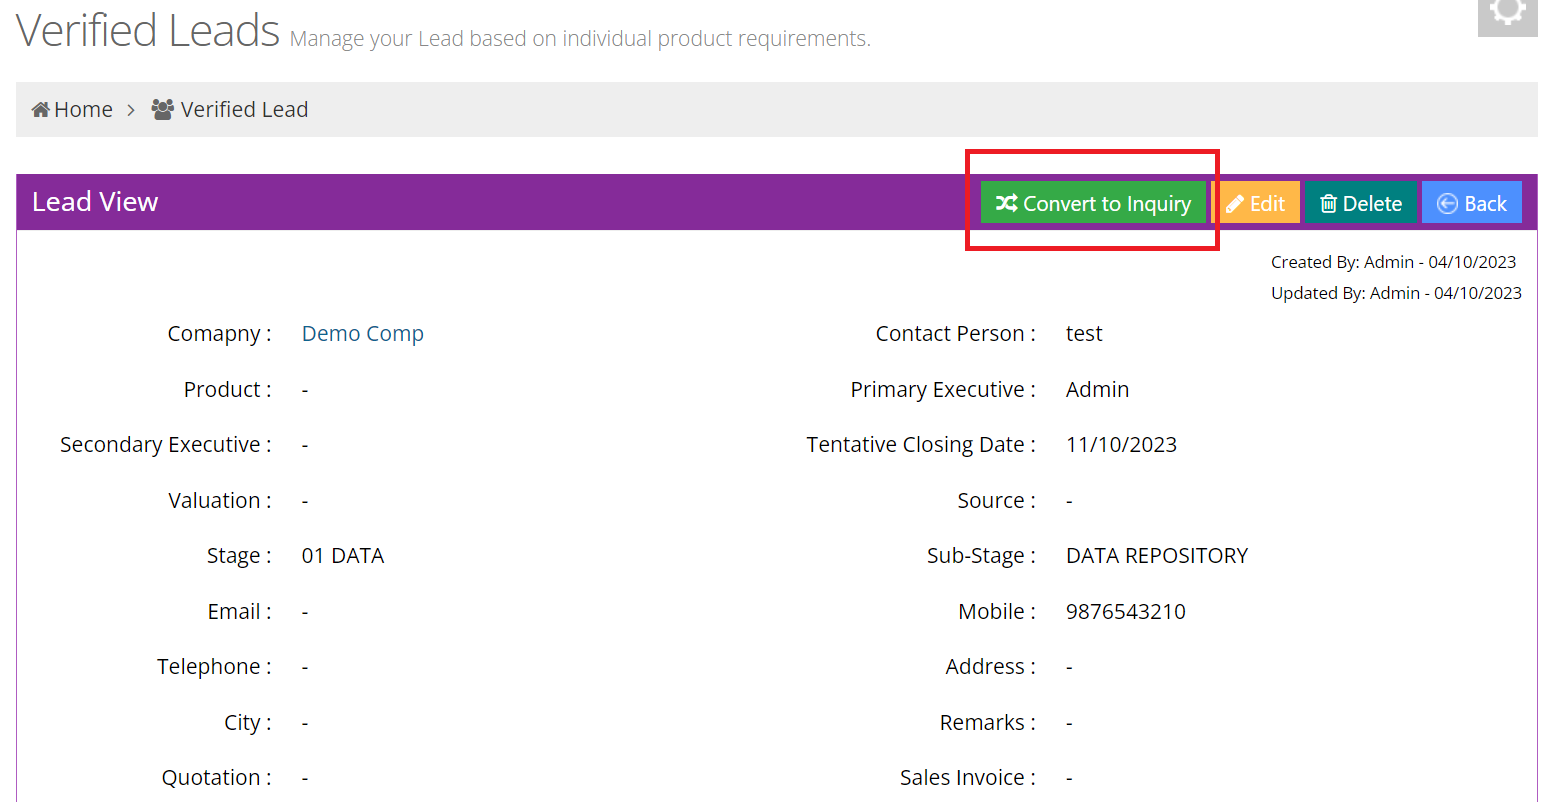
In the Verified Lead View EdifyBiz offers the following features and functionalities:
1. Follow-ups:Users can schedule and track follow-up actions with leads or customers.
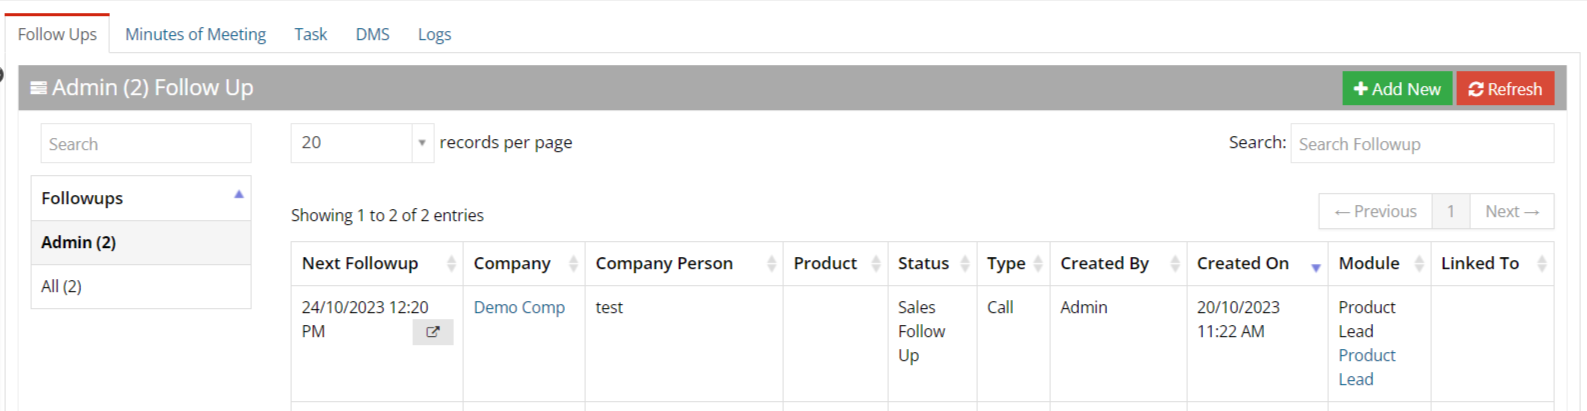
2. Minutes of Meeting: Users have the ability to store minutes of meetings of summarizing discussions and decisions made during interactions with clients or team members.

3. Task: To create and manage tasks to prioritize and track important actions and deadlines related to leads, customers, or projects.

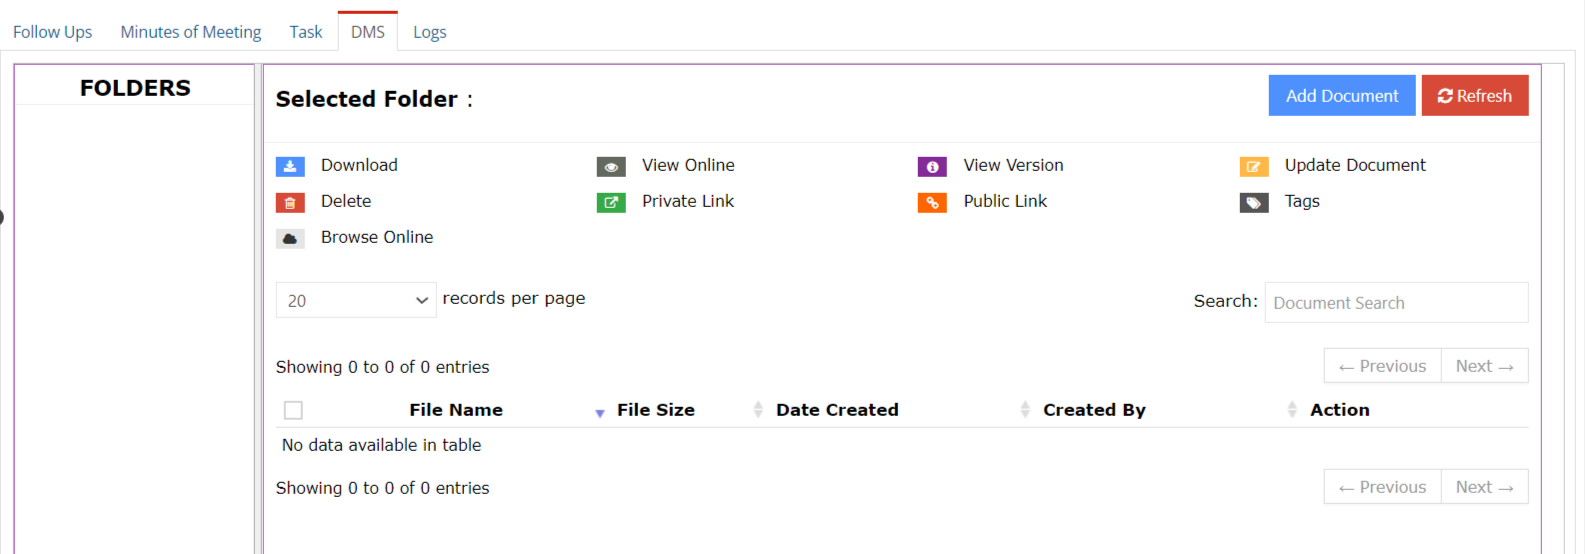
4. DMS:EdifyBiz includes a Document Management System to store and organize relevant documents and files associated with leads or customers.
5. Logs:The logs offer a detailed historical view of lead-related data, including remarks, stages, sub-stages, and the lead's status (e.g., "Approved" or "Not Approved). These logs provide a comprehensive understanding of lead progress and interactions.

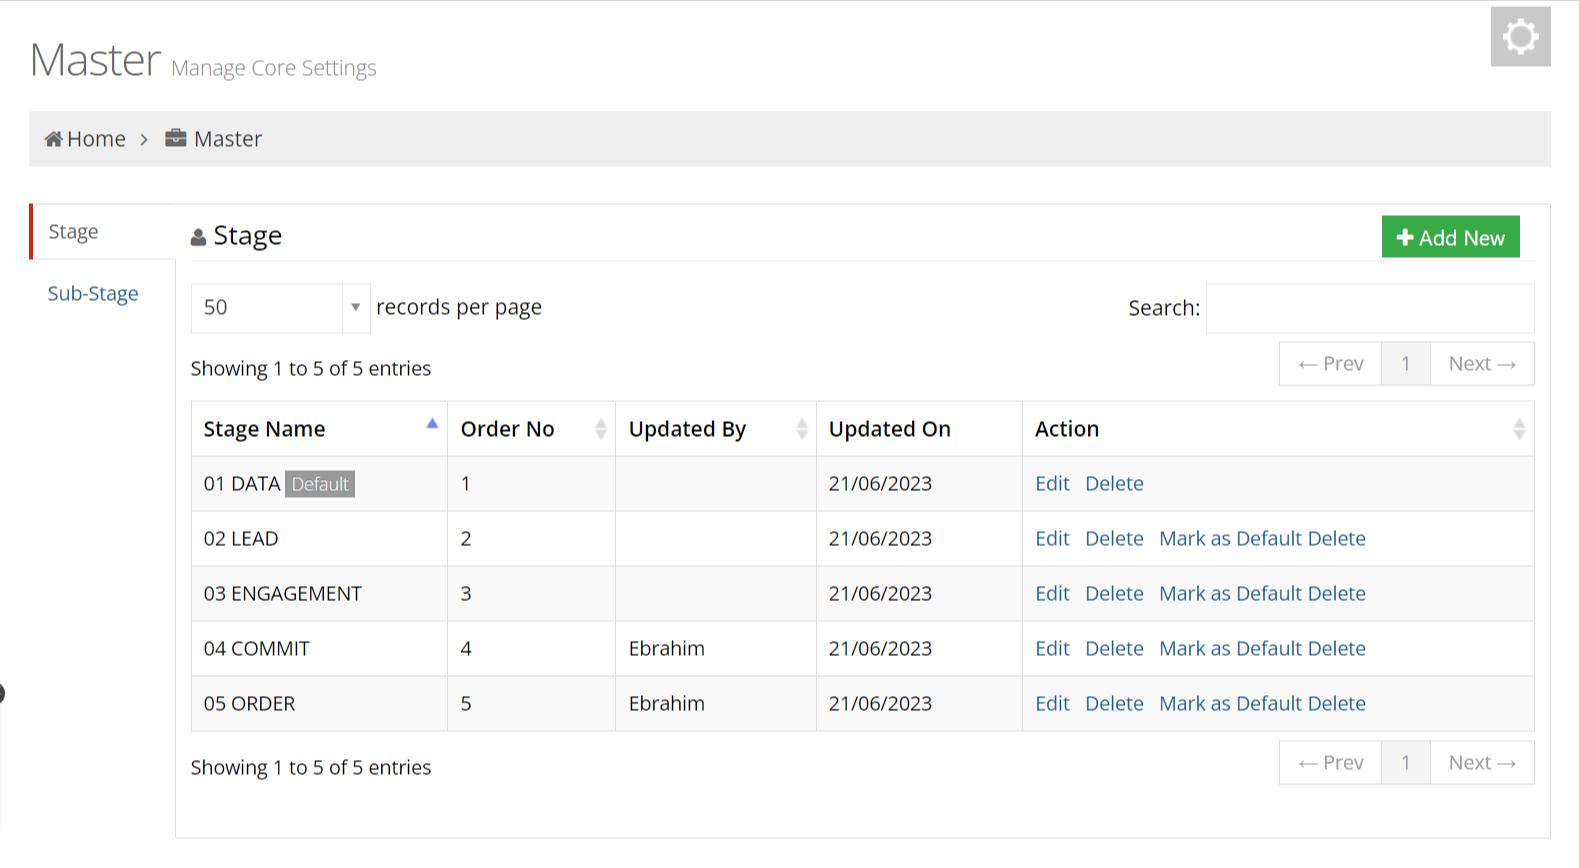
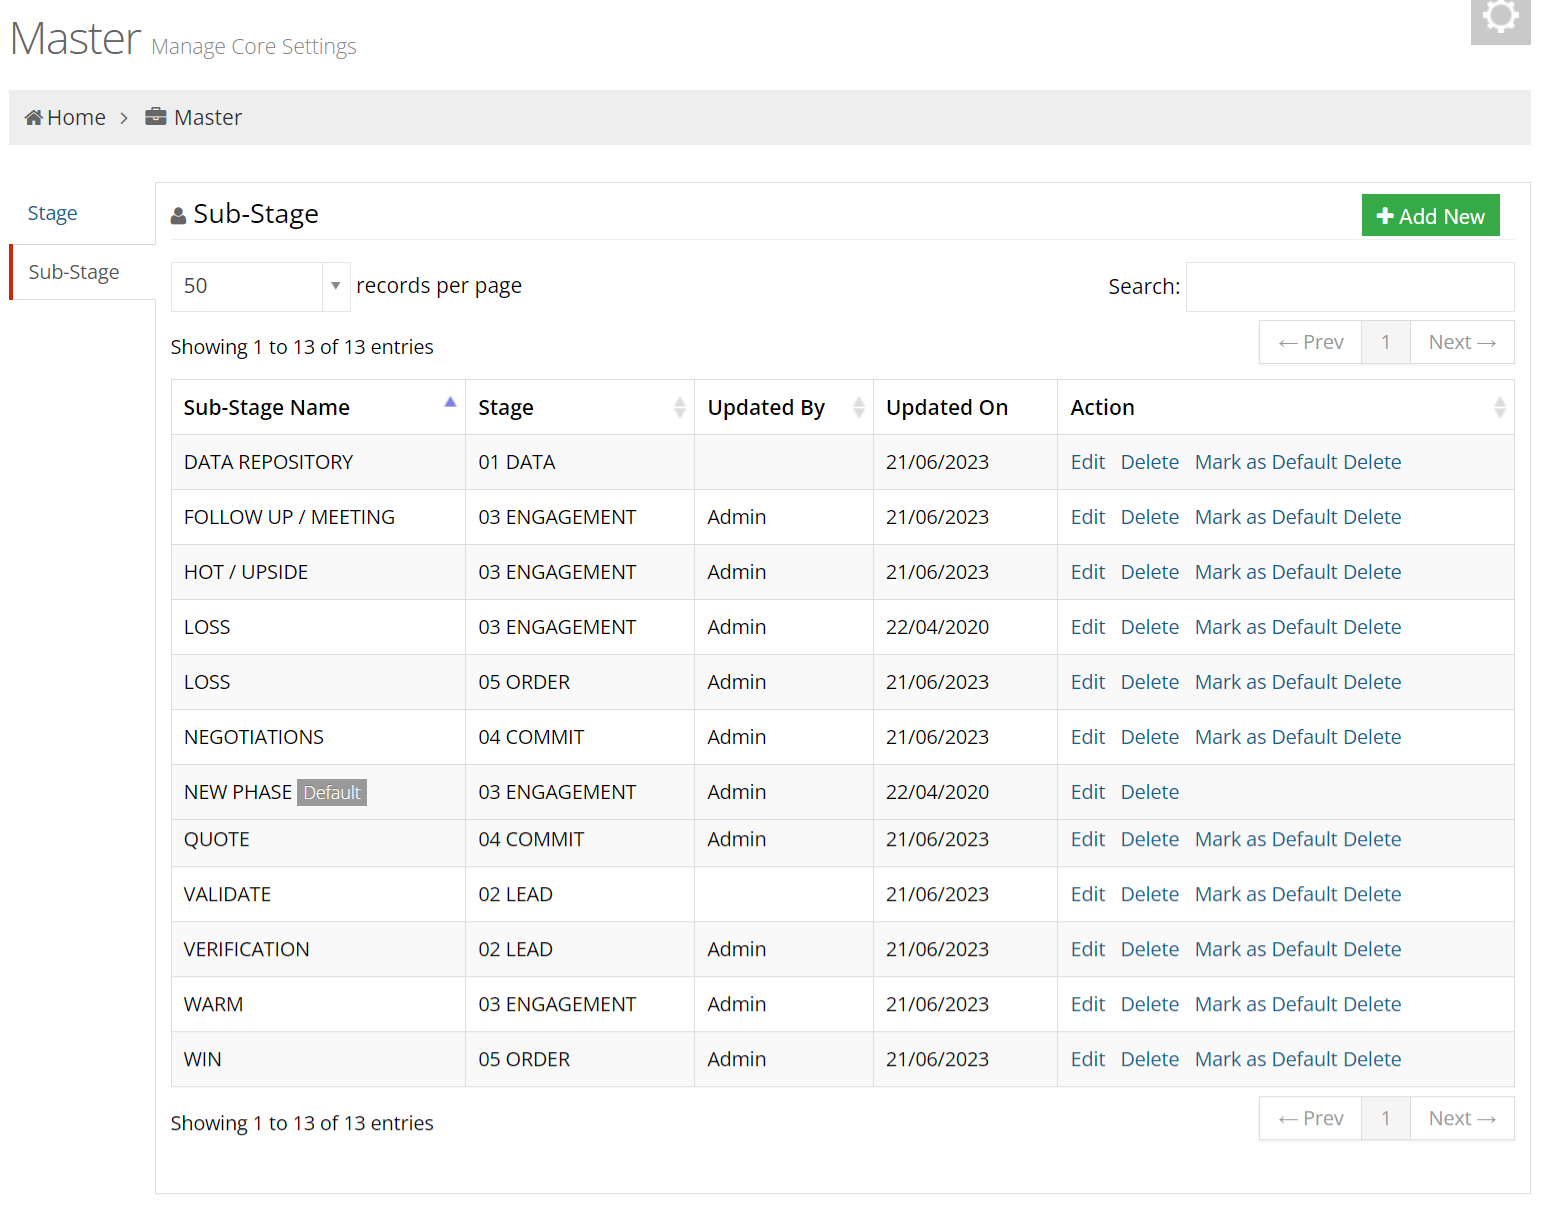
3. LEAD MASTER
Managers and department heads have access to the Master Data of Stages and Substages in Lead Management, and they can add, edit, and delete stage and substage data through Lead Master in accordance with specific requirements.