The Employee MIS Module is designed to help an organization manage its employees. The Employee MIS module is divided into two sub-modules:
- New Employee
- All

1. New Employee
This sub-module helps the user register a new employee.
Once the user clicks on New Employee, a form is displayed to the user. This form comprises of three sections, Personal Details, Get In Touch and Work Details.
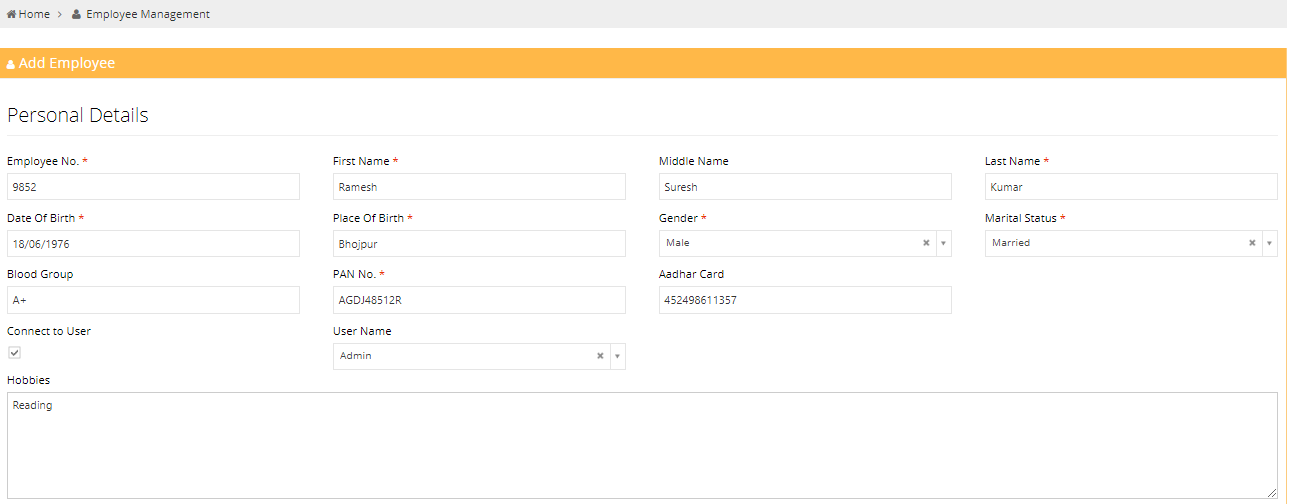
1.1 Personal Details
This section asks for the Personal Details of the new employee. Fields marked with an asterisk (*) are required and can not be left empty.
1.2 Get In Touch
This section asks for the Contact Details of the new employee. Fields marked with an asterisk (*) are required and can not be left empty.

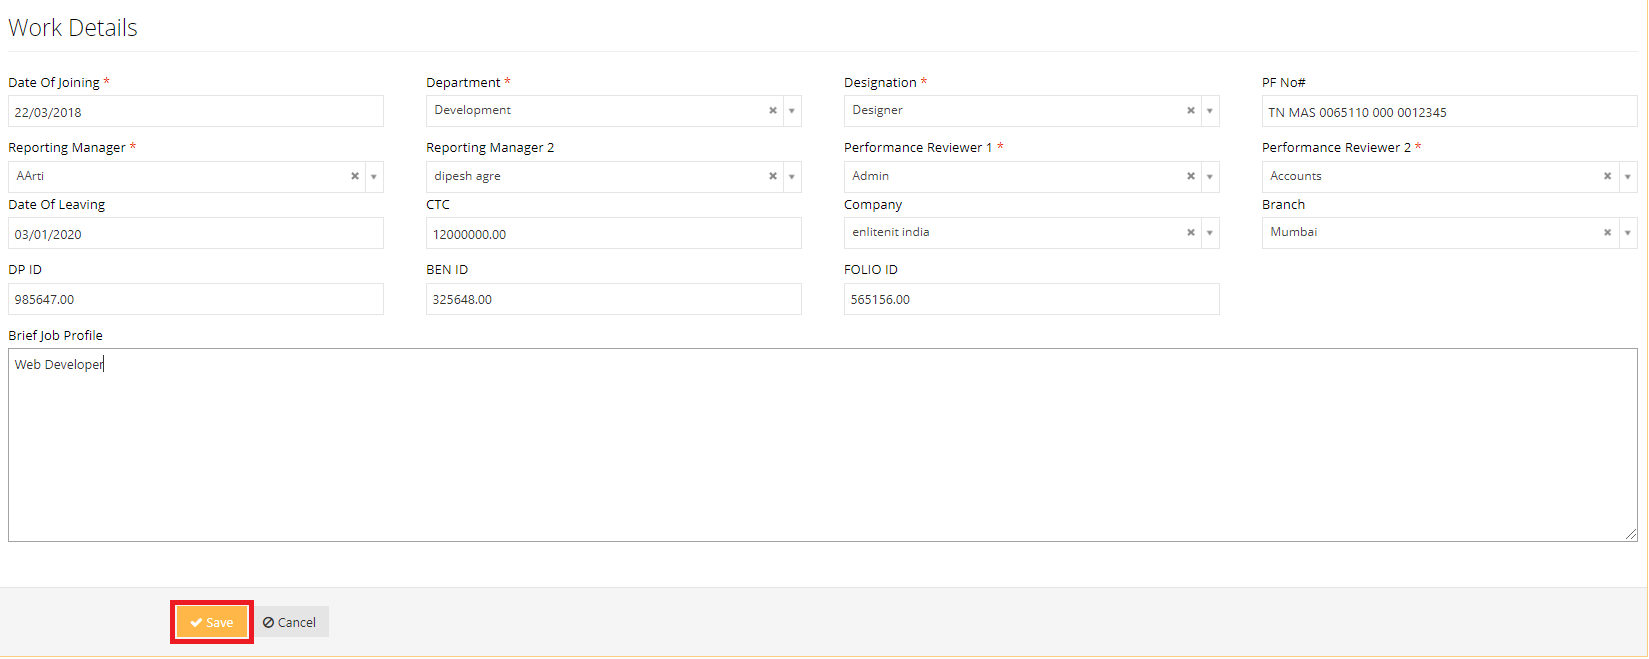
1.3 Work Details
This section asks for the Work Details of the new employee. Fields marked with an asterisk (*) are required and can not be left empty.
After filling the form, the user can click on the Save button to save the form or press Cancel to exit.
2. All
This sub-module displays to the user all existing employees.
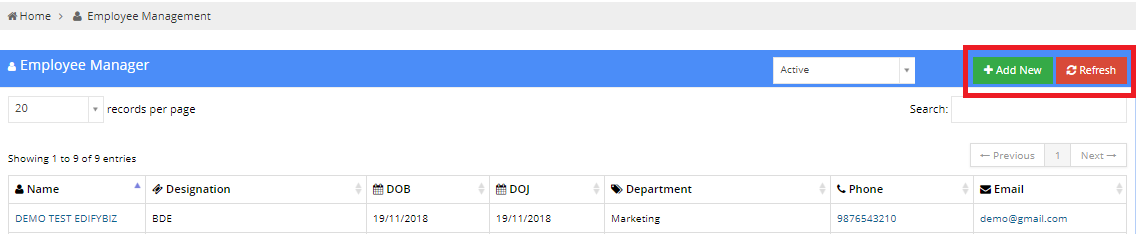
After clicking on All, the user can see a list of all the existing employees that have already been added. The user can alter the amount of records per page and use the search bar to look for particular employees.
The user can click on the Add New button to add a new employee. This will display the Employee form discussed earlier. On clicking on the Refresh button, the list of employees is updated to the latest values.
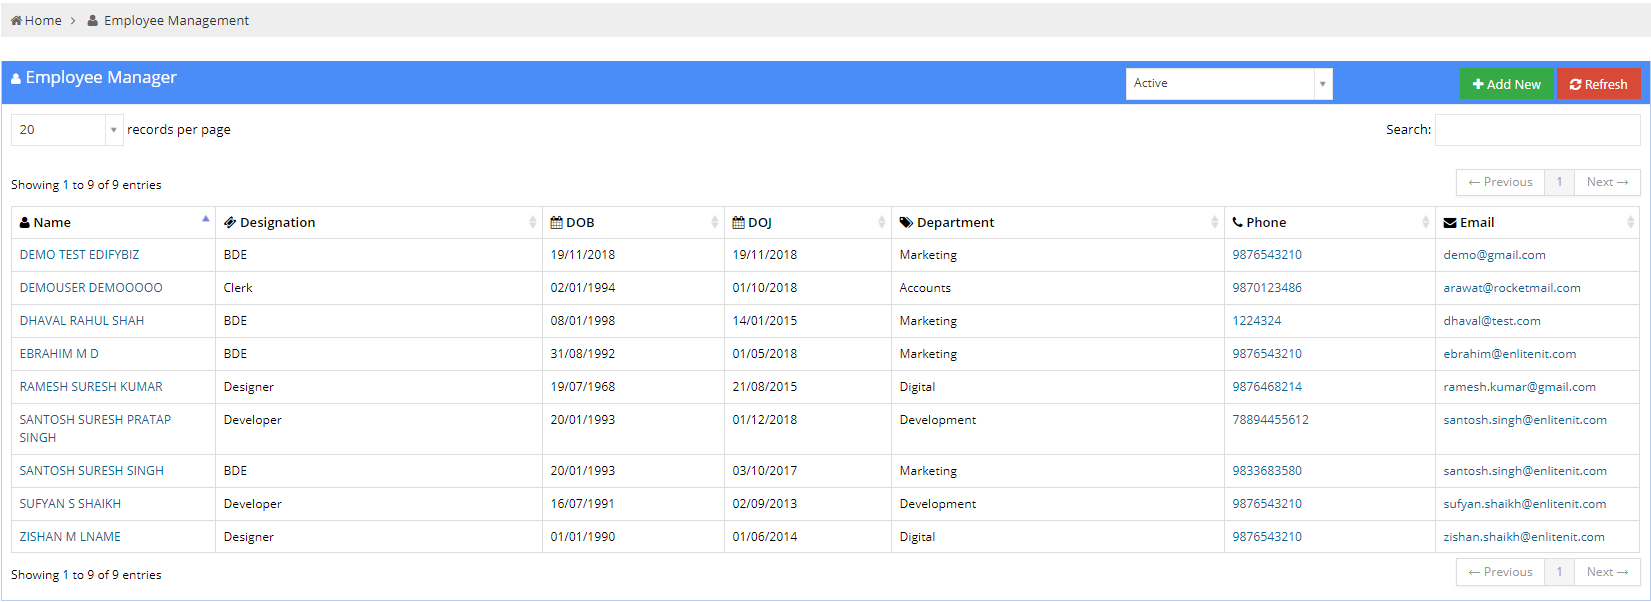
The list of employees has the following columns:
- Name :The Name column displays the Name of the employee.
- Designation :The Designation column displays the Designation of the employee.
- DOB :The DOB column displays the Date of Birth of the employee.
- DOJ :The DOJ column displays the Date of Joining of the employee.
- Department :The Department column displays the department of the organization for which the employee works.
- Phone :The Phone column displays the Contact Number of the employee.
- Email :The Email column displays the Email ID of the employee.
2.1 Employee View
To open Employee View, click on the name of an employee in the employee manager window.

Employee View displays all the entered details of the employee. The user can also add additional details about the employee.
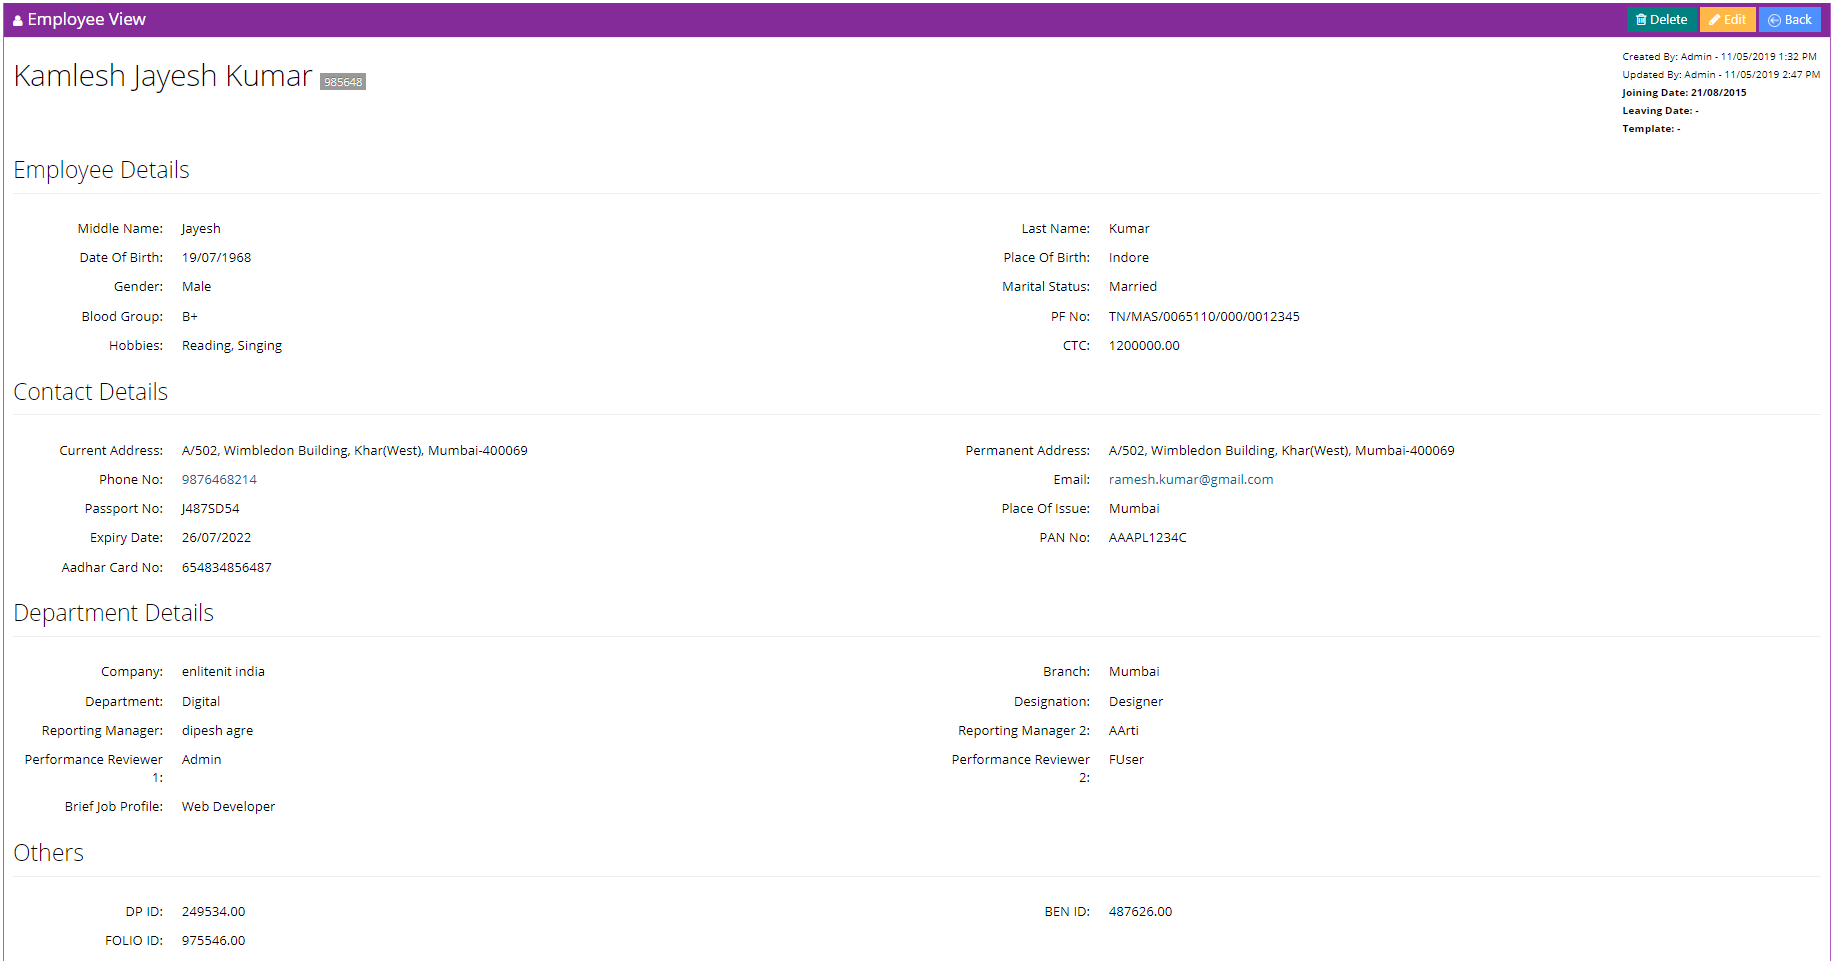
The user can delete an employee using the Delete button, edit employee details using the Edit button or go back to the previous page using the Back button

2.2 Additional Details
The user can add and view additional details about an employee in this section. This contains the following 18 tabs:2.2.1 Entitled Leave
The employee's entitled leaves are enlisted in this page. The details about the leaves can also be viewed. The leaves can be edited or deleted by the user by clicking on the Edit or Delete buttons in the Action column.
To add a new entitled leave, the user can press the Add New button or press the Apply Role button to apply for a Leave Role

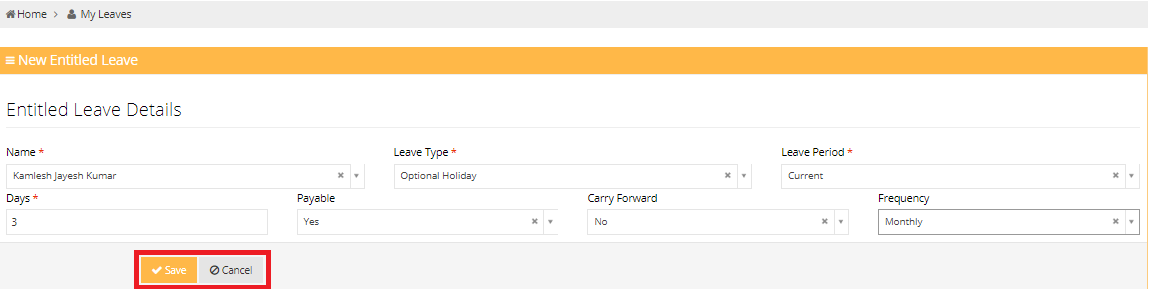
After clicking on the Add New button, the user is prompted to enter the entitled leave details. Fields marked with an asterisk (*) are required and can not be left empty.
This leave is saved if the user clicks on the Save button. The application is cancelled if the user clicks on the cancel button.
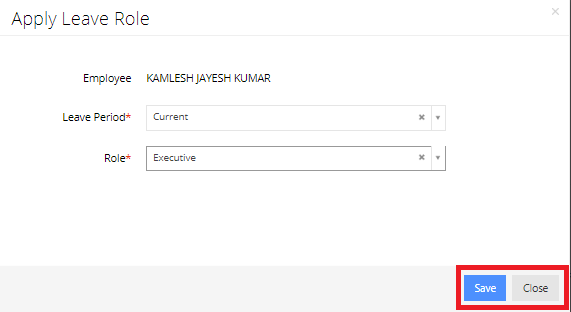
After clicking on the Apply Role button, the user is able to apply for a leave role. The user is asked to enter leave period and the role.
This Leave Role is saved if the user clicks on the Save button. The pop-up is closed if the user clicks on the Close button.
2.2.2 Leave History
The employee's leave history is enlisted in this page. The details about the leaves can also be viewed.
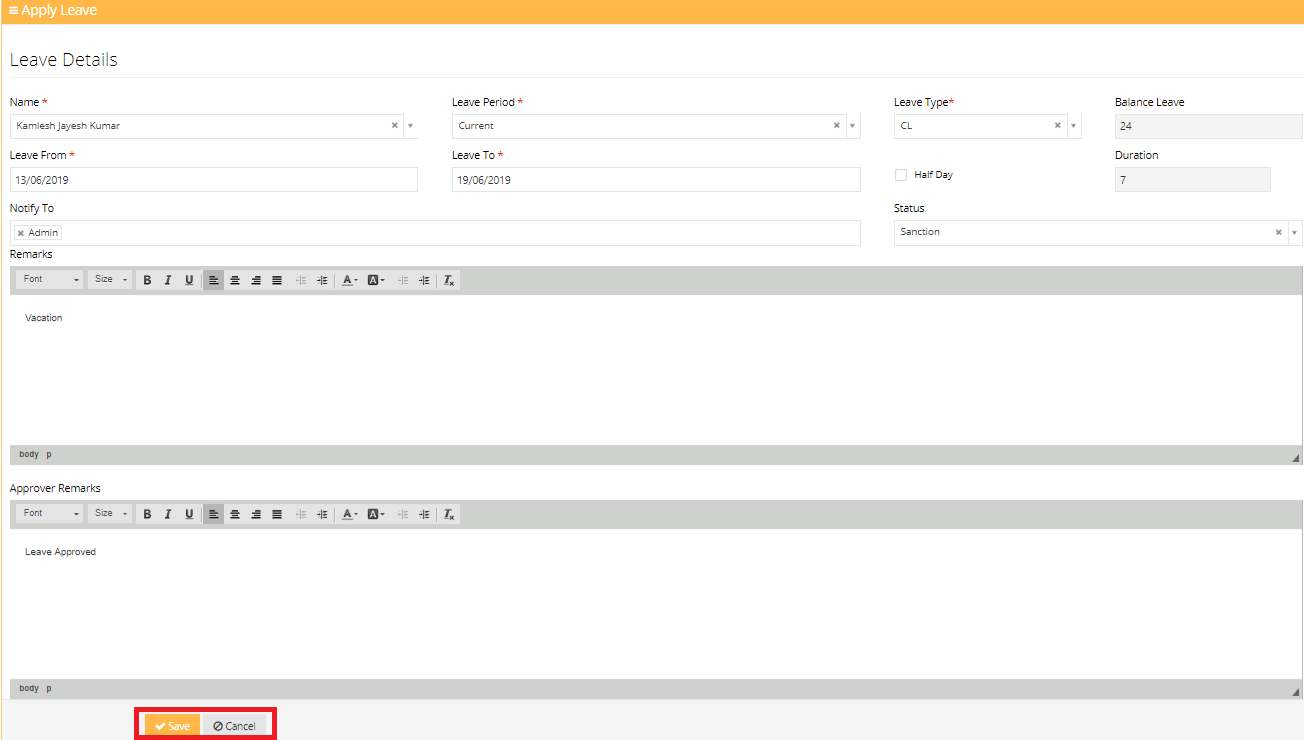
To apply for a leave, the user can press the Add New button. The user is then asked to enter the details of the leave.

After clicking on the Add New button, the user is prompted to enter the entitled leave details. Fields marked with an asterisk (*) are required and can not be left empty.
This leave application is saved if the user clicks on the Save button. The application is cancelled if the user clicks on the cancel button.
2.2.3 Family Details
The employee's family details can be added in this section. The user can also view already added family details in the table given below.
The entered details can be edited or deleted by the user by clicking on the Edit or Delete buttons in the Action column.
The employee's family details are added by entering the name of the family member, the relationship with the family member their date of birth.
Fields marked with an asterisk (*) are required and can not be left empty.
The entered details are saved when the user clicks on the ✔ button. The details are cancelled if the user clicks on the 🚫 button.

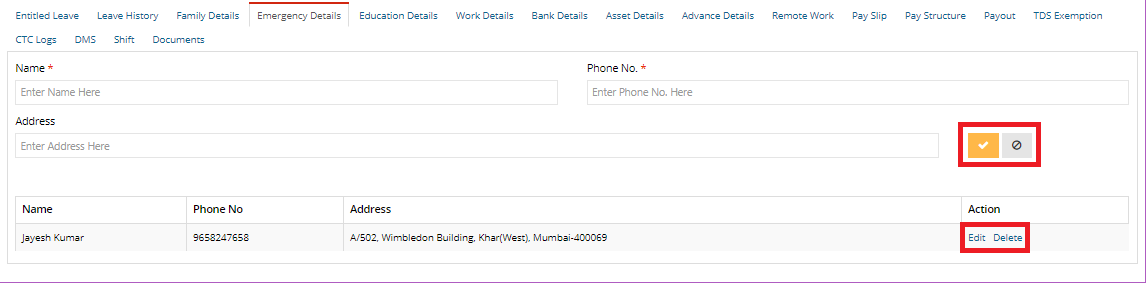
2.2.4 Emergency Details
The employee's emergency details can be added in this section. The user can also view already added emergency details in the table given below.
The entered details can be edited or deleted by the user by clicking on the Edit or Delete buttons in the Action column.
The employee's emergency details are added by entering the Name of the emergency contact, the Phone Number of the emergency contact and their Address.
Fields marked with an asterisk (*) are required and can not be left empty.
The entered details are saved when the user clicks on the ✔ button. The details are cancelled if the user clicks on the 🚫 button.
2.2.5 Education Details
The employee's education details can be added in this section. The user can also view already added education details in the table given below.
The entered details can be edited or deleted by the user by clicking on the Edit or Delete buttons in the Action column.
The employee's education details are added by entering the College Name, the Qualification, the Specializaton of the course, From Date and To Date of the course.
Fields marked with an asterisk (*) are required and can not be left empty.
The entered details are saved when the user clicks on the ✔ button. The details are cancelled if the user clicks on the 🚫 button.

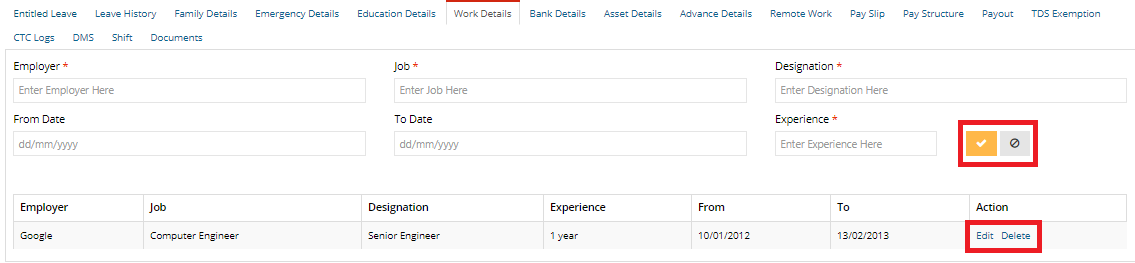
2.2.6 Work Details
The employee's previous work details can be added in this section. The user can also view already added work details in the table given below.
The entered details can be edited or deleted by the user by clicking on the Edit or Delete buttons in the Action column.
The employee's work details are added by entering the Employer, the Job, the Designation of the job, From Date, To Date of the job and the Experience at the job.
Fields marked with an asterisk (*) are required and can not be left empty.
The entered details are saved when the user clicks on the ✔ button. The details are cancelled if the user clicks on the 🚫 button.
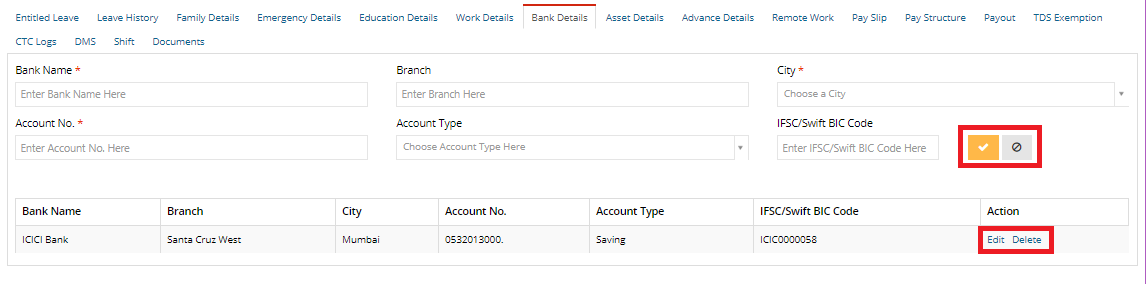
2.2.7 Bank Details
The employee's bank account details can be added in this section. The user can also view already added bank details in the table given below.
The entered details can be edited or deleted by the user by clicking on the Edit or Delete buttons in the Action column.
The employee's bank details are added by entering the Bank Name, the Branch of the bank, the City, the Account Number, Account Type and the IFSC/Swift BIC Code.
Fields marked with an asterisk (*) are required and can not be left empty.
The entered details are saved when the user clicks on the ✔ button. The details are cancelled if the user clicks on the 🚫 button.
2.2.8 Asset Details
The employee's asset details which are provided by the company can be added in this section. The user can also view already added asset details in the table given below.
The entered details can be edited or deleted by the user by clicking on the Edit or Delete buttons in the Action column.
The employee's asset details are added by entering the Item Name, the Serial Number of the asset, and additional Remarks.
Fields marked with an asterisk (*) are required and can not be left empty.
The entered details are saved when the user clicks on the ✔ button. The details are cancelled if the user clicks on the 🚫 button.

2.2.9 Advance Details
The employee's advance / loan payment details can be added in this section. The user can also view already added details in the table given below.
The entered details can be edited or deleted by the user by clicking on the Edit or Delete buttons in the Action column. To view additional details, click on the Details button.
The employee's advance payment details are added by entering the Date of payment, the Amount, the Tenure in months, the Loan Type and additional Remarks.
Fields marked with an asterisk (*) are required and can not be left empty.
The entered details are saved when the user clicks on the ✔ button. The details are cancelled if the user clicks on the 🚫 button.

2.2.10 Remote Work
The employee's remote work details can be added in this section. The user can also view already added details in the table given below.
The entered details can be edited or deleted by the user by clicking on the Edit or Delete buttons in the Action column.
The employee's remote work details are added by entering the Type of Work, the Start Date, the End Date and the Description of the remote work.
Fields marked with an asterisk (*) are required and can not be left empty.
The entered details are saved when the user clicks on the ✔ button. The details are cancelled if the user clicks on the 🚫 button.

2.2.11 Pay Slip
The employee's pay slips can be added in this section. The user can also view previously added pay slips in the table given below.
The user can add a pay slip by clicking on the Add New button and refresh the list by clicking on the Refresh button.
The employee's pay slip details comprise of the Pay Slip Number, Name, Month & Year of the slip, the Amount, the person who approved it and the time of approval.

2.2.12 Pay Structure
The employee's pay structure can be added or modified in this section. The user can also view the employee's existing pay structure.
The user can add a new pay structure by clicking on the Add New button and refresh the list by clicking on the Refresh button.
The employee's pay structure details comprise of the Name and the date from which the structure is effective.

2.2.13 Payout
The employee's payout details can be added in this section. The user can also view the employee's payout details.
The user can add new payout details by clicking on the Add New button and refresh the list by clicking on the Refresh button.
The employee's payout details comprise of the Pay Slip Number the Name, Month and Year of issuing and the Payout Amount.

2.2.14 TDS Exemption
The employee's TDS Exemptions can be added in this section. The user can also view already added details in the table given below.
The entered details can be edited or deleted by the user by clicking on the Edit or Delete buttons in the Action column.
A TDS Exemption is added by entering the Type of Exemption, the Amount, the Financial Year, and additional Remarks.
The user can attach files by clicking on the Attach Files button.
Fields marked with an asterisk (*) are required and can not be left empty.
The entered details are saved when the user clicks on the ✔ button. The details are cancelled if the user clicks on the 🚫 button.

2.2.15 CTC Logs
The employee's cost to the company can be viewed in this section.
The user can refresh the list by clicking on the Refresh button.
The employee's CTC Logs comprise of the CTC in lacs, the user who updated the values and the time at which the details were updated.

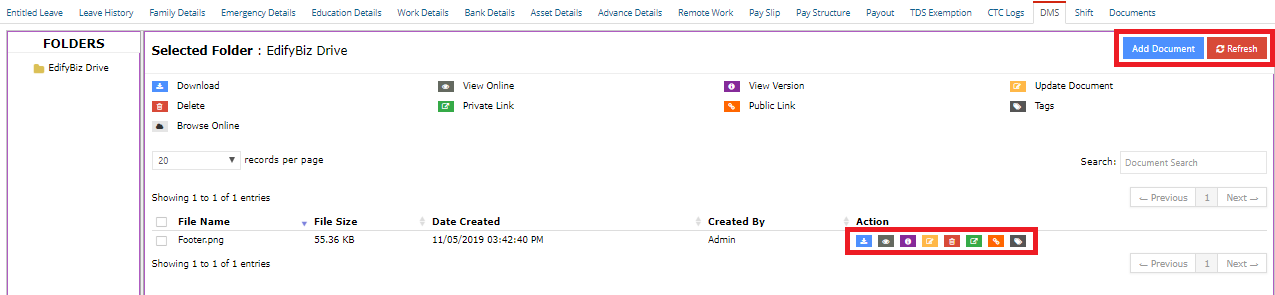
2.2.16 DMS
Users can manage their documents in this section. The user can also view already added documents and take different actions on them.
To add a new document, the user can click on the Add Document button and refresh the list of added documents by clicking on the Refresh button.
The user can navigate through different folders in the Folders column.
The details of a document include the File Name, the Size of the File, the Date of Creation and the user who created the document.
The actions that can be taken on a document include:
- Download: To download the document.
- View Online: This opens the document in a new tab.
- View Version: Allows the user to view previous versions of the document.
- Update Document: Allows the user to revise or update a document.
- Delete: Enables the user to delete a document.
- Private Link: This generates a link to the document. This document is password protected.
- Public Document: This generates a link to the document which can be viewed by anyone who posseses the link.
- Tags: This enables the user to add a tag to the document.
2.2.17 Shift
The employee's shift details can be added in this section. The user can also view already added details in the table given below.
The entered details can be edited or deleted by the user by clicking on the Edit or Delete buttons in the Action column.
The employee's shift details are added by entering the Shift Name and the date from which the shift is effective (W.E.F)
Fields marked with an asterisk (*) are required and can not be left empty.
The entered details are saved when the user clicks on the ✔ button. The details are cancelled if the user clicks on the 🚫 button.

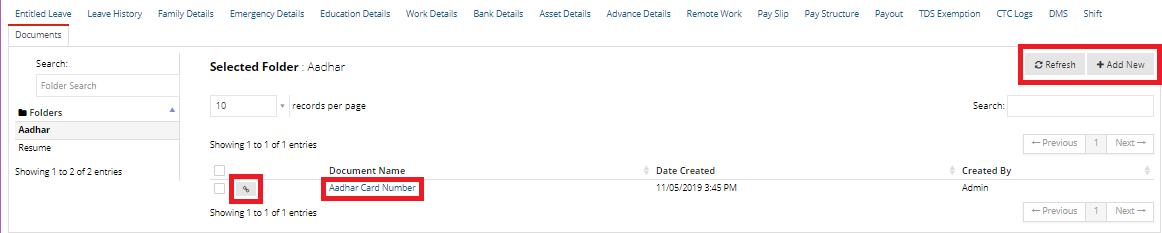
2.2.18 Documents
In this section, the user can upload and view different uploaded documents
The user can navigate through different folders in the Folders column on the left.
Once a folder is selected, the user can view the documents that exist in that folder.
The user can generate a link to the document by clicking on the Get Link button.
To get an overview of a document, the user can click on the name of the document.
To add a new document to the selected folder, the user can click on the Add New button.
When the user clicks on the Add New button, the user is prompted to enter the document details. These details include the Document title, the Folder and Apply Canned Action.
Use Apply Canned Action to generate a document in accordance to a set template.
The user then is able to format the document using the CK Editor.
Upon finishing the above procedure, the user can press the Save button to save the document or cancel the document and go back to the previous screen by pressing the Cancel button.

After clicking on the name of a document, the user can see a preview of the document
Various actions can be taken on the document. These include:
- Mail the document to someone else.
- Revise the document.
- Delete the document.
- Edit the document.
- Print the document.
