EMD
The EMD Module is designed to help an organization manage and keep track of their Earnest Money Deposits or Bank Guarantees. The EMD module is divided into two sub-modules:
- Add
- List
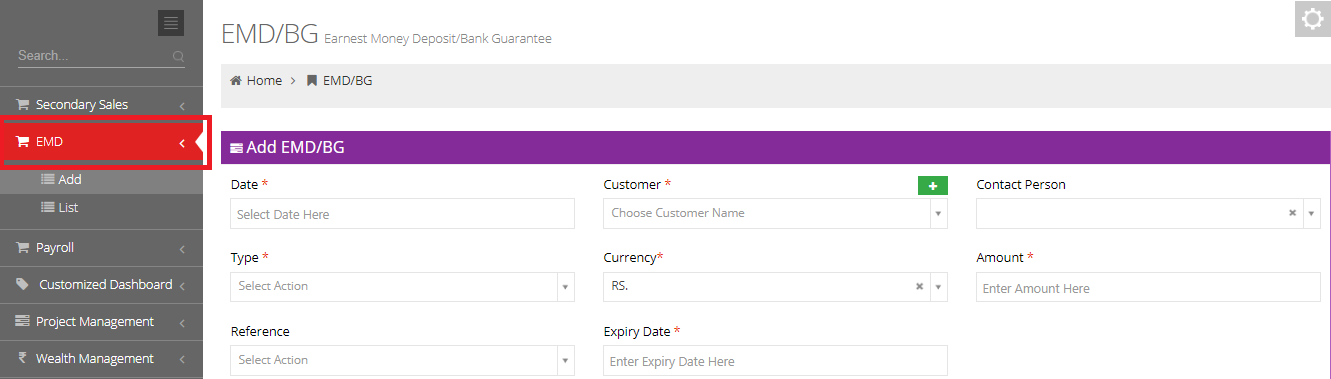
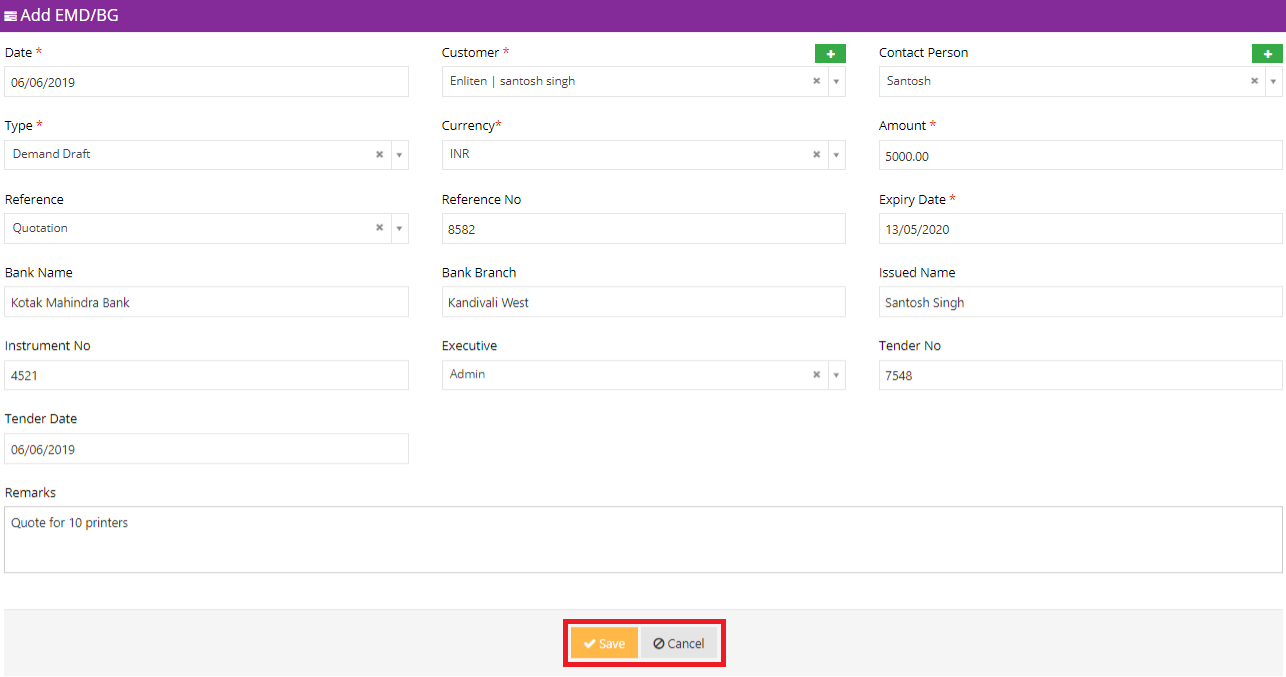
1. Add EMD/BG
This sub-module helps the user enter a record of an EMD paid.
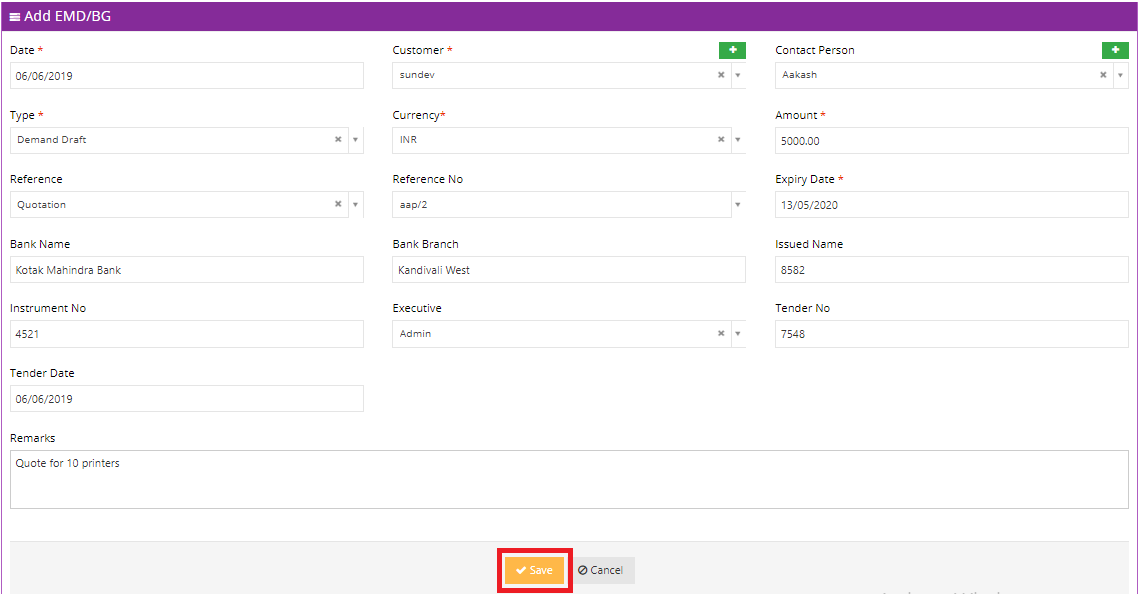
After clicking on Add in the sidebar, the user is prompted to fill a form asking for details of the deposit.
The user is prompted to fill the following fields:
- Date: This field requires the date of payment.
- Customer: This field stores the name of the customer to which the EMD was paid.
- Contact Person: This field stores the contact person of company.
- Type: This field stores the mode of payment of the EMD. This could be a Demand Draft, a Bank Guarantee, a Fixed Deposit or a Security Deposit.
- Currency: This field asks for the currency in which the payment was made.
- Amount: The user is prompted to enter the amount of the EMD in this field.
- Reference: This field requires the user to select the reference of the EMD. It could be a Quotation, a Sales Invoice or an Indent.
- Expiry Date: This field requires the user to enter the expiry date of the EMD.
- Bank Name: This field requires the user to enter the bank via which the EMD payment was made.
- Bank Branch: This field requires the user to enter the branch of the bank via which the EMD payment was made.
- Issued Name: This field stores the name under which the EMD was made.
- Tender Number: This field requires the user to enter the tender number of the quotation.
- Tender Date: This field requires the user to enter the date on which the tender was issued.
- Remarks: The user can store additional remarks against an EMD in this field.
Press the Save button to add the new EMD, press Cancel to discard the changes.
2. List
The user can alter the date range of the listing by using the Date Range dropdown just above the search bar.
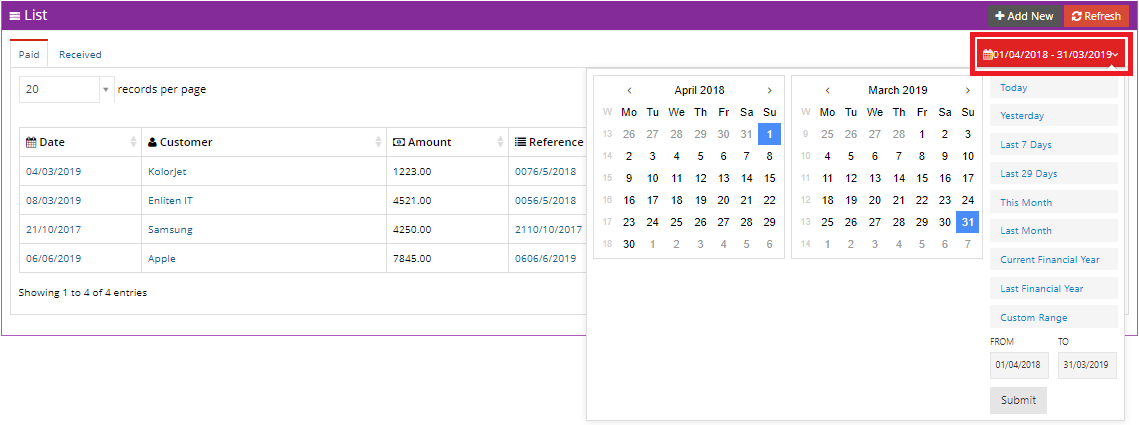

2.1 Paid
The Paid section displays the list of EMDs paid by the company. The user can see the date of payment along with the expiry date of each EMD.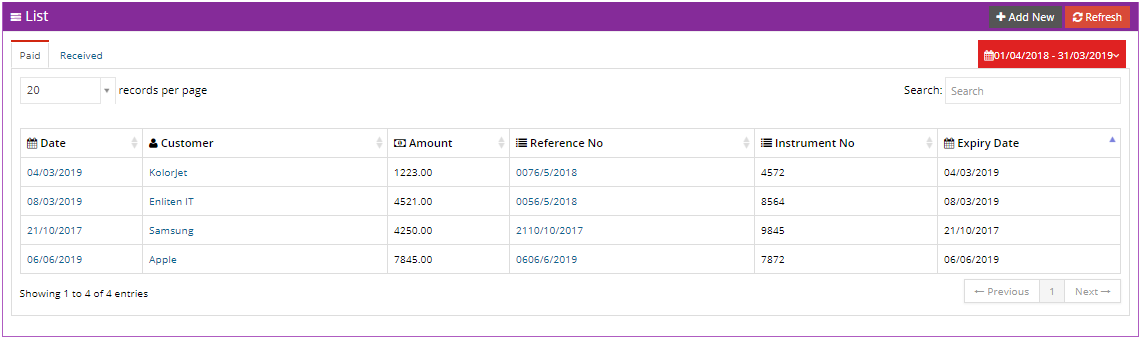
2.2 Received
The Received section displays the list of EMDs for which the deposit has been recovered. The user can see the date of payment of the EMD along with the date at which the EMD was recovered.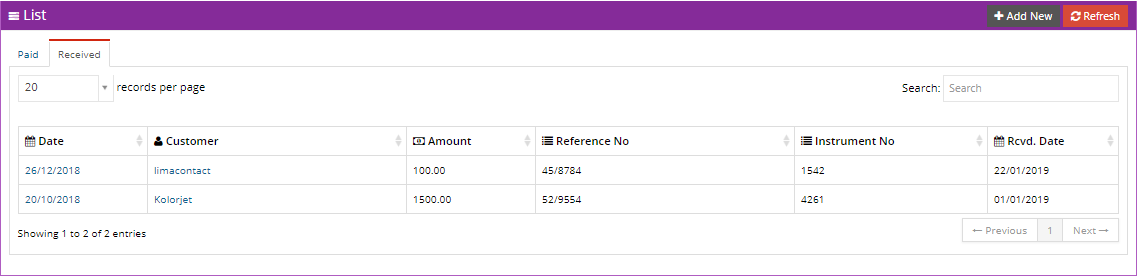
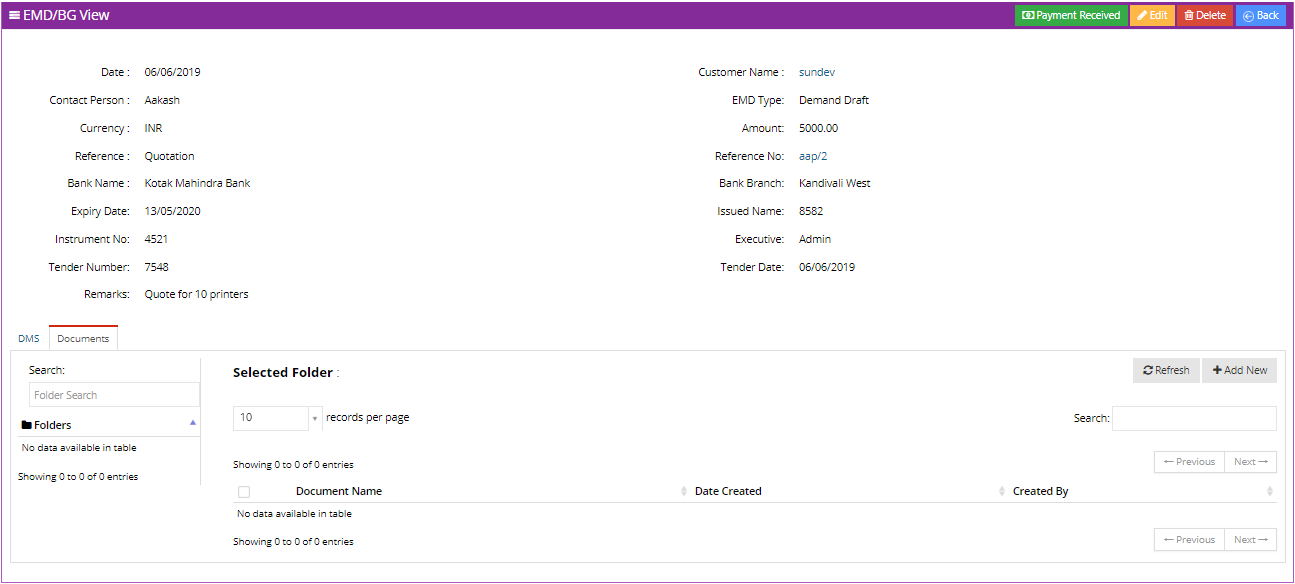
2.3 EMD/BG View
When the user clicks on a date of a record in the EMD list, the EMD view of that particular record is displayed to the user.
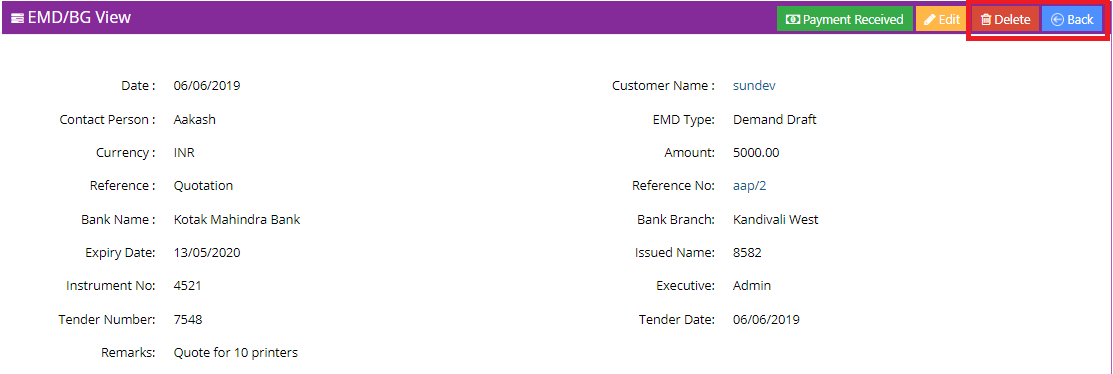
2.3.1 Actions
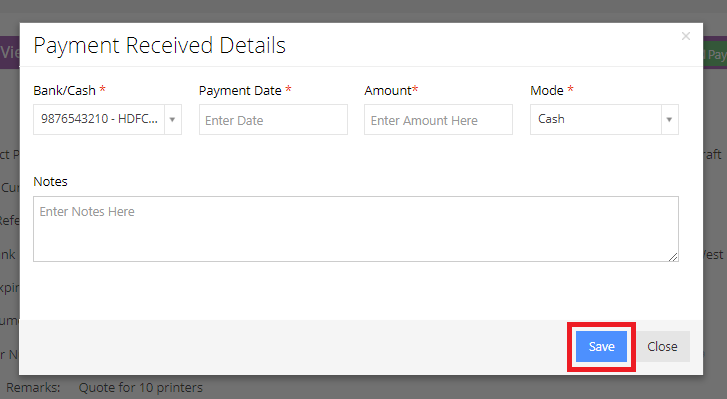
The following actions can be taken on an EMD record:- Payment Received: If the payment against an EMD is received,press the Payment Received button.
The user is then prompted to enter details of the payment. After filling all the details, press the Save button to add the EMD to the received list. Press the Cancel button to discard the changes.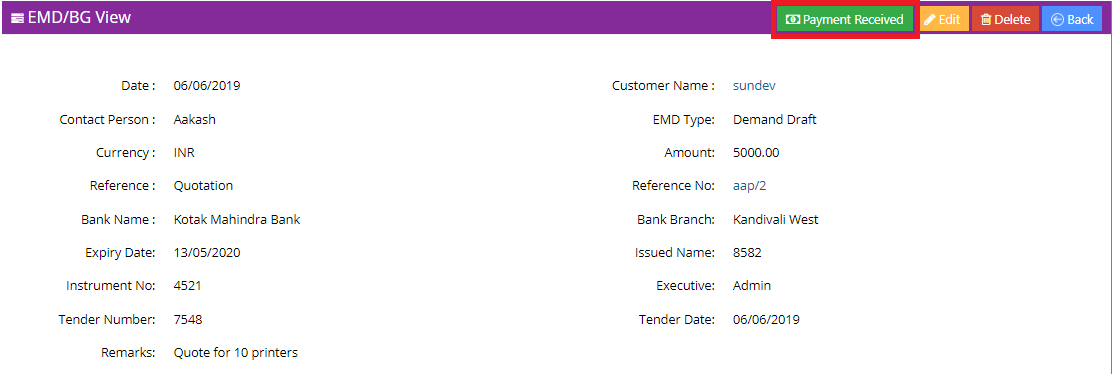
- Edit: To edit the EMD details, press the Edit button.
The user is then prompted to fill a form asking for the new details of the EMD. After entering all the details, press the Save button to save the changes. Press the Cancel button to go back to the view after discarding the changes.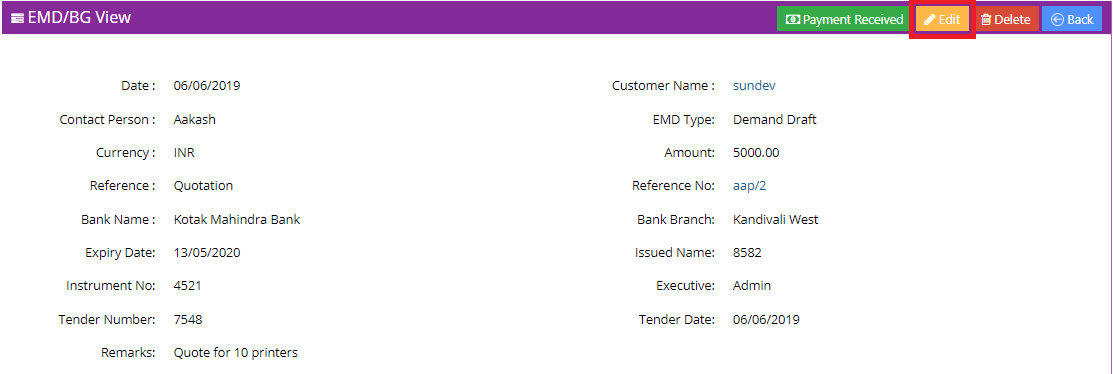
- Delete: To delete the record of the EMD, press the Delete button.
- Back: To go back to the EMD List, press the Back button.
2.3.2 Tabs
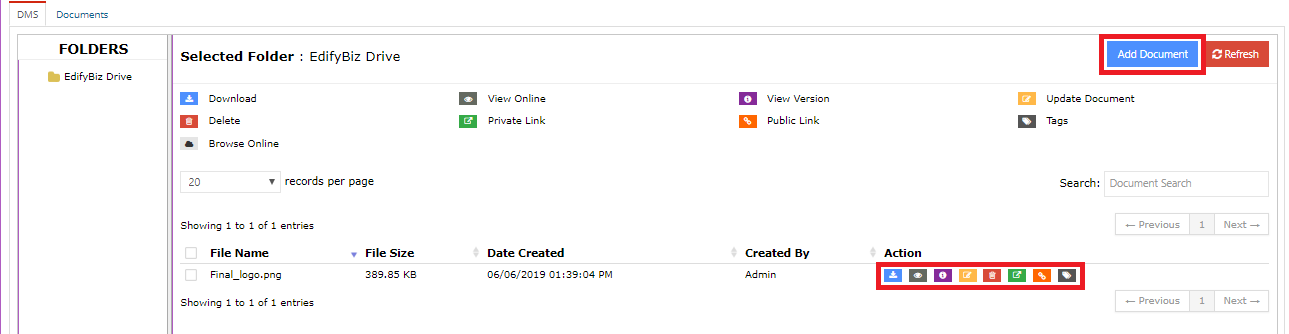
DMSThe user can attach additional documents to an EMD using Edifybiz's DMS functionality.
To add a new document, the user can click on the Add Document button and refresh the list of added documents by clicking on the Refresh button.
The user can navigate through different folders in the Folders column.
The details of a document include the File Name, the Size of the File, the Date of Creation and the user who created the document.
The actions that can be taken on a document include:
- Download: To download the document.
- View Online: This opens the document in a new tab.
- View Version: Allows the user to view previous versions of the document.
- Update Document: Allows the user to revise or update a document.
- Delete: Enables the user to delete a document.
- Private Link: This generates a link to the document. This document is password protected.
- Public Document: This generates a link to the document which can be viewed by anyone who posseses the link.
- Tags: This enables the user to add a tag to the document.
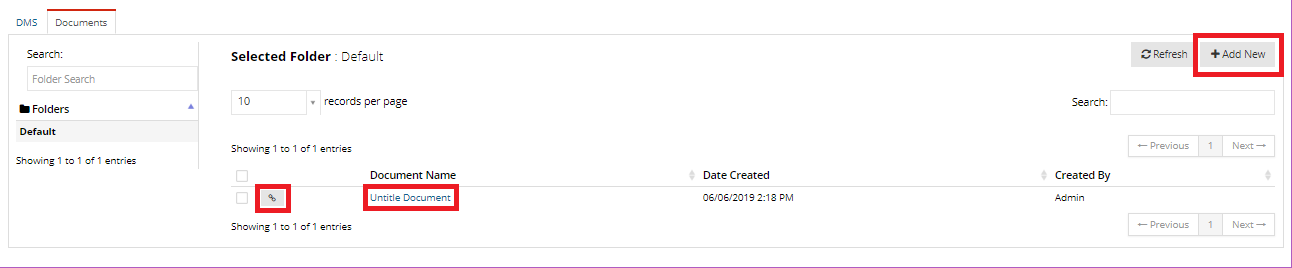
In this section, the user can upload and view different uploaded documents
The user can navigate through different folders in the Folders column on the left.
Once a folder is selected, the user can view the documents that exist in that folder.
The user can generate a link to the document by clicking on the Get Link button.
To get an overview of a document, the user can click on the name of the document.
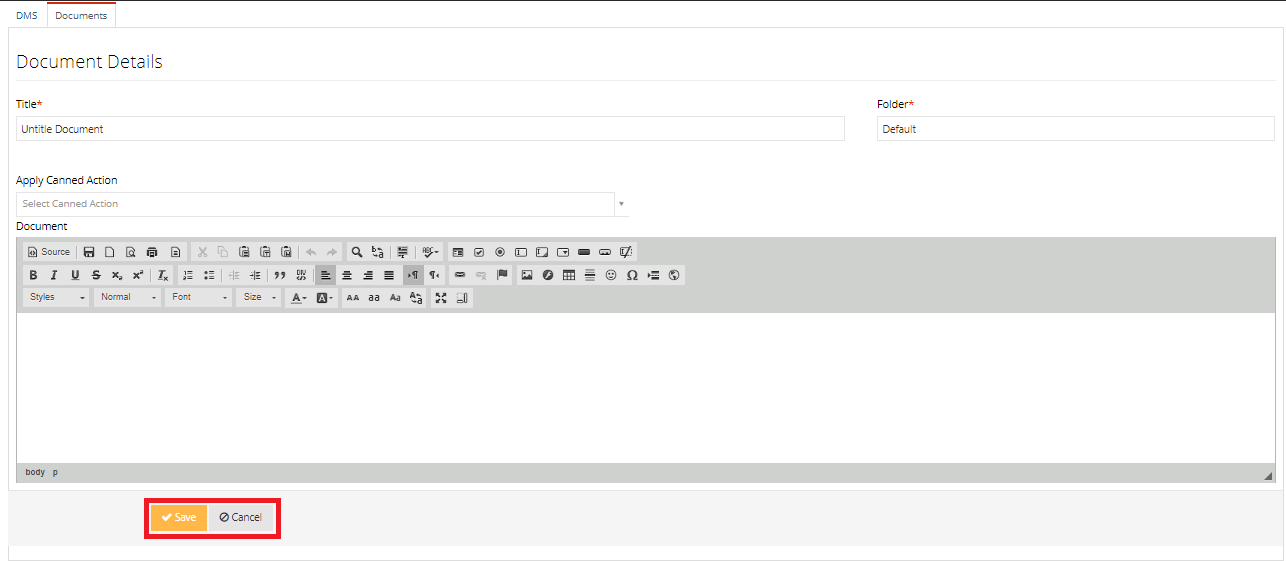
To add a new document to the selected folder, the user can click on the Add New button.
When the user clicks on the Add New button, the user is prompted to enter the document details. These details include the Document title, the Folder and Apply Canned Action.
Use Apply Canned Action to generate a document in accordance to a set template.
The user then is able to format the document using the CK Editor.
Upon finishing the above procedure, the user can press the Save button to save the document or cancel the document and go back to the previous screen by pressing the Cancel button.
After clicking on the name of a document, the user can see a preview of the document
Various actions can be taken on the document. These include:
- Mail the document to someone else.
- Revise the document.
- Delete the document.
- Edit the document.
- Print the document.
