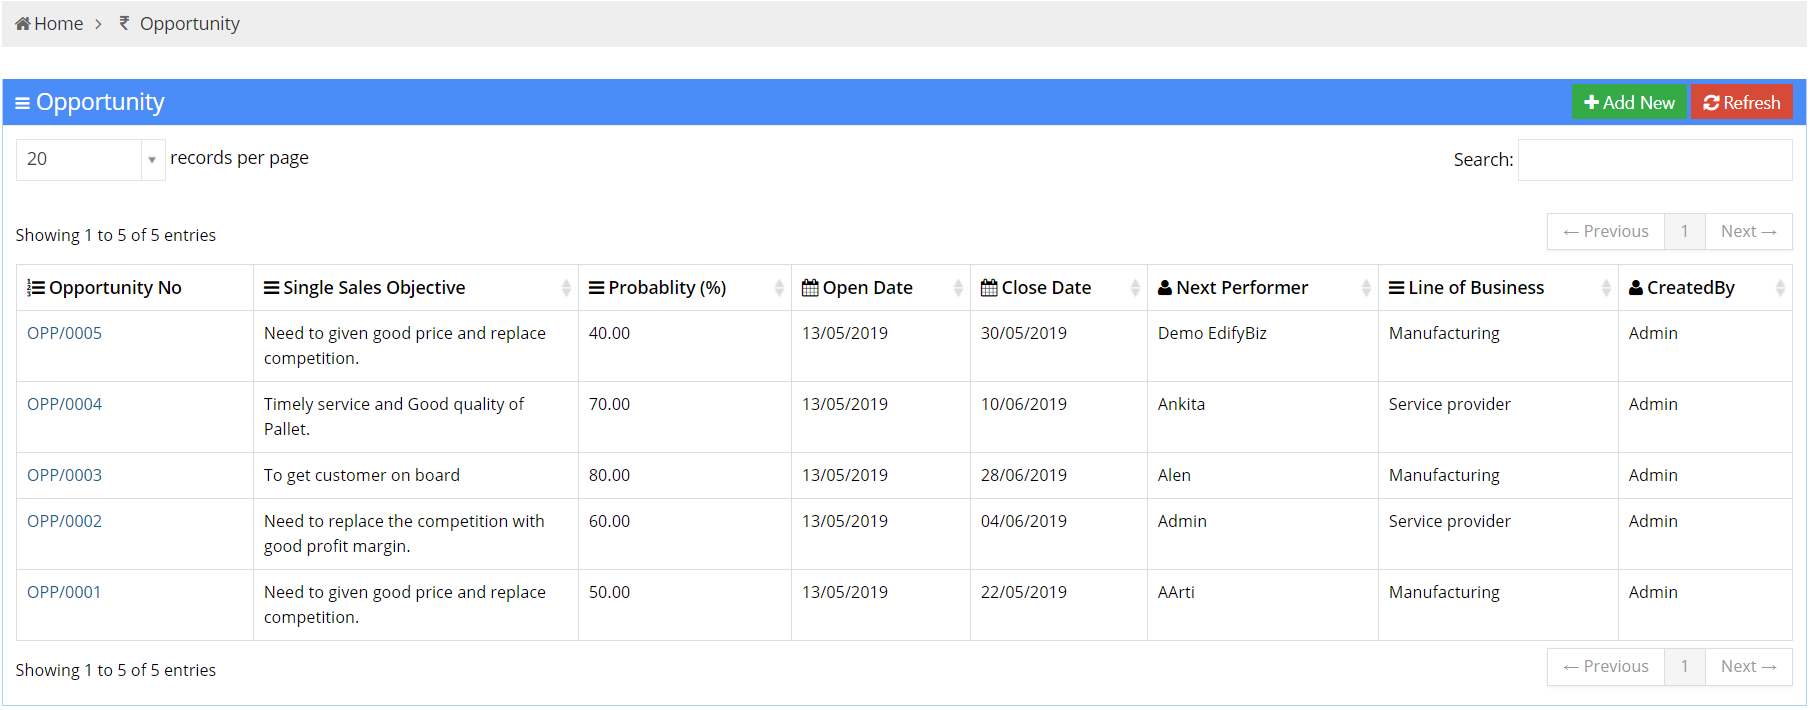
The Opportunity module helps an organization manage its opportunities in an efficient manner and help get better success rates.
- Opportunity No :This column displays the Opportunity Number.
- Single Sales Objective:This column displays the Single Sales Objective of the opportunity.
- Probability:This column displays the Probability of success of the opportunity .
- Open Date : This column displays the Open Dateof the opportunity.
- Close Date : This column displays the Close Dateof the opportunity.
- Next Performer:This column displays the Next Performerof the opportunity.
- Line of business:This column displays the what type of business the company has.
- Created By :This column displays the user who created that opportunity.
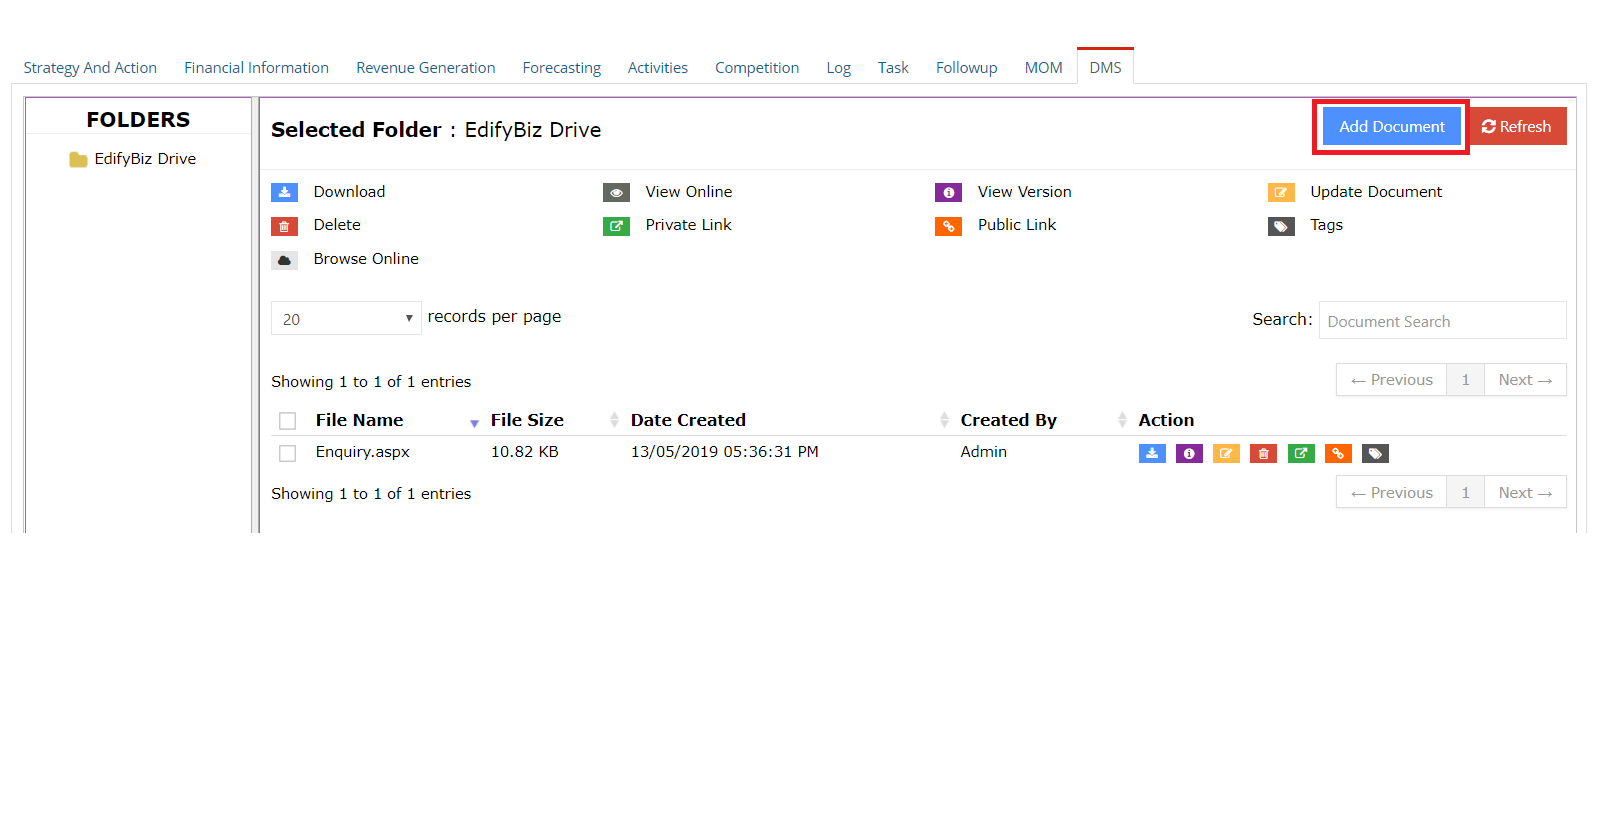
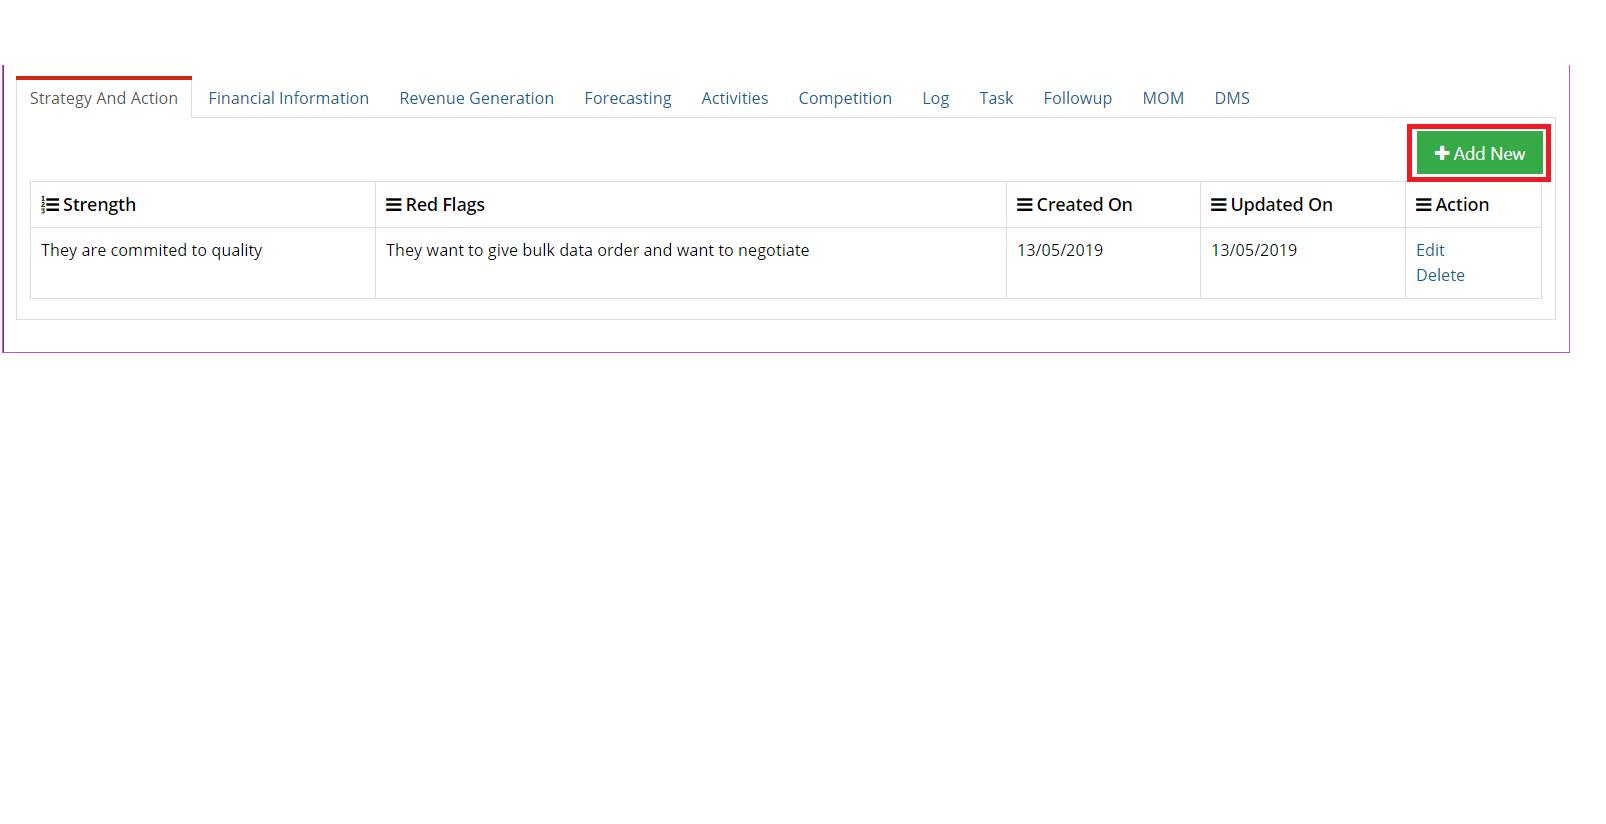
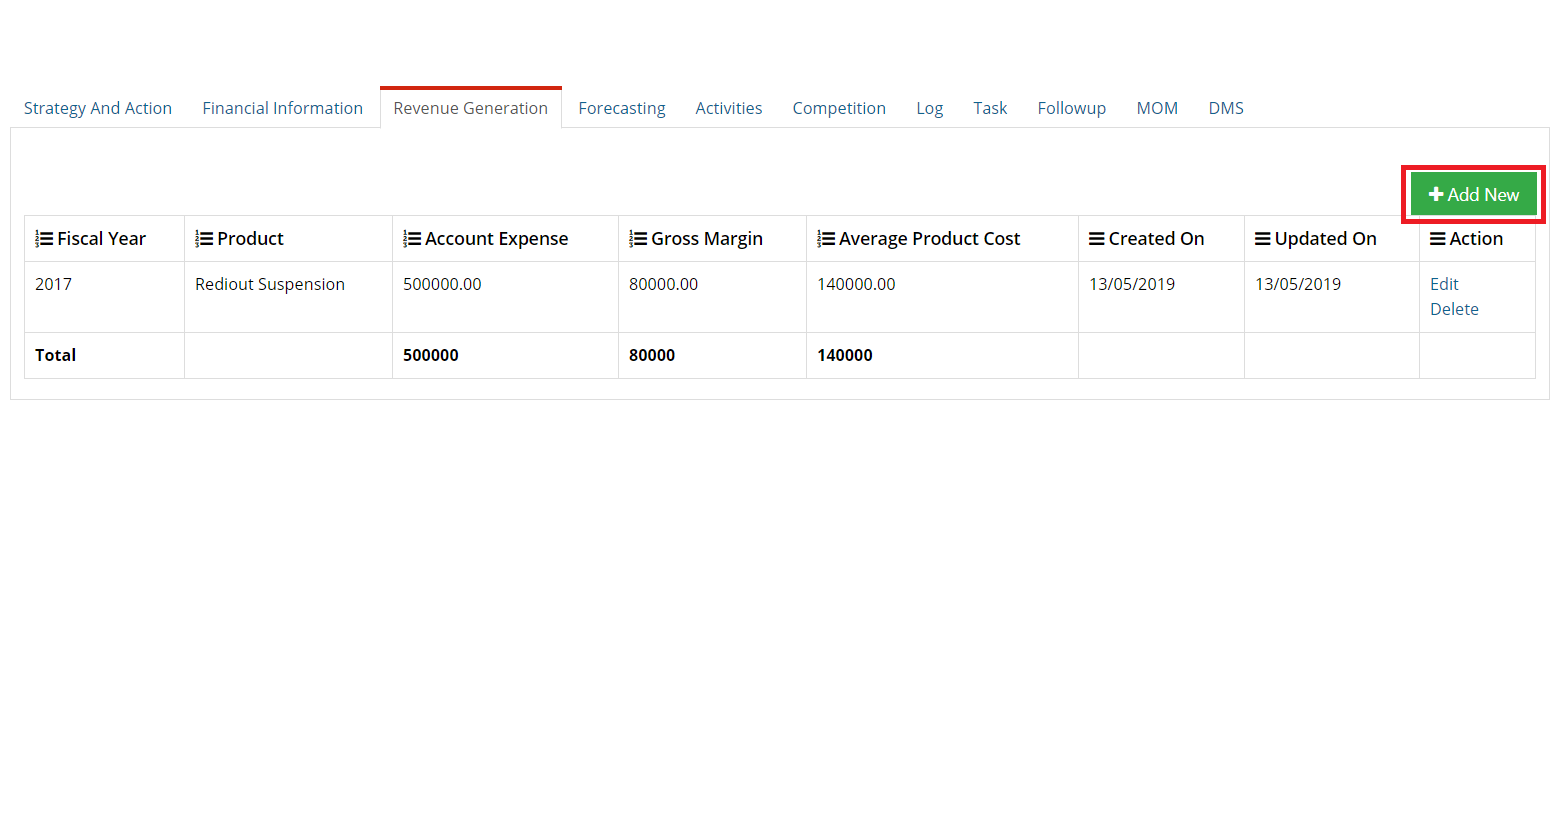
Add New
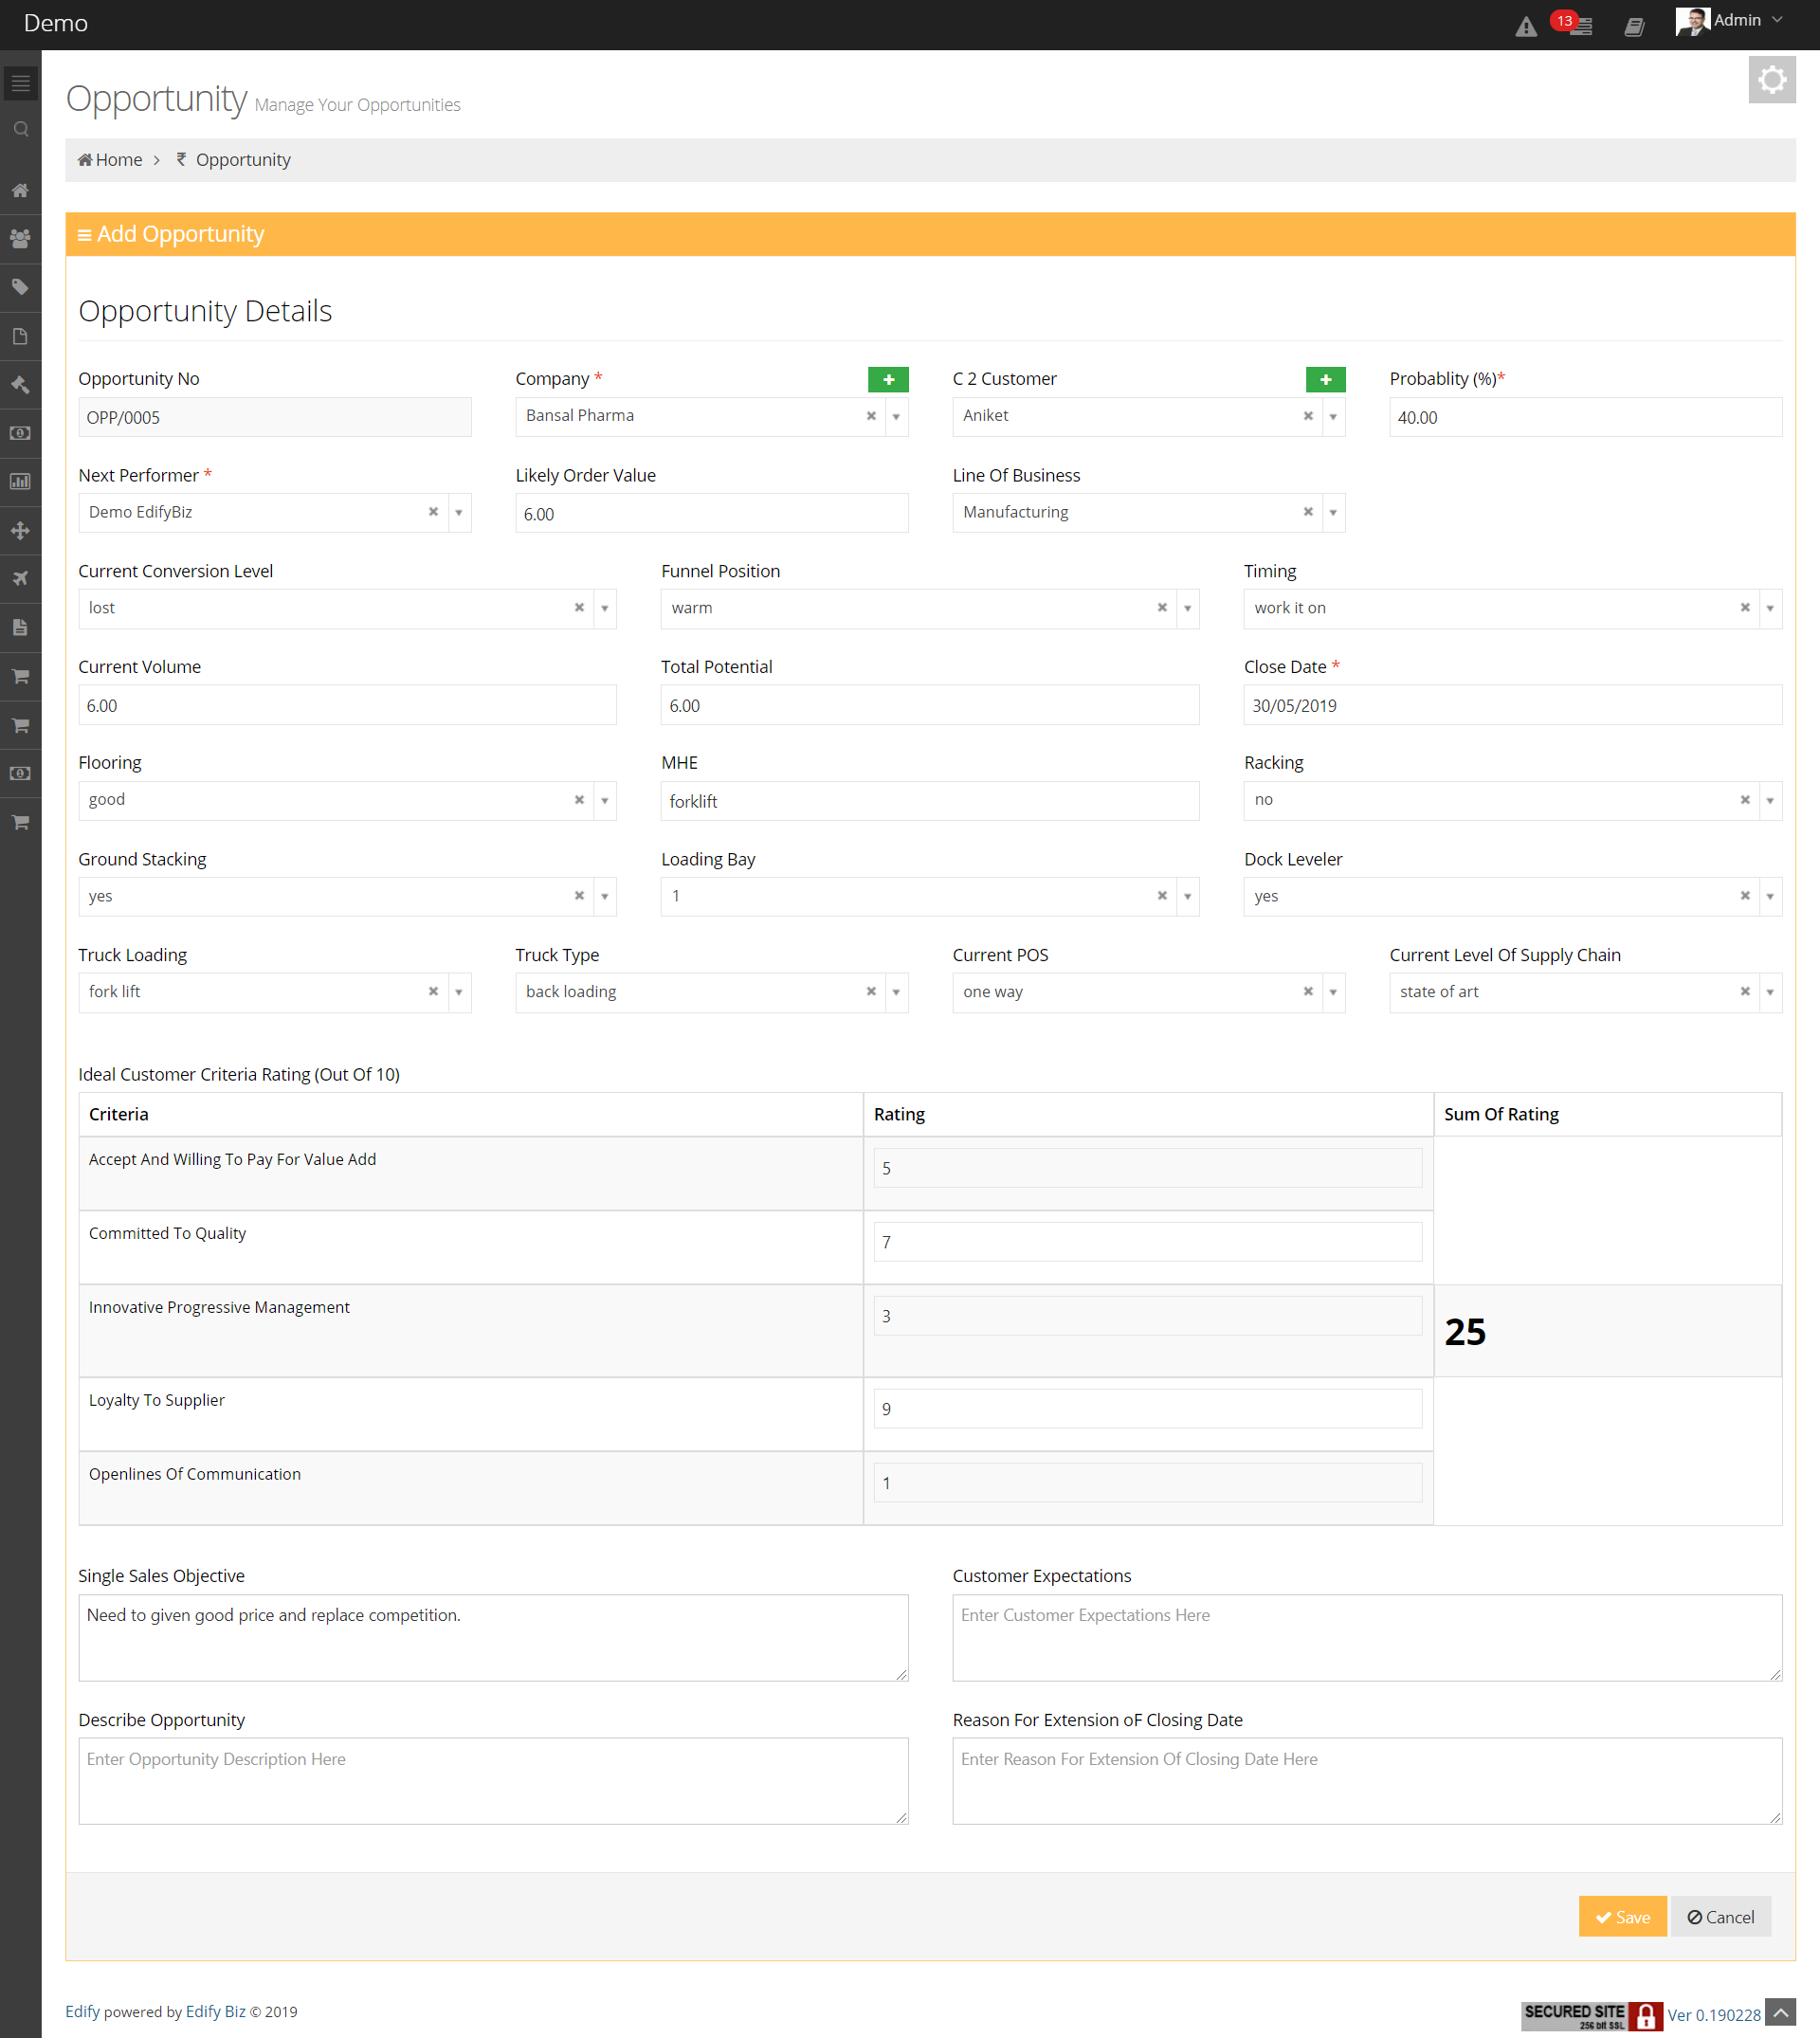
You can add a new Opportunity by clicking on the Add New button, which is located in the top right corner of the Opportunity page.

Fields marked with an asterisk (*) are required and can not be left empty.
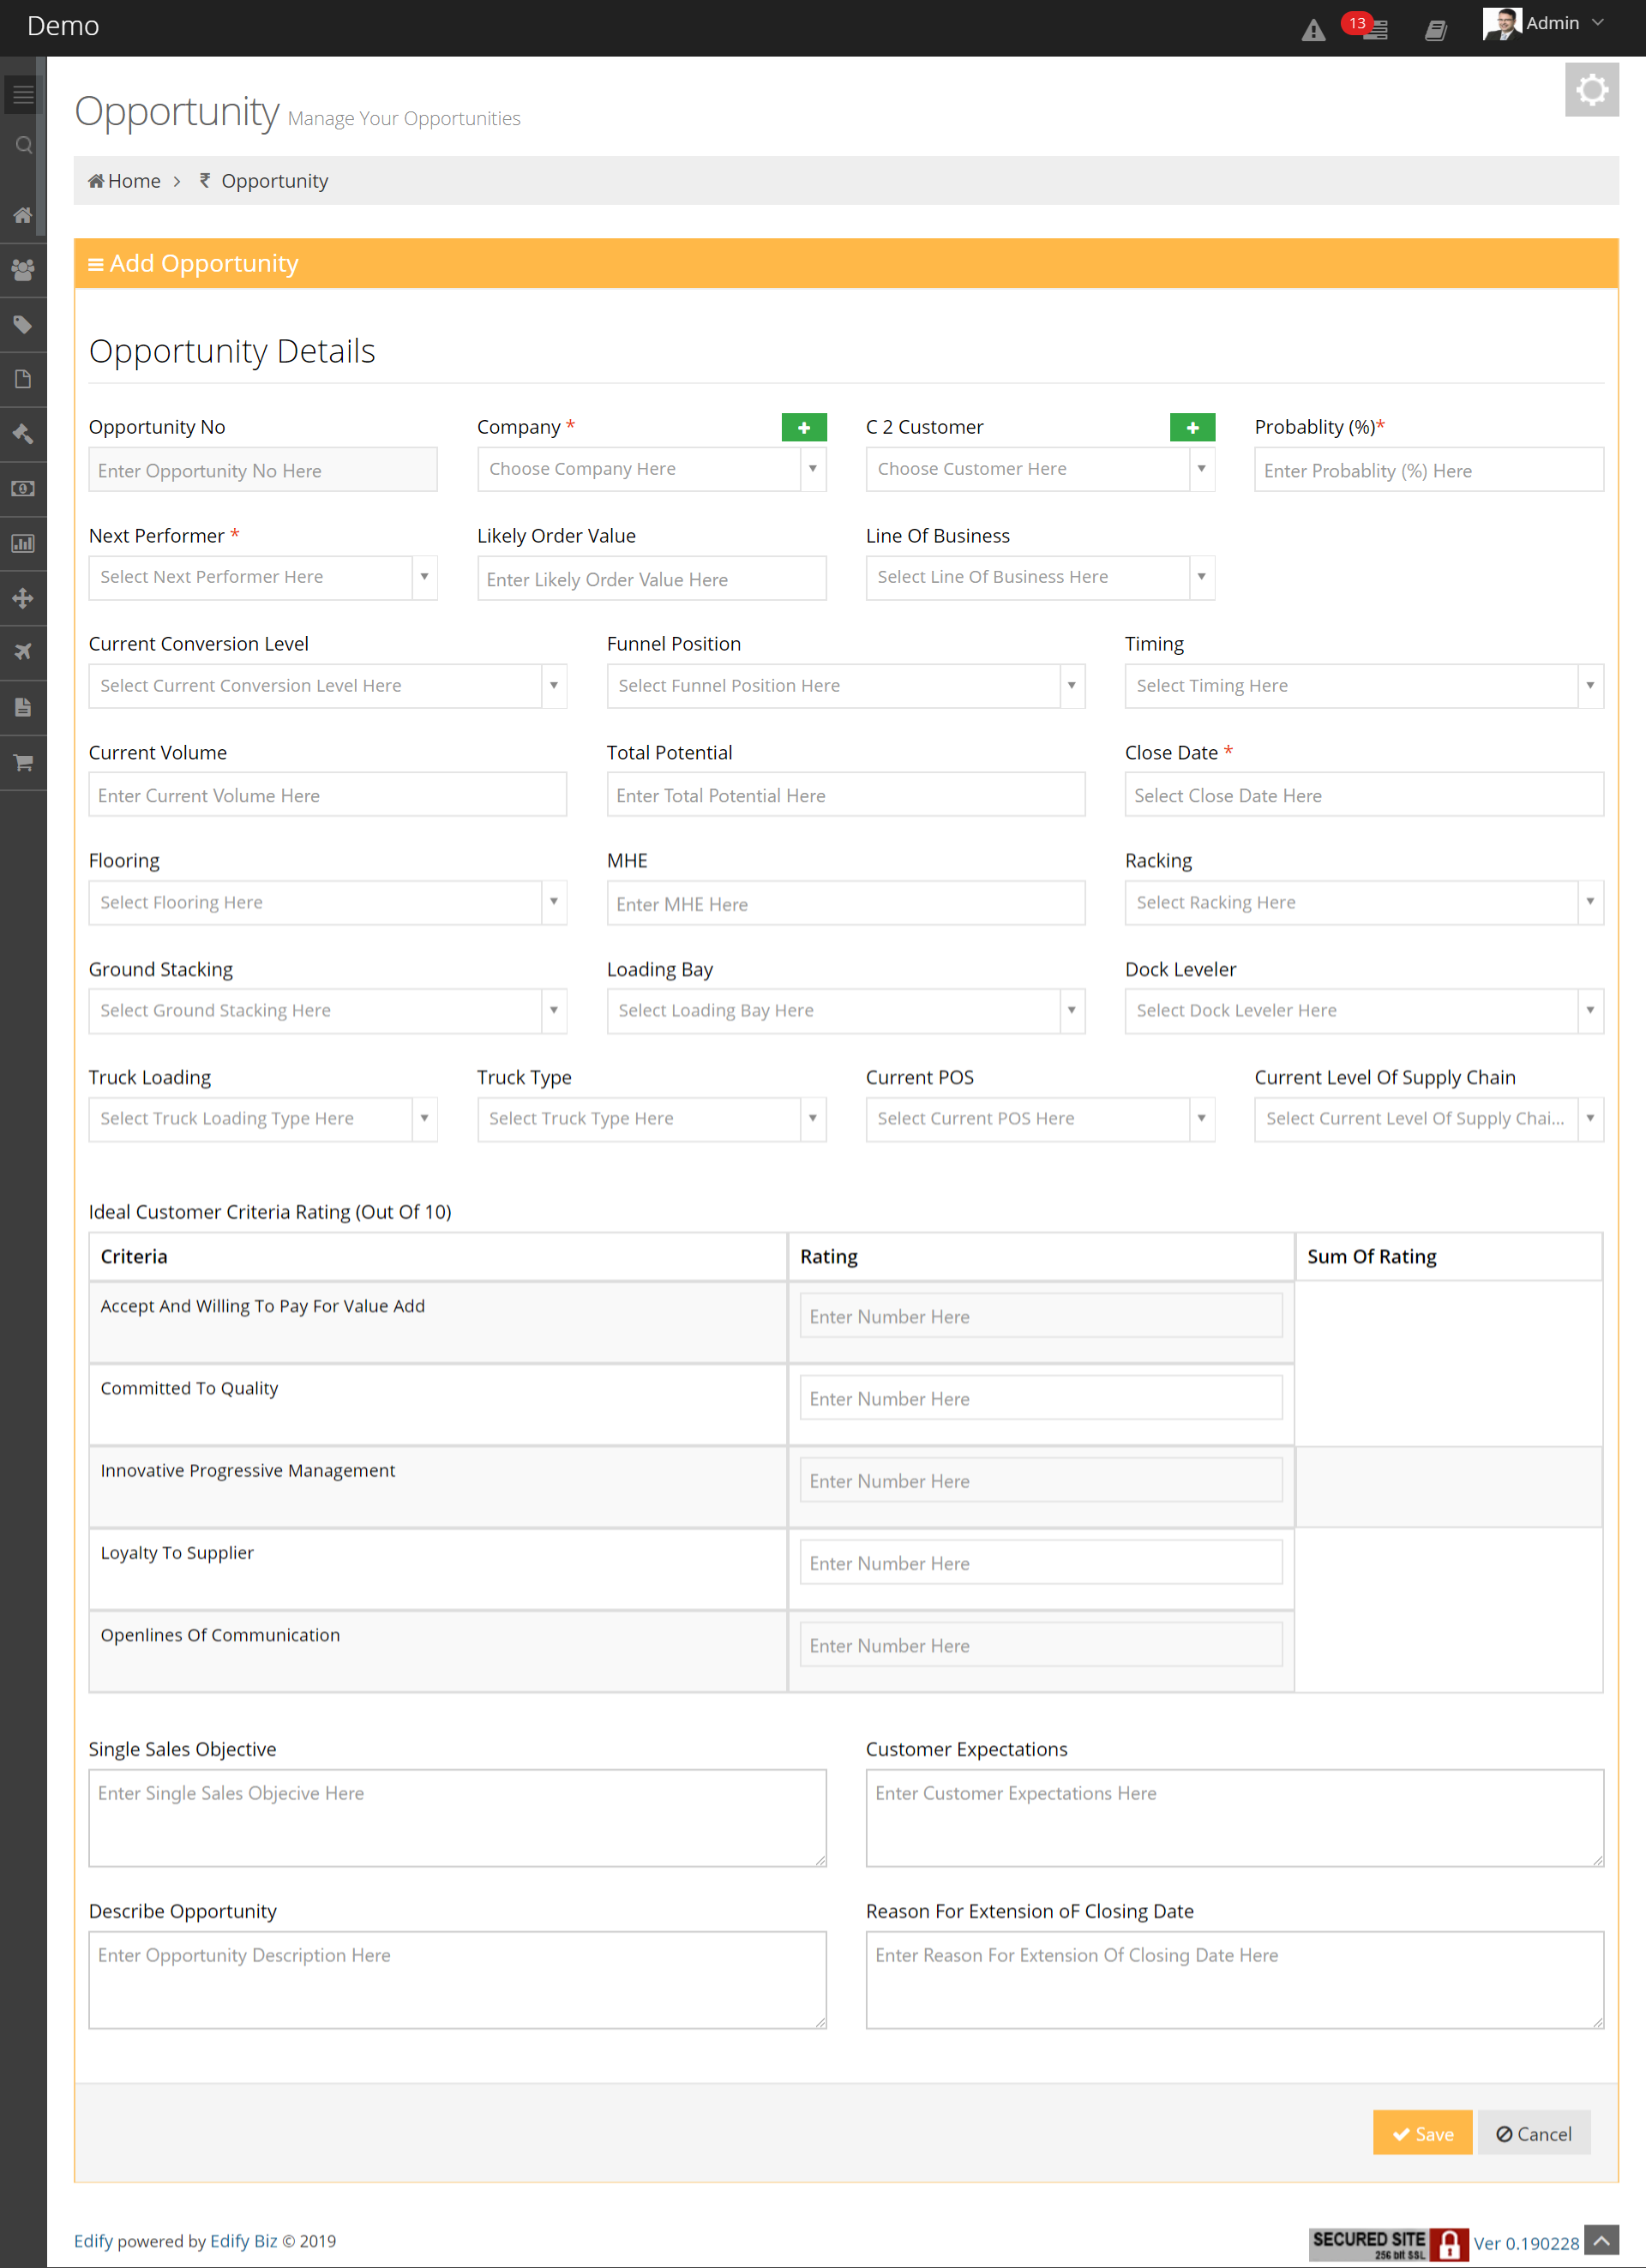
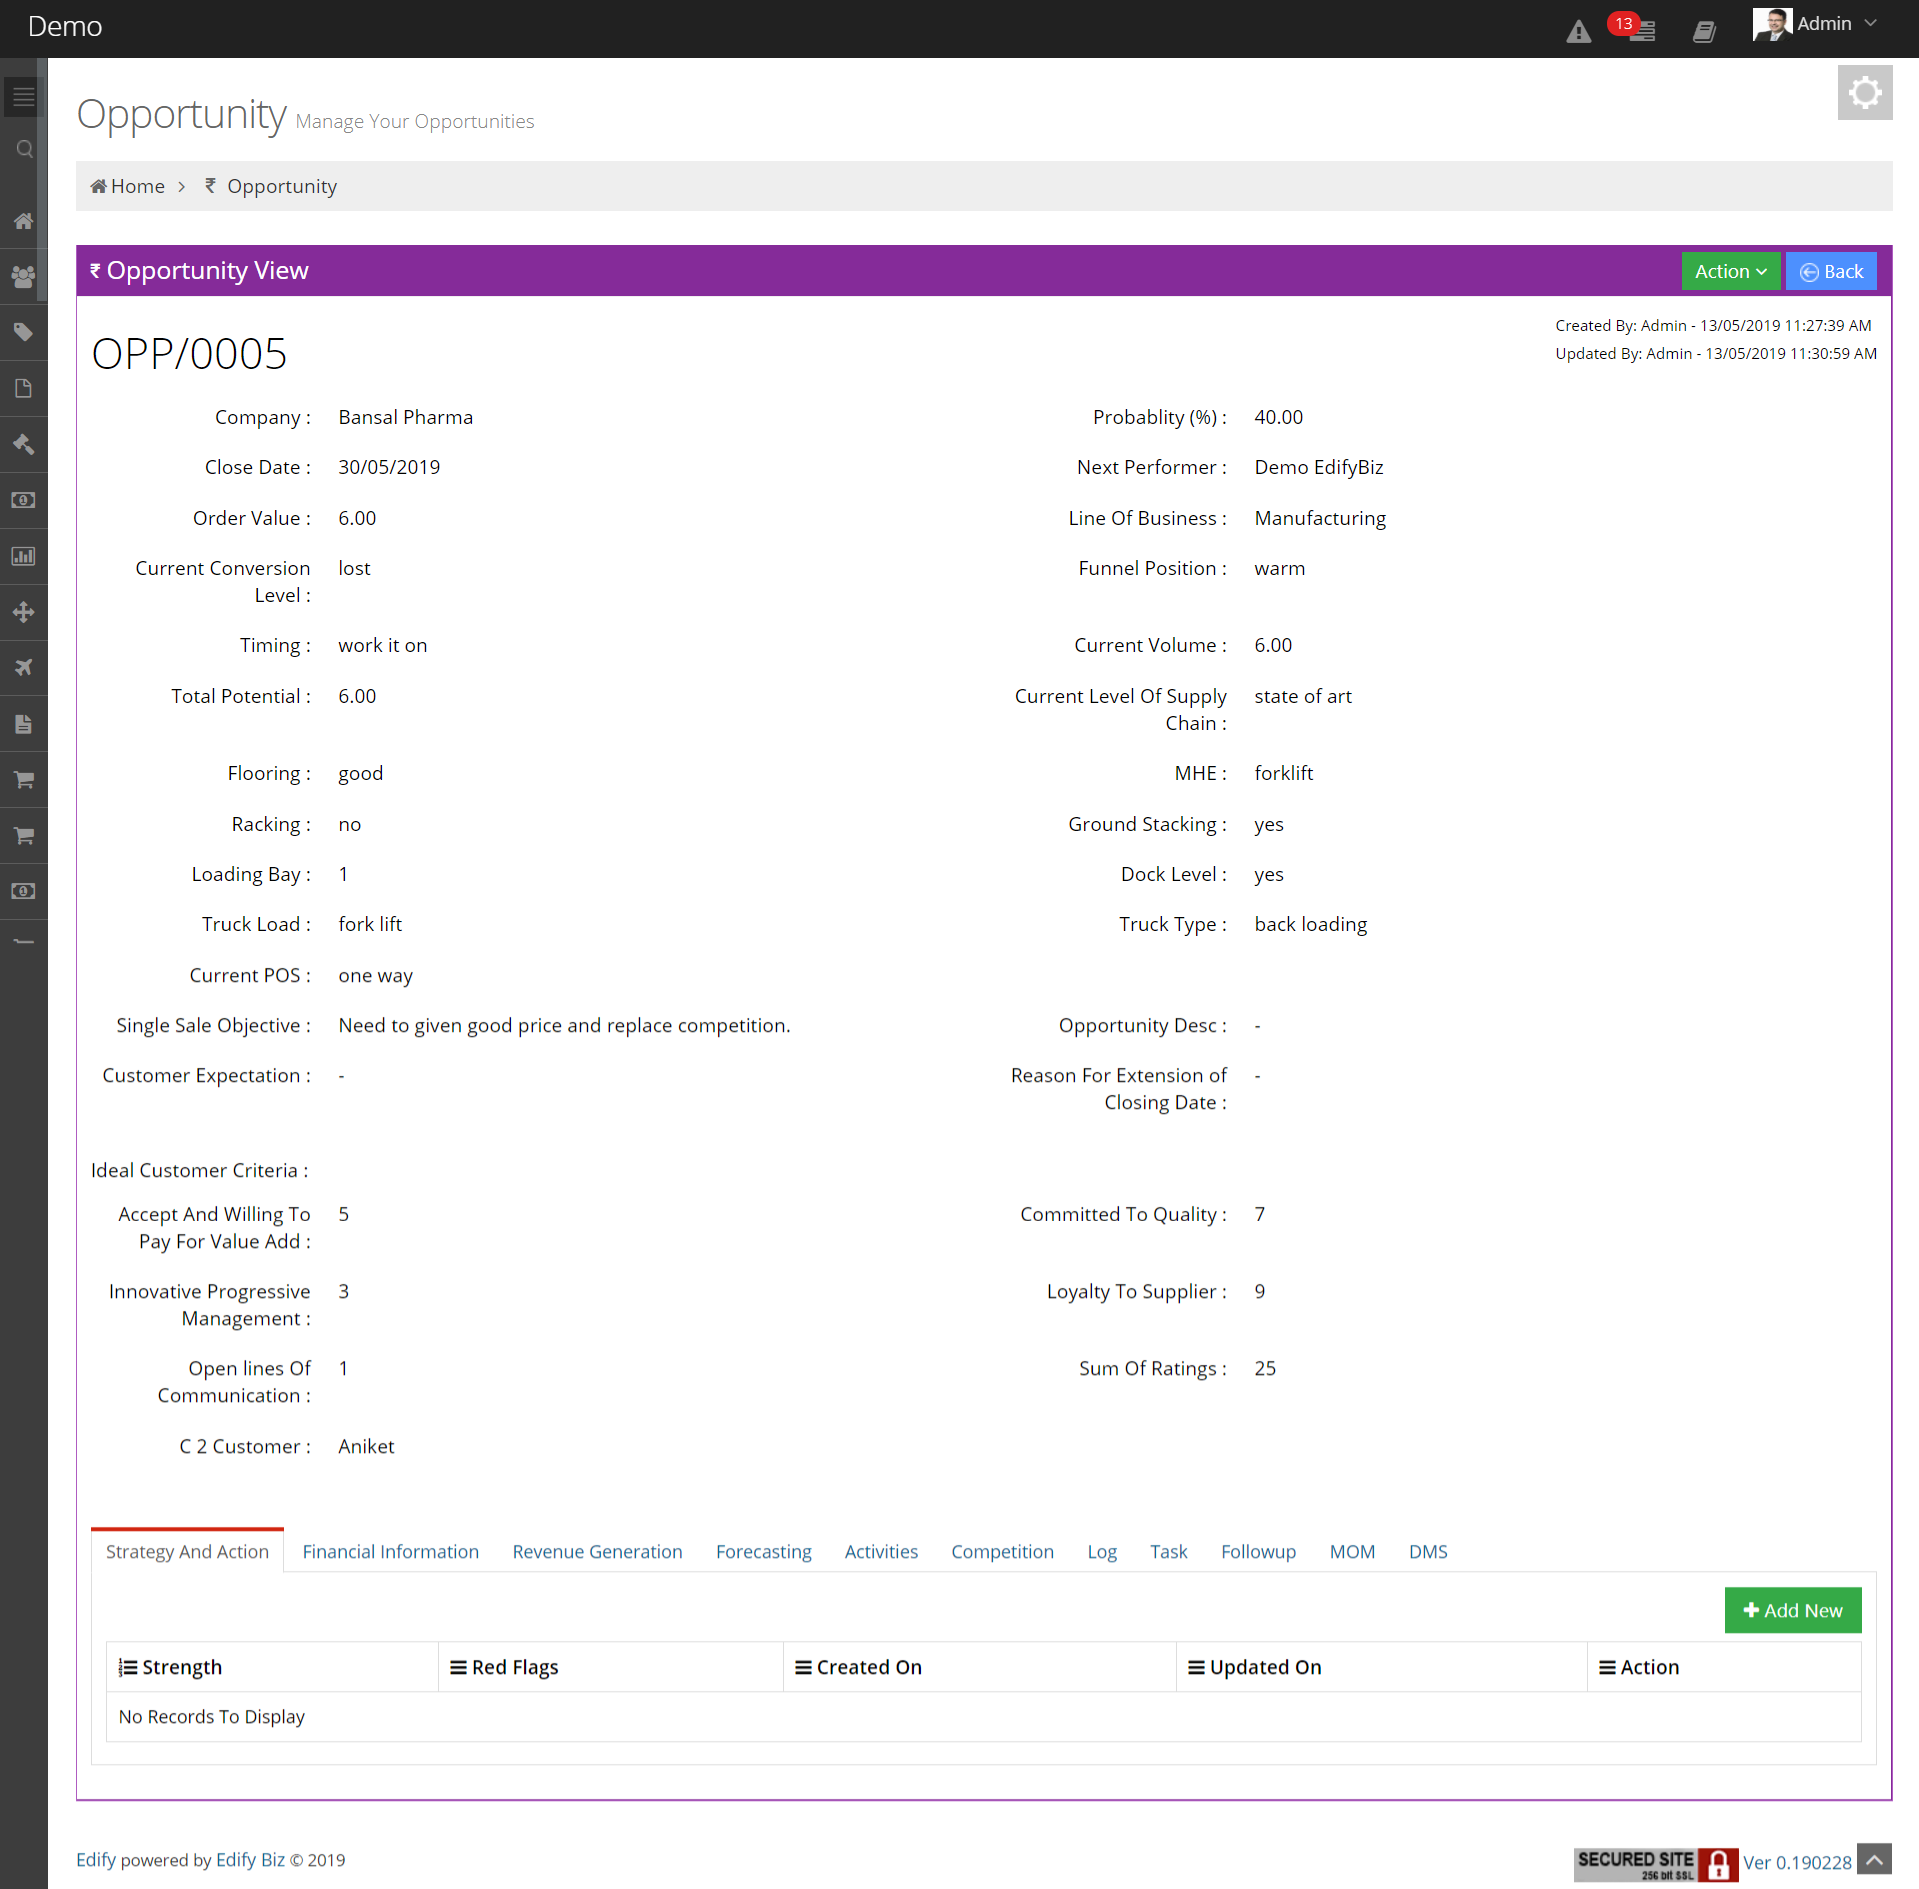
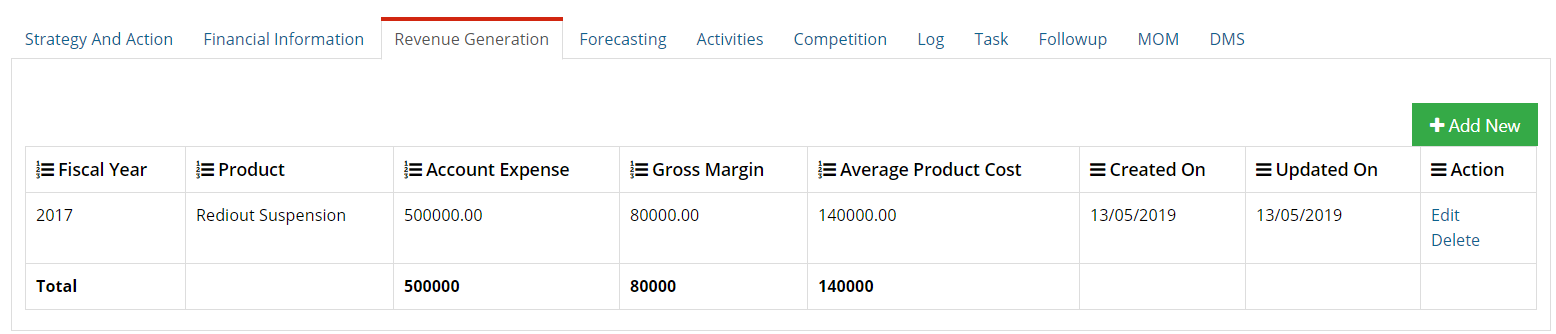
Opportunity View
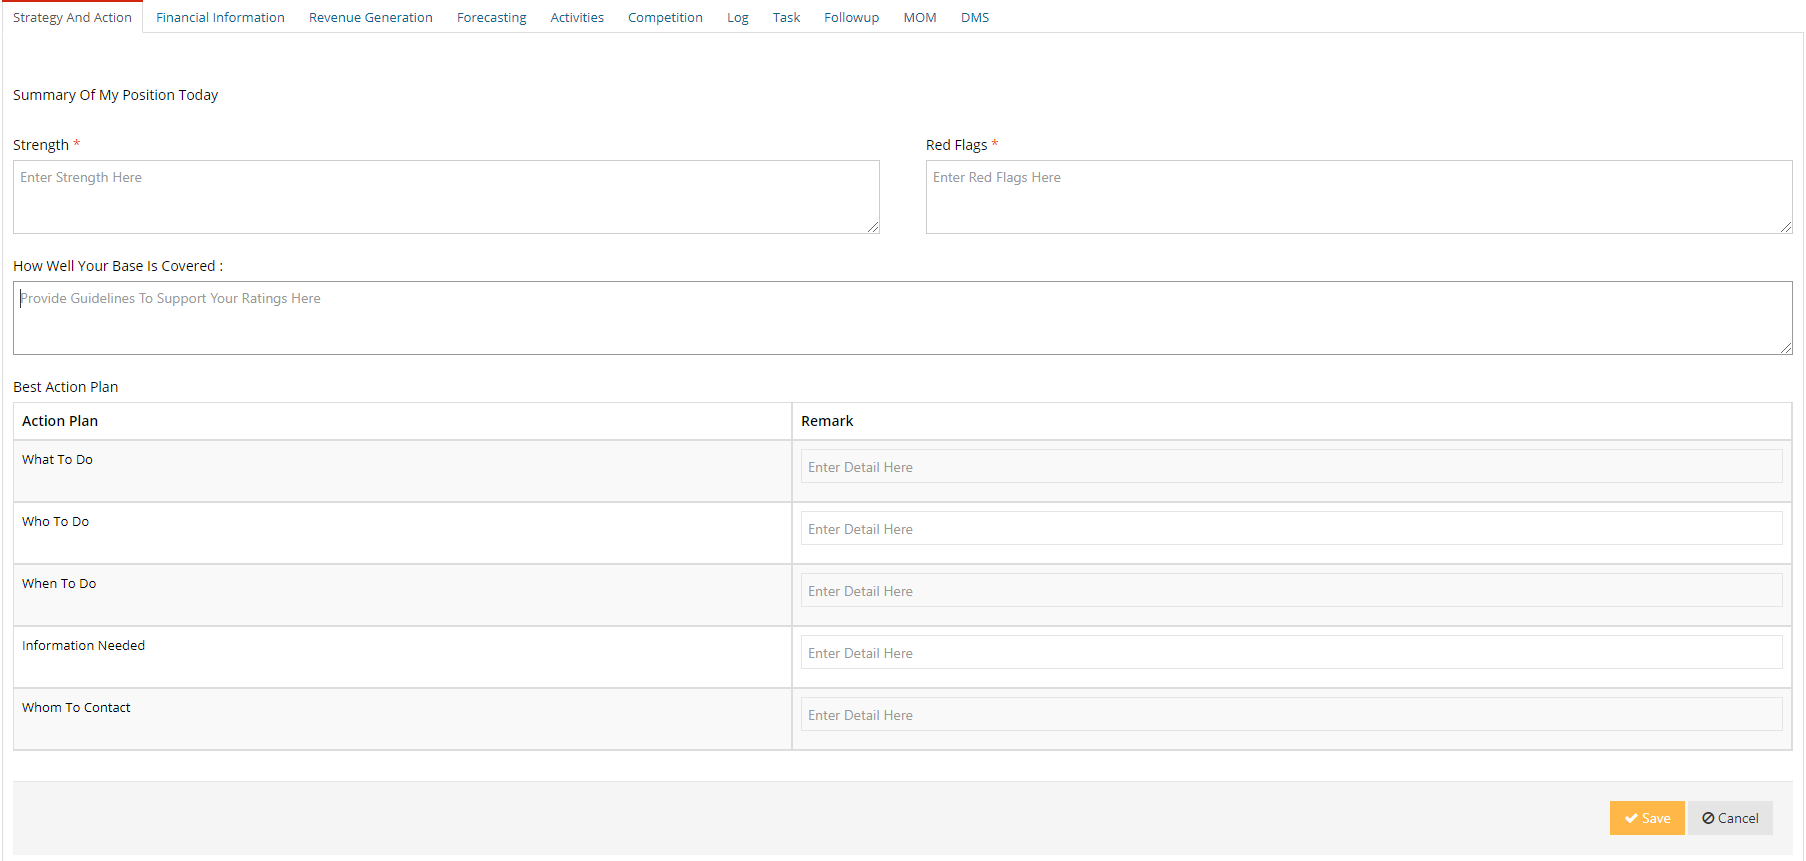
The Opportunity view displays all the entered details pertaining to the given opportunity. An example of this is depicted in the below image.
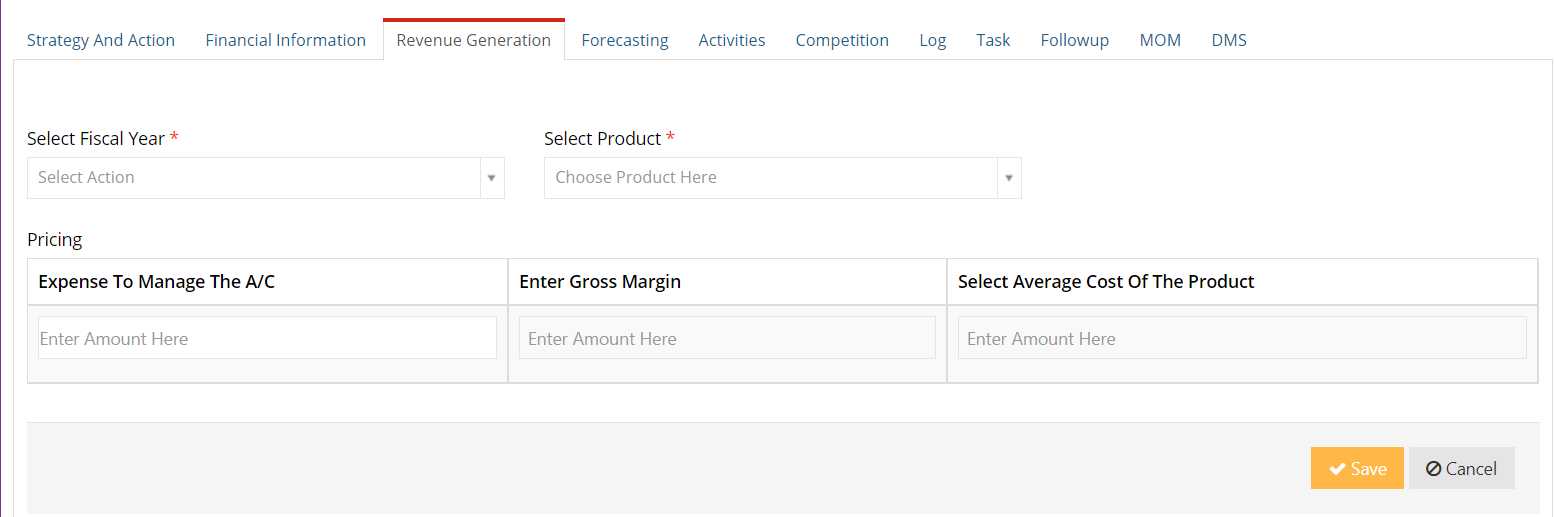
The user is now displayed a form with fields filled with existing data. The user can now make changes to the information before pressing the Save button in order to confirm the changes made. Press cancel to discard the changes and go back to the previous page.

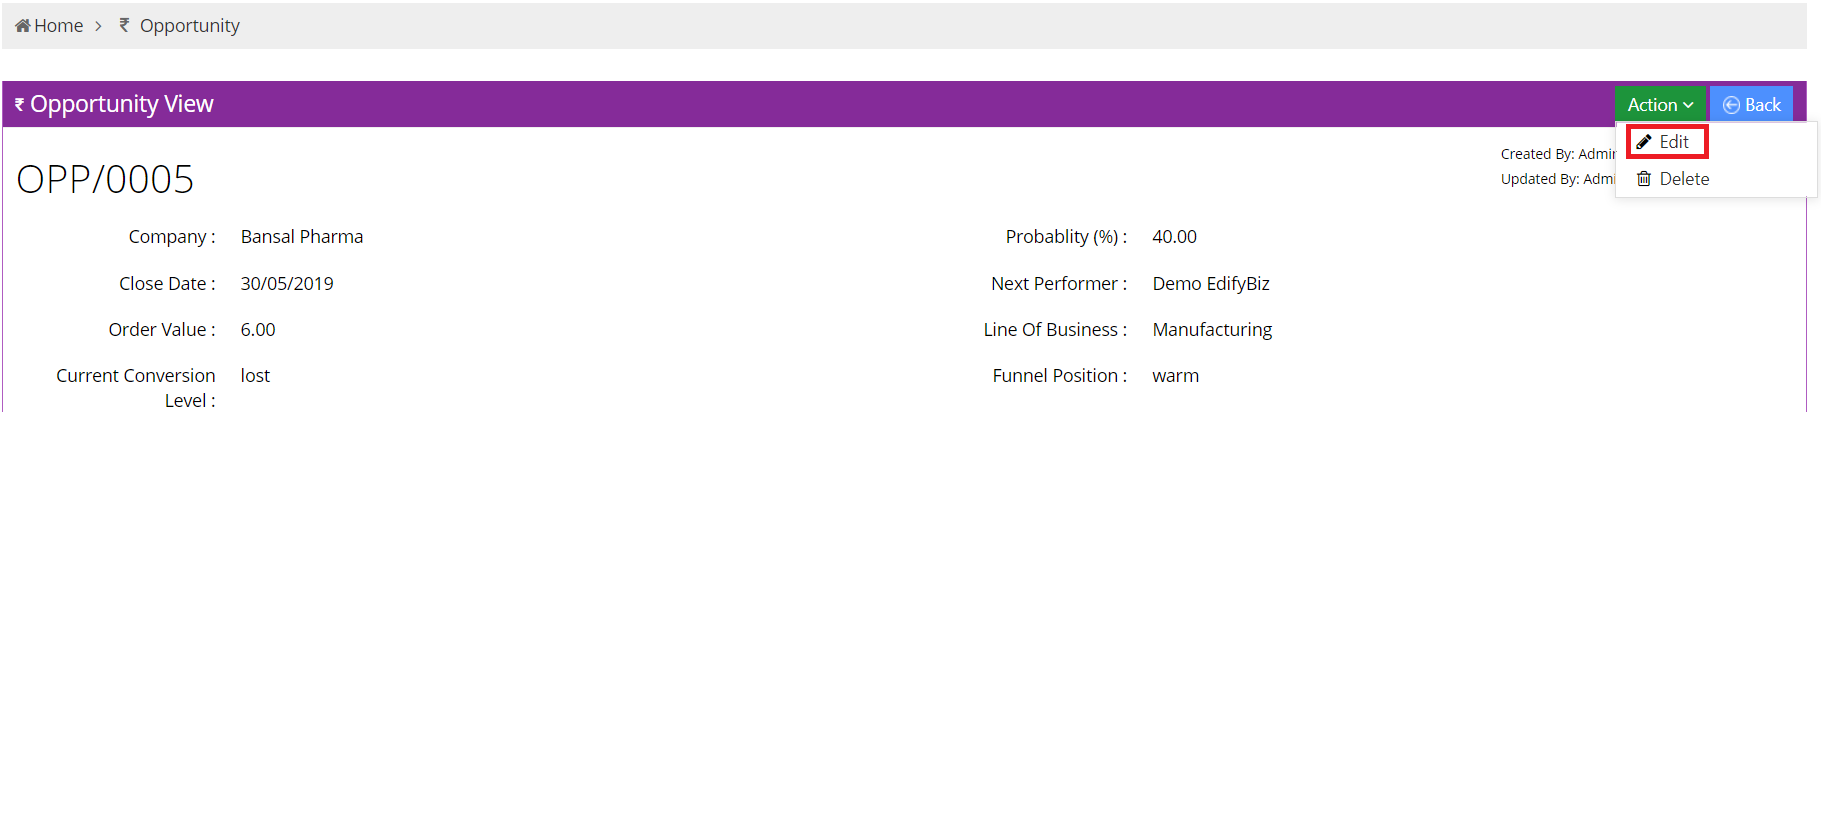
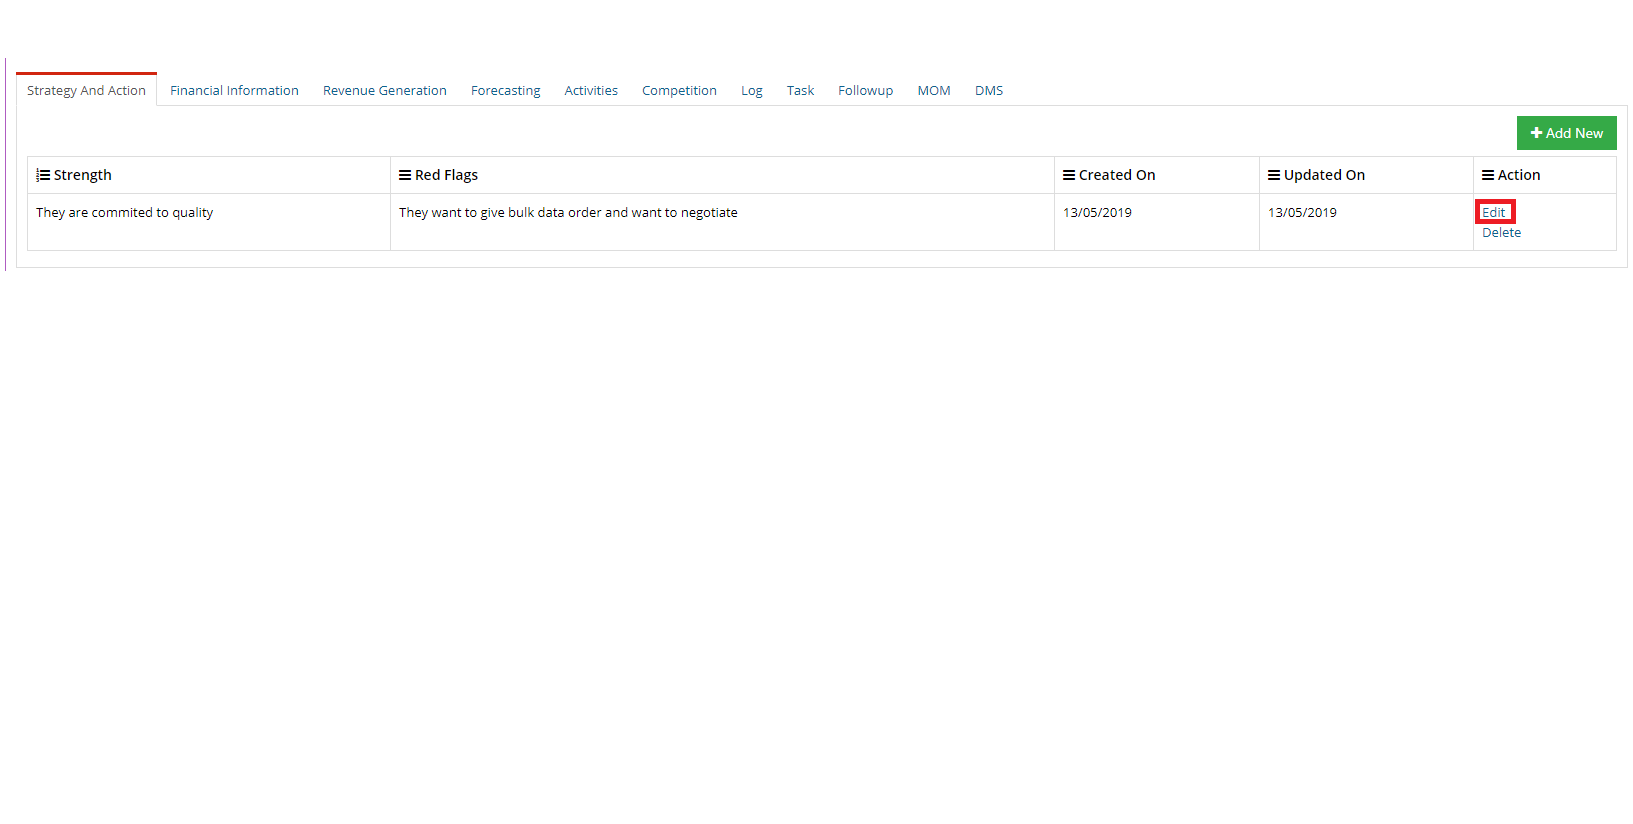
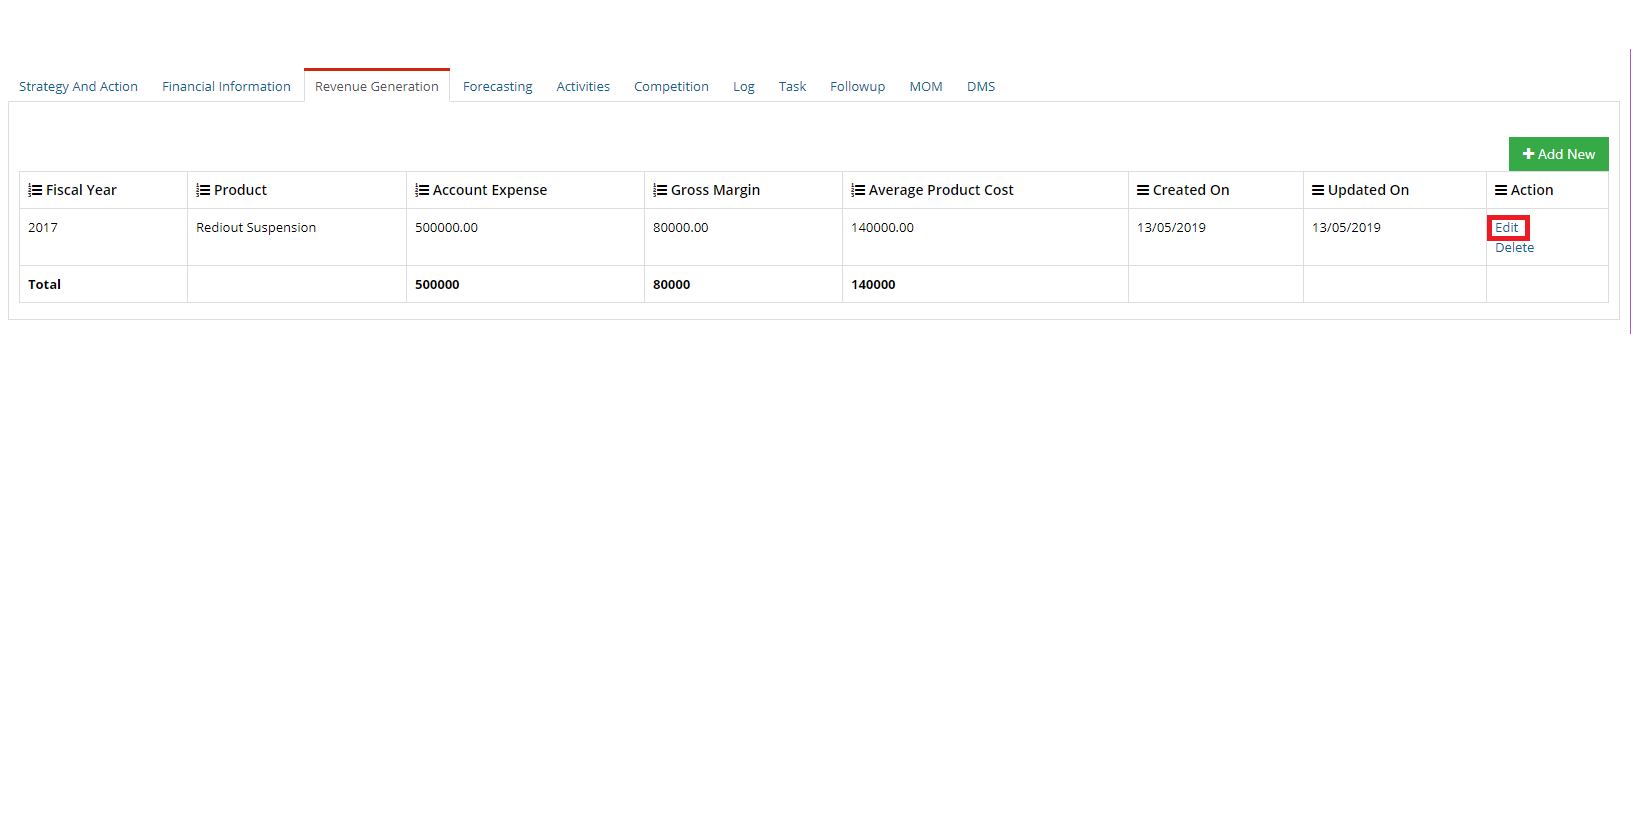
Press the Edit button in order to make changes to the previously entered data. The user can now make appropriate changes and press the Save button to confirm them.
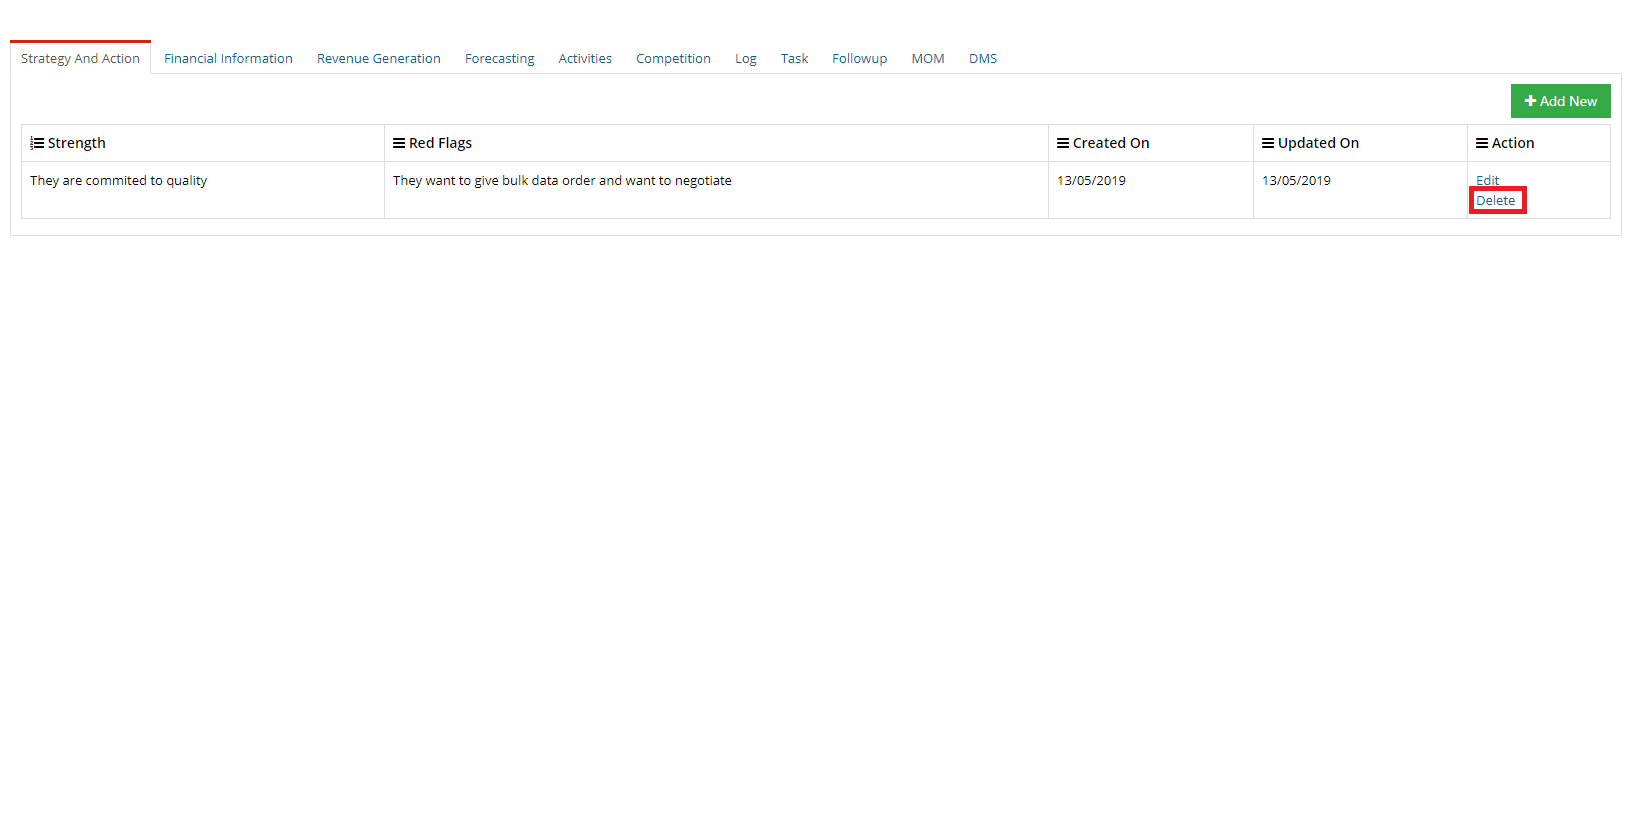
To delete a strategy and action, press the Delete button
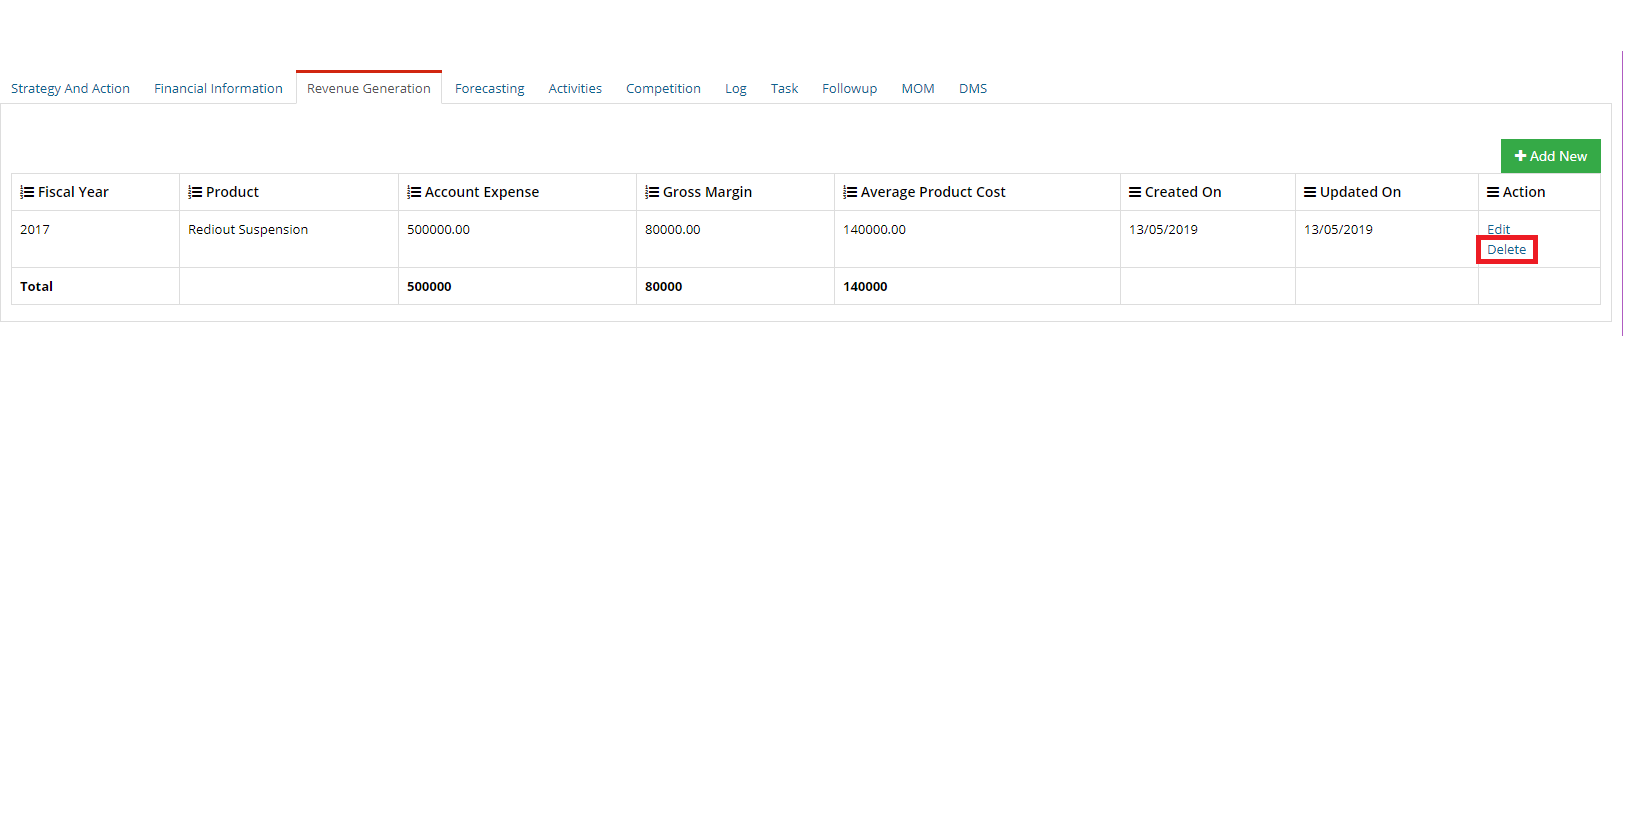
You can add a new record by pressing the Add New button. To Edit or Delete a record, click the respective links in the action column.
To edit a record, click on the Edit link in the Action column. The user can make changes to record and press Save to confirm them.
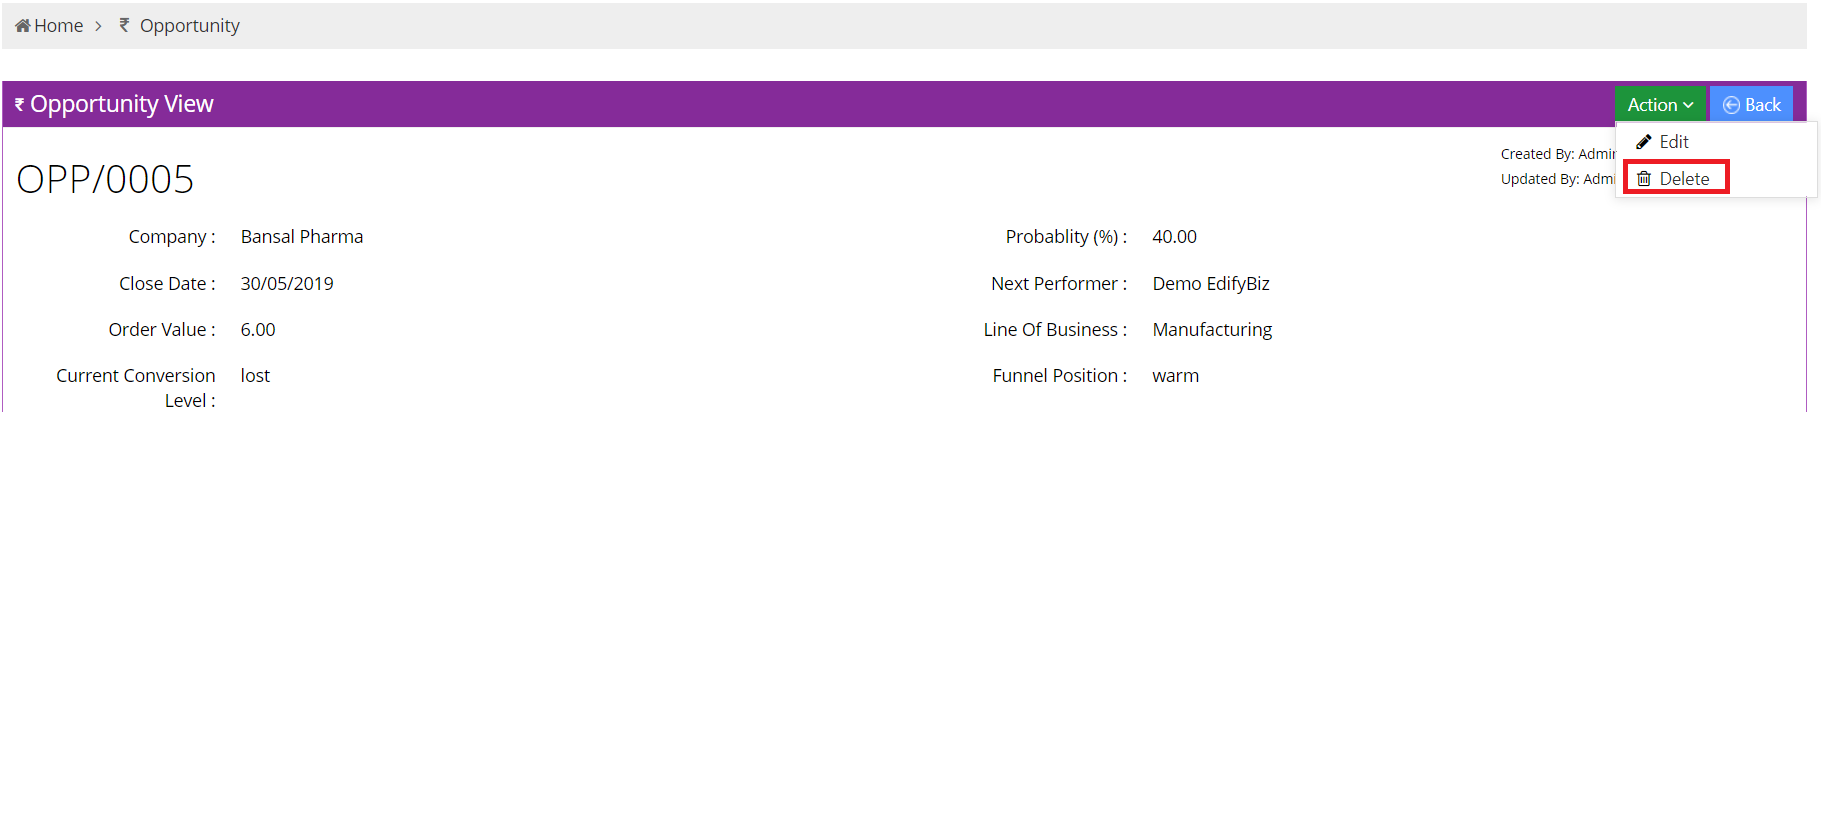
To delete a record, click on Delete.


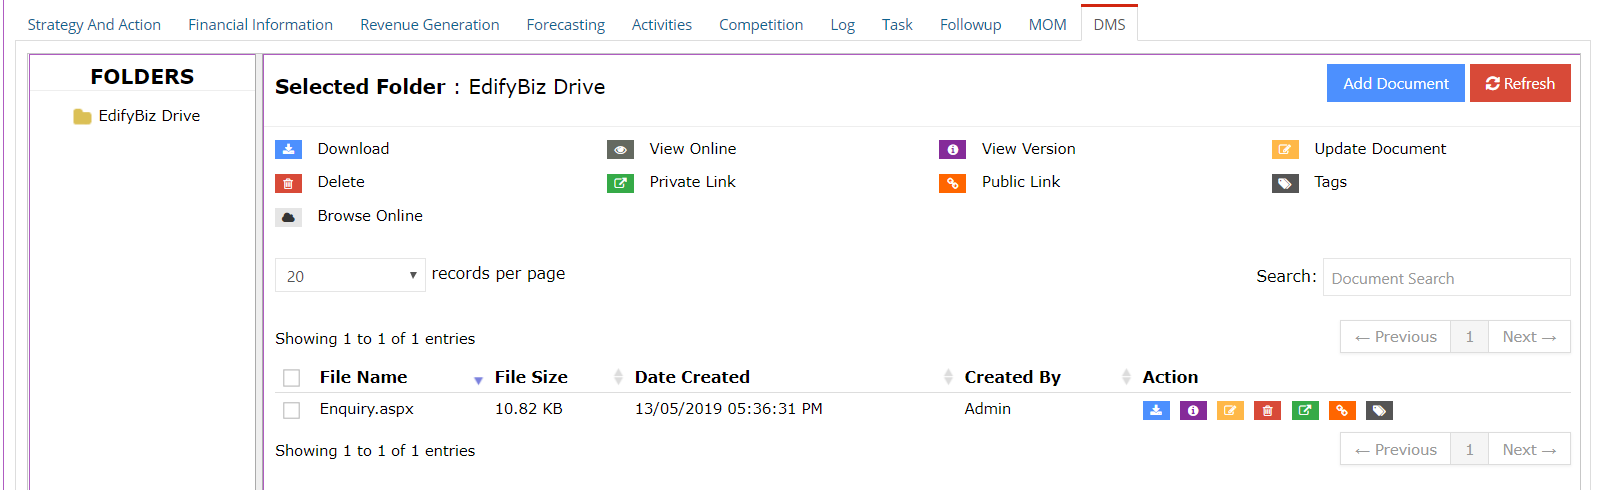
The user can attach additional documents to a complaint using Edifybiz's DMS functionality.
To add a new document, the user can click on the Add Document button and refresh the list of added documents by clicking on the Refresh button.
The user can navigate through different folders in the Folders column.
The details of a document include the File Name, the Size of the File, the Date of Creation and the user who created the document.
The actions that can be taken on a document include:
- Download: To download the document.
- View Online: This opens the document in a new tab.
- View Version: Allows the user to view previous versions of the document.
- Update Document: Allows the user to revise or update a document.
- Delete: Enables the user to delete a document.
- Private Link: This generates a link to the document. This document is password protected.
- Public Document: This generates a link to the document which can be viewed by anyone who posseses the link.
- Tags: This enables the user to add a tag to the document.